
Quick Start Manual

296 Rockwell Automation Publication IASIMP-QS019E-EN-P - August 2013
Appendix G Controller, Network, and Device Configuration Without the DMAT Wizard
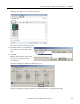
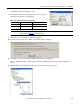
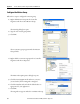
The Module Properties dialog box opens.
13. Click the Associated Axes tab.
14. Click New Axis.
The New Tag dialog box opens.
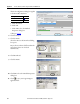
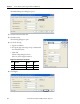
15. Create the axis tag.
a. Type the axis Name.
b. Accept the Type, Data Type, Scope, and External
Access default values.
c. Click OK.
The New Tag dialog box closes.
The new axis is assigned as Axis 1.
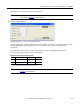
16. Click Apply.
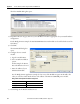
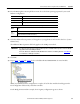
Widg-O-matic X-Y Gantry Axis Assignments
Axis Axis Name
Digital
Input 1
Digital
Input 2
1 Gantry_X_Axis Enable Home
2 Gantry_Y_Axis Enable Home