
Owner manual
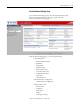
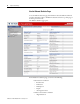

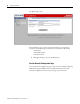
Table Of Contents
- 1794-UM066A-EN-P FLEX I/O Dual Port EtherNet/IP Adapter Modules User Manual
- Important User Information
- Preface
- Table of Contents
- 1 - Overview of FLEX I/O and Your Redundant EtherNet/IP Adapter Module
- Overview
- The FLEX I/O System
- Adapter Features
- Types of Adapters
- Hardware and Software Compatibility
- What the Adapter Does
- Use of the Control and Information Protocol (CIP)
- Understanding the Producer/Consumer Model
- Specifying the Requested Packet Interval (RPI)
- Support of Rack Optimized and Direct Connections
- Chapter Summary
- 2 - Install Your FLEX I/O Adapter
- 3 - Configure the Adapter for Your EtherNet/IP Network
- 4 - Rack Optimized Discrete I/O
- 5 - Analog I/O with Direct Connection
- A - Interpret Status Indicators
- B - Specifications
- C - Configure the RSLinx Ethernet Communication Driver
- D - Adapter Web Dialogs
- Index
- Back Cover
Publication 1794-UM066A-EN-P - February 2012
72 Adapter Web Dialogs
–Secondary Name Server
–Domain Name
• For Ethernet Link Port 1 and Port 2, specify the following:
– Autonegotiate Status
- Autonegotiate Speed and Duplex
- Force Speed and Duplex
– Select Port Speed – 10 megabits, 100 megabits
– Select Duplex Mode – Half Duplex, Full Duplex
7. From the Network Configuration page, click Apply Changes to save the
modified values.
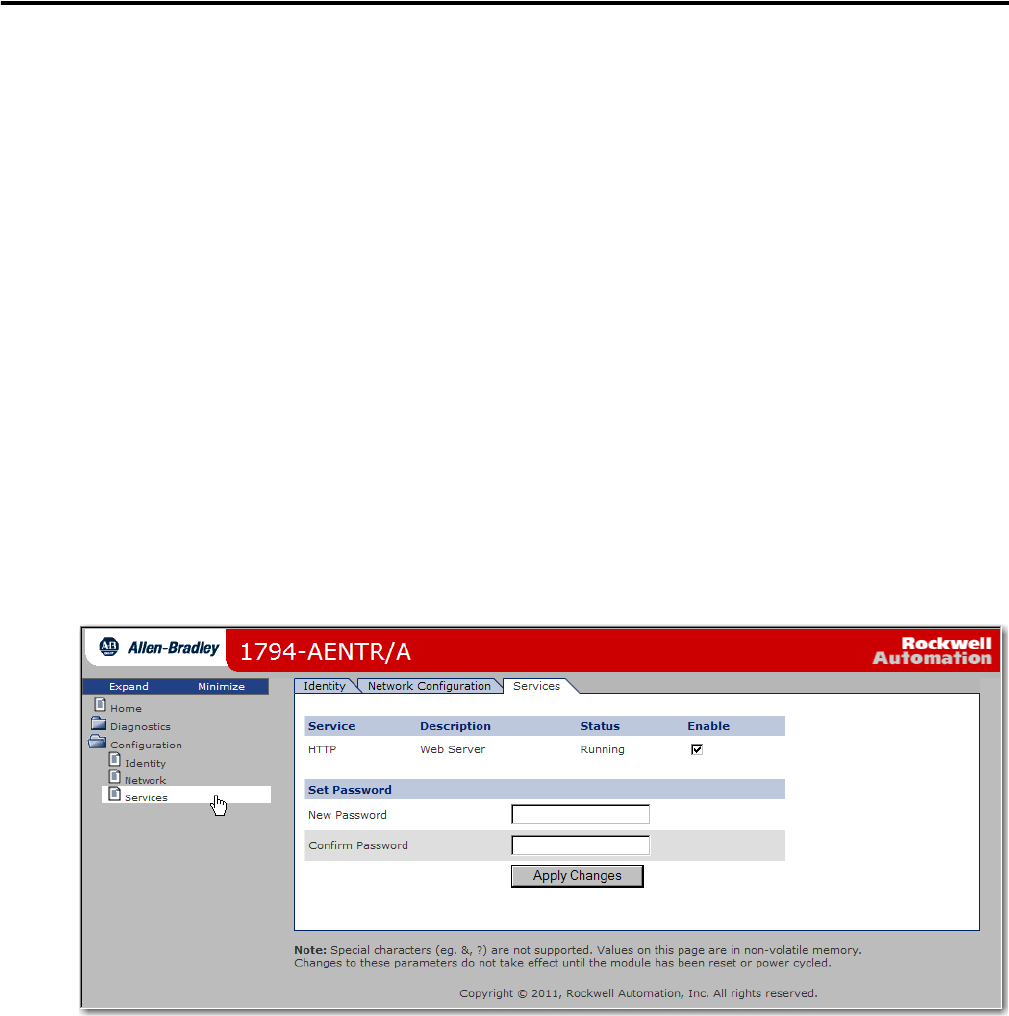
Use the Device Services Page
To use the Services page to change the password for the Configuration web page
or disable the web server, click Device Services tab at the top of the page or panel
on the left.
The Device Services page opens.
From the Services page, make these entries.
• Click the Enable box to change whether the web server runs after the
module is reset.
• Change the password by typing a new value for New Password and
Confirm Password, noting the following:
– The entry is case sensitive.
– The default value is <blank>.
8. Click Apply Changes.