
Owner manual
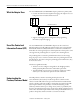
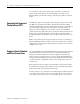


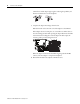
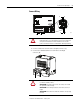
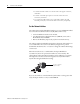
Table Of Contents
- 1794-UM066A-EN-P FLEX I/O Dual Port EtherNet/IP Adapter Modules User Manual
- Important User Information
- Preface
- Table of Contents
- 1 - Overview of FLEX I/O and Your Redundant EtherNet/IP Adapter Module
- Overview
- The FLEX I/O System
- Adapter Features
- Types of Adapters
- Hardware and Software Compatibility
- What the Adapter Does
- Use of the Control and Information Protocol (CIP)
- Understanding the Producer/Consumer Model
- Specifying the Requested Packet Interval (RPI)
- Support of Rack Optimized and Direct Connections
- Chapter Summary
- 2 - Install Your FLEX I/O Adapter
- 3 - Configure the Adapter for Your EtherNet/IP Network
- 4 - Rack Optimized Discrete I/O
- 5 - Analog I/O with Direct Connection
- A - Interpret Status Indicators
- B - Specifications
- C - Configure the RSLinx Ethernet Communication Driver
- D - Adapter Web Dialogs
- Index
- Back Cover
Publication 1794-UM066A-EN-P - February 2012
10 Install Your FLEX I/O Adapter
terminal base and the adapter tight together, reducing the possibility of a
break in communication over the backplane.
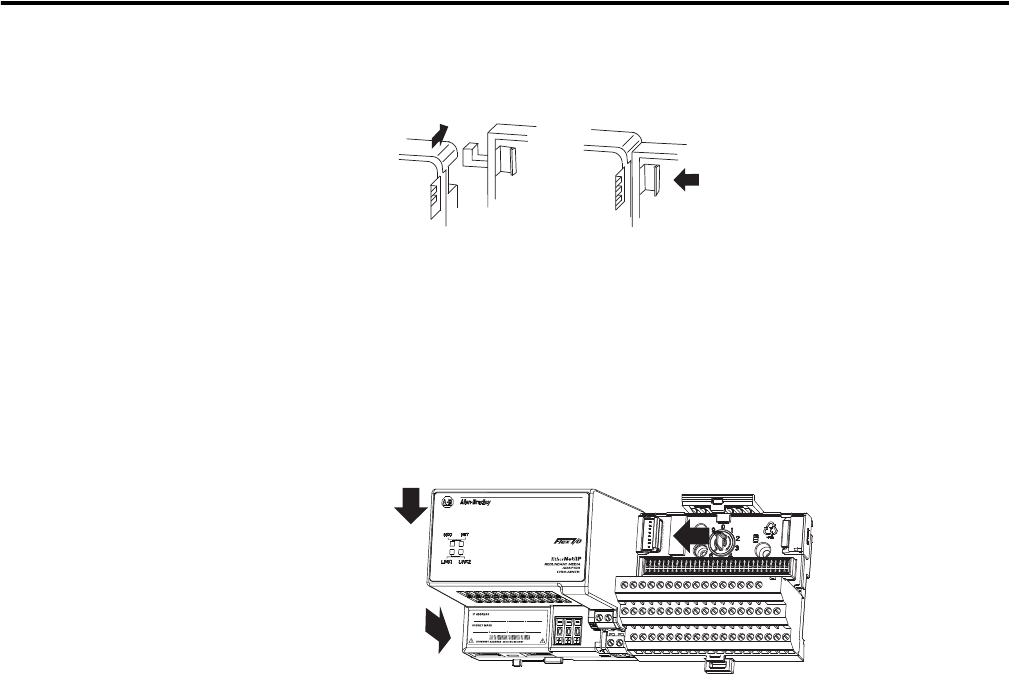
7. Complete the adapter mounting as shown below.
Push down and in at the same time to lock the adapter to the DIN rail.
If the adapter does not lock in place, use a screwdriver or similar device to
move the locking tab down while pressing the adapter flush onto the DIN
rail, and release the locking tab to lock the adapter module in place. If
necessary, push up on the locking tab to lock.
When the adapter is locked onto the DIN rail, gently push the FlexBus
connector into the adapter to complete the backplane.
8. Reinstall the module in the adjacent terminal base unit.