Allen Bradley Temperature Control Module (Cat. No. 1771 TCM Configuration Software Release 1.
Important User Information Because of the variety of uses for the products described in this publication, those responsible for the application and use of this control equipment must satisfy themselves that all necessary steps have been taken to assure that each application and use meets all performance and safety requirements, including any applicable laws, regulations, codes and standards.
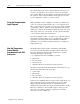
Table of Contents Using this Manual . . . . . . . . . . . . . . . . . . . . . . . . . . . . . . . P-1 Who Should Use this Manual . . . . . . . . . . . . . . . . . . . . . . . . . . . Conventions Used in this Manual . . . . . . . . . . . . . . . . . . . . . . . . . Terms and Abbreviations . . . . . . . . . . . . . . . . . . . . . . . . . . . . . . Related Publications . . . . . . . . . . . . . . . . . . . . . . . . . . . . . . . . . . P-1 P-1 P-2 P-2 Interfacing with the Temperature Control Module . . .
ii Table of Contents Module Description . . . . . . . . . . . . . . . . . . . . . . . . . . . . . . . . . . Copying Configuration Values From One Module to Another . . . . . Copying Configuration Values From One Module Into a New Module Moving a Module From One Project to Another . . . . . . . . . . . . . . . What to do next . . . . . . . . . . . . . . . . . . . . . . . . . . . . . . . . . . . . . 4-6 4-6 4-7 4-8 4-8 Configuring the Loops . . . . . . . . . . . . . . . . . . . . . . . . . . . .
Table of Contents iii Monitoring and Controlling the Loops . . . . . . . . . . . . . . . . 7-1 Loop Monitor Screen . . . . . . . . . . . . . . . . . . . . . . . . . . . . . . . . . Changing Loop Settings . . . . . . . . . . . . . . . . . . . . . . . . . . . . . . . Entering Loop Settings . . . . . . . . . . . . . . . . . . . . . . . . . . . . . . To Cancel . . . . . . . . . . . . . . . . . . . . . . . . . . . . . . . . . . . . . . . To Download . . . . . . . . . . . . . . . . . . . . . . . . . . . . . .
Preface Using this Manual This manual describes the use of Temperature Control configuration software for use with the Temperature Control module (1771-TCM, series C). For information on how to install the module or how to generate the necessary ladder-logic programming for operating the module with this configuration software, see publication 1771-6.5.120. This ladder logic is provided with your Temperature Control configuration software as well.
P–2 Using this Manual Terms and Abbreviations For a complete listing of Allen–Bradley terminology, refer to the Allen-Bradley Industrial Automation Glossary (publication AG-7.1).
Chapter 1 Interfacing with the Temperature Control Module This chapter describes how to interface the Temperature Control module through the PLC processor to the configuration software.
1–2 Interfacing with the Temperature Control Module The sample ladder logic can be combined with the other logic you need for your application. If you prefer to write your own ladder logic, it must duplicate the arrangement of data within the block and the operation of the control bits that the sample logic uses in order for the configuration software to operate correctly.
Interfacing with the Temperature Control Module 1–3 The following graphic illustrates how the individual data blocks are sent to and returned from the TCM module.
1–4 Interfacing with the Temperature Control Module Computer with Temperature Control Software PLC Data Table RAM Upload Data Table Interface Area Disk Files Download For information on block-transfer programming, refer to your Temperature Control Module User Manual (publication 1771-6.5.120) Data Table Interface Area Publication 1771 6.4.
Interfacing with the Temperature Control Module 1–5 To establish a TCM project file, you must enter the starting address of this interface area for each Temperature Control module. (See Chapter 4 for more information.) The example ladder logic in Appendix C of the Temperature Control Module User Manual (publication 1771-6.5.120) uses N7:0 as the starting address for this interface area. To keep things simple, we recommend using word 0 of a file as the starting address.
Interfacing with the Temperature Control Module Communication Control Bits 1 Loop 2 configuration block write to TCM required 2 Loop 3 configuration block write to TCM required 3 Loop 4 configuration block write to TCM required 4 Loop 5 configuration block write to TCM required 5 Loop 6 configuration block write to TCM required 6 Loop 7 configuration block write to TCM required 7 Loop 8 configuration block write to TCM required 8 Auto tune (system ID data) block write to TCM required 9 Au
Chapter 2 Installing the Software This chapter shows you how to install the TemperatureControl configuration software for the 1771-TCM module.
2–2 Installing the Software Preparation for Installing the Software The Temperature Control configuration software includes three sets of disks: " This set: Installs: 1 (3 disks) The configuration software itself 2 (2 disks) Win32s software (Windows 3.1 or 3.11 only) 3 (2 disks) INTERCHANGE software Getting help while installing TemperatureControl software • Press F1 to display installation help. • Click on Cancel to abort the installation.
Installing the Software 2–3 2. Insert disk 1 of the Configuration Software into drive a:. 3. On the command line, type: a:\setup 4. Click on OK. The software initialization screen appears, as well as a completion percentage graph that indicates initialization status. Once initialization is complete, the Welcome screen appears. 5. Click on the Next button to continue with the installation. A prompt appears, asking you if you wish to read the readme file.
2–4 Installing the Software 6. Insert disk 2 of the Configuration Software into drive a: and click on OK. The Choose Destination Location screen appears. 7. Either enter a new destination where you would like the TCM software to be installed, or click on the Next button to accept the default directory. If the directory does not already exist, you are prompted to decide whether you want to create it. Choose Yes if you want the system to create the directory.
Installing the Software 2–5 9. Click on the Next button. The Choose Destination Location screen appears. 10.Either enter a new destination where you would like the ladder logic files to be installed, or click on the Next button to accept the default directory. If the directory does not already exist, you are prompted to decide whether you want to create it. Choose Yes if you want the system to create the directory. The system then installs the files. If you are using Windows 3.1 or 3.
2–6 Installing the Software 13.Insert disk 1 of the INTERCHANGE software into drive a: and click on OK. " Existing INTERCHANGE software If the current version of INTERCHANGE software already exists on the computer, you are asked whether to reinstall the software. As the system copies the INTERCHANGE files from disk 1, it displays a completion percentage graph. When the system has copied the files from disk 1, you are prompted to insert disk 2: 14.
Installing the Software 2–7 15.In this dialog box: If you select: Modify AUTOEXEC.BAT after creating a backup copy. (Note: This is the recommended choice.) Make a backup copy of AUTOEXEC.BAT and make changes to the copy. Then: •the system asks if you want to modify your AUTOEXEC.BAT file so that it automatically loads INTERCHANGE software. If you select No at that prompt, you must manually start INTERCHANGE software * •the system makes a backup copy of your AUTOEXEC.
2–8 Installing the Software 16.In this dialog box: If you select: Then: the system alerts you that installation will resume after you have completed device configuration. Click on OK. You see: Yes Refer to the Device Configuration Utility User Manual, publication 5850 6.5.7, for detailed instructions on using this utility. you see: No Click on OK. Publication 1771 6.4.
Installing the Software Starting the Software 2–9 After you’ve rebooted your computer, follow these steps to start the software: 1. In the Allen-Bradley program group, select the TemperatureControl icon. TemperatureControl icon 2. From the File pull-down menu, select Open. As it loads the software, a welcome screen appears. When the software is loaded, you see the Temperature Control Project screen: Publication 1771 6.4.
2–10 Installing the Software Using Online Help To access the TemperatureControl software online help, from the Help pull-down menu, you can select Contents: You see the TemperatureControl online help Contents screen. Click on any of the underlined text to view the help on that topic. You can also press F1 from any screen to view help for that screen. To learn how to use the online help screens, from the Help pull-down menu, select How to Use Help. The How to Use Help screen appears.
Chapter 3 Organizing the Project File This chapter shows you how to organize a temperature control project file. This includes: • a definition of the temperature control project file • creating a project file • adding modules to the project file • modifying an existing module The Temperature Control Project File Before you can configure a temperature control module, you must create a project file that includes the module and its loops.
3–2 Organizing the Project File If you previously created and saved any project files, the diretories where they were saved will be listed in the Previous Directories page. Click on a directory to display the project files in that directory. Click on a file to display its description, or double click on a file to open the Module Manager screen for that project. 2. From the File pull-down menu, select New. The New-Project dialog box appears. 3. Type the project/file name and then select OK.
Organizing the Project File Adding Modules to the Project File 3–3 To add a module to the project file: 1. From the Module pull-down menu, select New. The New Module dialog box appears. 2. In this dialog box, enter the following for the module. In this field: Name: PLC Node: Port: DT Address: Rack No.: Group No.: Slot No.: Select on enter: A short descriptive name to help you identify the module. The node number on the DH+ link of the PLC processor for the module.
3–4 Organizing the Project File 3. Select OK. The module list for the project appears, with the module added. The new module will have 8 default loop names. " If you want to edit the project description that shows on the first screen, from the Project pull-down menu, you can select Description. The project description is also printed when you print a project. Modifying an Existing Module To change the Name, PLC Node, Port, Data Table Address, Rack, Group, or Slot of an existing module: 1.
Chapter 4 Configuring the Modules This chapter shows you how to configure the 1771-TCM module.
4–2 Configuring the Modules When you first open any of the configuration screens, the software attempts to perform an upload from the PLC processor so that the screen displays the current values the module is using. If the software cannot upload from the processor (e.g. if the connection to the processor has been broken), then the software performs an upload from the file. Now the data source (the PLC or file) is shown in the left-hand side of the status bar at the bottom of each configuration screen.
Configuring the Modules 4–3 The Module Configuration screen for the module you selected appears. 3. Select your desired temperature units (Celsius or Fahrenheit). All temperature values will be displayed in the selected units, and you should enter all temperature values in these units. 4. Enable or disable the cold-junction alarms.
4–4 Configuring the Modules Downloading Configuration Values Once you have made your desired selections on the Module Configuration screen, you must download these parameter values. To do so: 1. From the Module menu, select Download. " Accessing the Download function You may also access the Download function by pressing CTRL + D. The Download dialog box appears. If you choose: Then: Download to PLC the configuration values are downloaded to the PLC data table block.
Configuring the Modules Uploading Configuration Values 4–5 Although an automatic upload is performed when a screen first opens, you may also perform a manual upload at any time. This is useful, for example, when you want to transfer data stored in the disk file to the PLC processor by first uploading from the file and then downloading to the processor. To upload configuration values: 1. From the Module menu, select Upload.
4–6 Configuring the Modules Module Description You can enter descriptive information for each module. This can be any information you wish to associate with the module, such as physical location, product being manufactured, etc. You can view this information at any time; it is included in printed reports, as well. To enter or view the module description: 1. At the Module Manager screen, select a module. 2. From the Module menu, select Description...
Configuring the Modules 4–7 4. From the Edit menu, select Paste into selection. 5. Go to each configuration screen for the destination module, view the pasted data, make any required changes, and then download to the PLC processor, to a file, or to both to save the pasted data.
4–8 Configuring the Modules Moving a Module From One Project to Another To move a module from one project to another: 1. At the Module Manager screen, select the module you wish to move. 2. From the Edit menu, select Cut. 3. Close the Module Manager screen. 4. From the Project Manager screen, open the destination project (or create a new project). 5. From the Edit menu, select Paste into new. The New Module dialog box appears. 6. Fill in the information in the dialog box and click on OK.
Chapter 5 Configuring the Loops This chapter shows you how to configure the PID loops of the 1771-TCM module.
5–2 Configuring the Loops 6. Repeat from step 2 until you have made all desired changes to the loop list. Configuration Selections Open Circuit Detection On the Configuration screen, you are given several configuration selections to establish. However, your selections do not control the PLC data table values in real time. These selections do not take effect until you download the selections to the PLC data-table interface area.
Configuring the Loops Barrel/Non Barrel Control 5–3 Under control type, you select between barrel and non-barrel control. Barrel control can be used for either heat-only or heat/cool applications. Non-barrel control can be used for either heat-only, cool-only, or heat/cool applications. Barrel control is for multiple-zone applications in which there is thermal conduction between the zones.
5–4 Configuring the Loops Inner/Outer Zone If you make the selection for barrel temperature control, you also have a selection for whether it is an inner zone or an outer zone. An outer zone is a zone at either end of the barrel. An inner zone is any zone other than at the very end of the barrel (between two other zones). The PID gain calculation algorithm for an inner zone is slightly different from that for an outer zone to account for an inner zone being more affected by adjacent zones.
Configuring the Loops Alarms 5–5 In the Loop Configuration screen, you select values for the following temperature-level alarms: • low temperature alarm • high temperature alarm • low deviation alarm (deviation from the set point) • high deviation alarm (deviation from the set point) High Deviation Alarm Value Set Point Temperature Low Deviation Alarm Value 0° Low Temperature Alarm Value High Temperature Alarm Value Time Publication 1771 6.4.
5–6 Configuring the Loops Alarm Dead Band Once the temperature alarm bits are on, they are kept on until the temperature drops below the high alarm by the alarm dead-band value or rise above the low alarm by this value. You specify the temperature alarm dead band. This dead band provides a hysteresis effect. The dead-band value applies to the high and low temperature and deviation alarm values.
Configuring the Loops 5–7 In general, a smaller TPO period provides smoother control unless the minimum on time is greater than 10% of the TPO period. If the the minimum on time is greater than 10% of the TPO period, the TPO signal will not be able to provide any control of the temperature until the temperature has moved away from the set point far enough to require a 10% TPO signal.
5–8 Configuring the Loops " Viewing configuration data If you want to view the configuration data for a different loop, you can select Next or Previous from the Loop menu to cycle through the loops. You can also press CTRL + N or CTRL + P. Entering Loop Configuration Values Enter loop configuration values within the stated ranges.
Configuring the Loops In this field: Run Setpoint Standby Setpoint Manual Output Value SP Ramp Rate SP Ramp Enable Max. M Limit Min. M Limit Heat TPO Period Heat Min. On Time Cool TPO Period Cool Min. On Time High Temp Alarm Low Temp Alarm High Deviation Alarm Low Deviation Alarm Dead Band for Alarms C Alarm Rate Temperature Sensor Type Temperature Sensor Filter Temperature Sensor TC Enter this value: 0.0 thru 3276.7° 0.0 thru 3276.7° -100.00 thru +100.00 0.00 thru 99.
5–10 Configuring the Loops Downloading Configuration Values Once you have entered the appropriate values at the Configuration screen, you must download these parameter values. To do so: 1. From the Loop pull-down menu, select Download. " Accessing the Download function You may also access the Download function by pressing CTRL + D. The Download dialog box appears. If you choose: Then: Download to PLC the configuration values are downloaded to the PLC data table block.
Configuring the Loops Uploading Configuration Values 5–11 In the case that you are reconfiguring a loop or group of loops, you may find it useful to first upload the old configuration values for that module. Also, after downloading, you’ll want to verify that the PLC processor received the correct information. To do so, at the Loop pull-down menu, select Upload. 1. From the Loop pull-down menu, select Upload. " Accessing the Upload function You may also access the Upload function by pressing CTRL + U.
5–12 Configuring the Loops Using One Loop to Configure Another If you have several loops that are similar or identical, you can configure one loop and then use that loop to configure the other similar loops. To copy configuration data from one loop to another: 1. At the Module Manager screen, select the loop that has the desired configuration (i.e. the source loop). 2. From the Edit menu, select Copy. The values from the source loop will be placed on the Windows clipboard. 3. Select the second (i.e.
Configuring the Loops Loop Description 5–13 You can enter descriptive information for each loop. This can include any information you wish to associate with the loop, such as physical location, product being manufactured, etc. You can view this information at any time; it is also included in the printed reports. To enter or view the loop description: 1. At the Module Manager screen, select a loop. 2. From the Loop menu, select Description... The Loop Description screen appears for the loop you selected.
5–14 Configuring the Loops Notes: Publication 1771 6.4.
Chapter 6 Tuning the Loops This chapter shows you how to tune a loop. This includes: • configuring tuning • auto-tuning the loops • viewing auto-tuning results • changing system response • fine-tuning the loops Introduction to Loop Tuning Before a PID loop can be run in automatic control mode, the proportional, integral, and derivative gains must be set. Traditionally, these gains have been set manually using a trial and error process.
6–2 Tuning the Loops 2. Once you are satisfied that your loop is operating properly in Manual mode, use the Manual Tuning screen to set the proportional gain to 1, leaving the integral and derivative gains at 0. This configures the loop for straight proportional control. 3. Place the loop in Automatic mode. With a proportional gain of 1, the loop output should be directly proportional to the deviation between the measured variable and the setpoint. 4.
Tuning the Loops 6–3 Since non-barrel loops are tuned starting from the setpoint, instead of from a low temperature, the step size should be chosen to keep the temperature within the operating range. For example, assume your loop is at the setpoint of 100 degrees, and the loop output is at 20 percent, when auto-tuning is started.
6–4 Tuning the Loops Auto Tuning the Loops Before you can auto-tune a loop, you must satisfy these prerequisites: • Barrel loops must be at least 50 degrees F below the run setpoint before tuning is started; we recommend that you make the difference 100 or 150 degrees. • The TPO period you configured for the loop should be less than the system lag time. Lag time is the delay that occurs between a change in loop output and the start of the resulting temperature change.
Tuning the Loops 6–5 4. Select Start Tuning. Once the tuning process starts, the Start Tuning selection becomes Stop Tuning. 5. If at any time during the process you want to stop the auto-tuning, select Stop Tuning. During auto-tuning, do not close the Tuning Assistant screen, as this will prevent proper completion of tuning. You may minimize the window if desired.
6–6 Tuning the Loops You must scroll horizontally to view all columns. The slope, time-constant, and dead-time values are the measured process dynamics that the module uses together with the system response (slow, medium, or fast) you enter at the Loop Configuration screen to calculate the PID gains (controller gain, integral gain, and derivative gain).
Tuning the Loops 6–7 Fine Tuning Procedure To fine-tune a loop: 1. At the Module Manager screen, select the module and loop you want to fine-tune. 2. At the Loop menu, select Manual Tune. The Manual-Tuning screen appears. In this field: Heat Controller Gain Heat Integral Gain Heat Derivative Gain Cool Controller Gain Cool Integral Gain Cool Derivative Gain Enter this value: 0 thru 32.767 0 thru 3.2767 repeats/s 0 thru 3276.7s 0 thru 32.767 0 thru 3.2767 repeats/s 0 thru 3276.7s 3.
6–8 Tuning the Loops Changing the System Response Setting After Tuning is Complete You can change the system response setting after auto-tuning is complete, provided you follow these steps: 1. At the Tuning Results screen, select the loop you wish to alter. 2. From the Loop menu, select Configure tuning. " Accessing the tuning configuration values To access the configuration values for this loop, you can also double click on the loop. The Tuning Configuration screen appears. 3.
Chapter 7 Monitoring and Controlling the Loops This chapter shows you how to monitor and control the PID loops. This includes: • Loop Monitor screen • changing loop settings • Module Monitor screen Loop Monitor Screen To monitor a loop of a particular module, at the Project screen, select the module and loop; from the Loop menu, select Monitor. The Loop Monitor screen for the current loop appears. The values on this screen are refreshed about once per second.
7–2 Monitoring and Controlling the Loops The module status pane is used to display error messages. If the number of current error messages exceeds the number of lines that can be displayed, you can scroll thru the messages.
Monitoring and Controlling the Loops Changing Loop Settings 7–3 To change loop settings, at the Loop Monitor screen, click on Change Settings. The Change-Settings dialog box appears. Entering Loop Settings Enter loop settings values within the stated ranges. In each case where a decimal point is shown, if you want to enter a digit to the right of the decimal point, you must type in the decimal point. The decimal point is not inferred.
7–4 Monitoring and Controlling the Loops To Cancel At any time at the change-settings dialog box, you can select Cancel. This will cancel all of your selections at this dialog box and return you to the Loop Monitor screen. To Download Once you have entered the appropriate values at the change-settings dialog box, you can download them to the PLC data-table interface area by selecting Download. From this dialog box, you can not download to the disk file.
Chapter 8 Documenting Projects, Modules, and Loops This chapter shows you how to use the Temperature Control Module Configuration software to produce a printed record of your system, including descriptive information for each project, module, and loop, as well as the values of all configuration parameters.
8–2 Documenting Projects, Modules, and Loops Printing a Single Module or Loop To print a single module or loop: 1. Open the Module Manager screen on the project containing the module or loop you wish to document. 2. Select the module or loop you wish to document. 3. From the Project menu, select Print to produce a printed report, or Print Preview to view the report on the screen. A dialog box appears, prompting you to select File or PLC. 4. Select the set of values you wish to document.
Index A I alarm dead band, 5-6 hysteresis, 5-6 inner/outer zone, installation, software, 2-1 installation procedure, software, audience, P-1 auto tuning, 5-4 installing the utility software, 6-4 installing Win32s files, B barrel/non-barrel, 2-2 2-1 2-3 L 5-3 loop configuration, block transfer, 1-2 5-1 loop list generation procedure, loop monitor sreen, C 5-1 7-1 module monitor sreen, 7-4 changing loop settings, 7-3 communication, how data is transferred, 1-2 computer requirements
I–2 Index set point ramping, 7-1 thermal runaway, 5-4 single transfer, 1-2 TPO, P-2, 5-6 software disks, tuning, 6-1 auto , 6-4 fine , 6-6 2-2 software installation procedure, 2-2 software interface with PLC processors, 1-3 software, starting, tuning assistant, 6-4 2-9 starting the software, V 2-9 vocabulary, P-2 T W TC break detection, 5-2 terms, P-2 thermal integrity loss detection, 5-4 project file, 3-1 temperature control project file, 3-1
Customer Support If you need additional assistance on using your software, Allen-Bradley offers telephone and on-site product support at Customer Support Centers worldwide For technical assistance on the telephone, first contact your local sales office, distributor, or system integrator. If additional assistance is needed, then contact your local Customer Support Center or contact System Support Services.
Allen Bradley, a Rockwell Automation Business, has been helping its customers improve productivity and quality for more than 90 years. We design, manufacture and support a broad range of automation products worldwide. They include logic processors, power and motion control devices, operator interfaces, sensors and a variety of software. Rockwell is one of the world's leading technology companies. Worldwide representation.