
Owner manual

GuardLogix Controllers 5
Publication 1756-IN045E-EN-P - October 2009
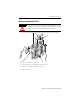
Prepare the Chassis
Before you install a controller, follow these preliminary steps.
1. Install a ControlLogix chassis (catalog number 1756-A4/B, 1756-A7/B,
1756-A10/B, or 1756-A17/B) according to the ControlLogix Chassis
Installation Instructions, publication
1756-IN080.
2. Install one of the following ControlLogix power supplies according to the
corresponding installation instructions.
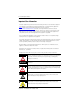
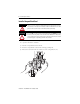
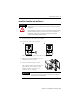
Make Sure That You Have All of the Components
A key and the 1756-BA2 battery ship with the 1756-L6xS
controller, while the 1756-LSP safety partner ships with
the 1756-BA2 battery.
If you want to connect a device to the serial port of the
controller (for example, connect a computer to the
controller), use a 1756-CP3 serial cable.
You can use a 1784-CF64 or 1784-CF128 CompactFlash card with GuardLogix
controllers, firmware revision 18 and later.
For this power supply Follow the instructions in this publication
1756-PA72
ControlLogix Power Supplies Installation Instructions, publication 1756-IN078.
1756-PB72
1756-PA75
ControlLogix Power Supplies Installation Instructions, publication 1756-IN613.
1756-PB75
1756-PA75R
(1)
(1) A 1756-PSCA2/A redundant power-supply chassis adapter is required for use with redundant power supplies. Refer
to ControlLogix Redundant Power Supplies Chassis Adapter Module Installation Instructions, publication
1756-IN590.
ControlLogix Redundant Power Supplies Installation Instructions, publication 1756-IN573.
1756-PB75R
(1)
IMPORTANT
You must use a 1756-L6xS primary controller and a 1756-LSP safety partner to
achieve SIL 3/PLe.