ControlNet™ Adapter Module (Catalog Numbers 1747-ACN15, 1747-ACNR15) User Manual
Important User Information Because of the variety of uses for the products described in this publication, those responsible for the application and use of this control equipment must satisfy themselves that all necessary steps have been taken to assure that each application and use meets all performance and safety requirements, including any applicable laws, regulations, codes and standards.
Table of Contents Preface Who Should Use this Manual . . . . . . . . . . . . . . . . . . . . . . . . . . . . . Purpose of this Manual . . . . . . . . . . . . . . . . . . . . . . . . . . . . . . . . . . Related Documentation . . . . . . . . . . . . . . . . . . . . . . . . . . . . . . Common Techniques Used in this Manual. . . . . . . . . . . . . . . . . . . Rockwell Automation Support . . . . . . . . . . . . . . . . . . . . . . . . . . . . Local Product Support . . . . . . . . . . . . . . . . . . . . . . .
Table of Contents ii Chapter 4 Application Examples Example 1 . . . . . . . . . . . . . . . . . . . . . . . . . . . . . . . . . . . . . . . . . . . . 4-2 Hardware Setup . . . . . . . . . . . . . . . . . . . . . . . . . . . . . . . . . . . . 4-2 Configuring The ControlNet Network with RSNetWorx™ for ControlNet . . . . . . . . . . . . . . . . . . . . . . . . . 4-3 Create a Ladder Logic Program . . . . . . . . . . . . . . . . . . . . . . . . 4-10 Example 2 . . . . . . . . . . . . . . . . . . . . . . . . . .
Table of Contents iii Grounding Guidelines. . . . . . . . . . . . . . . . . . . . . . . . . . . . . . . . B-9 Master Control Relay . . . . . . . . . . . . . . . . . . . . . . . . . . . . . . . B-11 Emergency-Stop Switches . . . . . . . . . . . . . . . . . . . . . . . . . . . . B-13 Common Power Source . . . . . . . . . . . . . . . . . . . . . . . . . . . . . B-15 Loss of Power Source. . . . . . . . . . . . . . . . . . . . . . . . . . . . . . . . B-16 Input States on Power Down . . . . . . . . . . . . . .
Table of Contents iv Publication 1747-UM003A-EN-P
Preface Read this preface to familiarize yourself with the rest of the manual. It provides information concerning: • who should use this manual • the purpose of this manual • related documentation • conventions used in this manual • Allen-Bradley support Who Should Use this Manual Use this manual if you are responsible for designing, installing, programming, or troubleshooting control systems that use the ControlNet Adapter Module.
Preface 2 Rockwell Automation Support Rockwell Automation offers support services worldwide, with over 75 Sales/ Support Offices, 512 authorized Distributors and 260 authorized Systems Integrators located throughout the United States alone, plus Rockwell Automation representatives in every major country in the world.
Chapter 1 Introducing the ControlNet Adapter Module Chapter Objectives This chapter describes the ControlNet adapter modules (cat. no. 1747-ACN15 and 1747-ACNR15): • features • hardware components, including – diagnostic indicators – network access port (NAP) – ControlNet connectors – network address switch assemblies Module Description and Features The 1747-ACN15 and 1747-ACNR15 adapters control remote 1746 I/O on the ControlNet network.
1-2 Introducing the ControlNet Adapter Module Figure 1.
Introducing the ControlNet Adapter Module 1-3 ControlNet Connectors Cable connection to the module is through standard BNC connectors on the module frontplate. Figure 1.2 Redundant Media System trunkline A = A Terminator Terminator trunkline B = B Terminator Terminator PLC-5C or SLC 5/02 or later with 1747-SCNR end device(1) end device(1) (1) End device supporting redundant cabling is a 1747-ACNR15. Refer to the ControlNet Cable System Planning and Installation User Manual, publication 1786-6.2.
1-4 Introducing the ControlNet Adapter Module Publication 1747-UM003A-EN-P
Chapter 2 Installing Your ControlNet Adapter Module Chapter Objectives This chapter describes the procedures for installing your ControlNet adapter module.
2-2 Installing Your ControlNet Adapter Module Low Voltage Directive This product is tested to meet Council Directive 73/23/EEC Low Voltage, by applying the safety requirements of EN 61131-2 Programmable Controllers, Part 2 - Equipment Requirements and Tests. For specific information required by EN 61131-2, see the appropriate sections in this publication, as well as the following Allen-Bradley publications: • Industrial Automation Wiring and Grounding Guidelines For Noise Immunity, publication 1770-4.
Installing Your ControlNet Adapter Module Installing the Adapter Module in the Chassis 2-3 Once you’ve set the appropriate switch assemblies for your adapter module, follow these procedures for installation. Refer to the Industrial Controller Wiring and Grounding Guidelines, Publication 1770-4.1 for proper grounding and wiring methods to use when installing your module. ATTENTION ! Remove system power before removing or installing your module in the I/O chassis.
2-4 Installing Your ControlNet Adapter Module Connecting Your Adapter to the ControlNet Network You connect your 1747-ACN15 or -ACNR15 adapter module to a ControlNet network via taps. These taps are available: Straight T-tap 1786-TPS IMPORTANT Straight Y-tap 1786-TPYS Right-angle T-tap 1786-TPR Right-angle Y-tap 1786-TPYR Taps contain passive electronics and must be purchased from Allen-Bradley for the network to function properly. 1.
Installing Your ControlNet Adapter Module 2-5 segment 1 Tap dust cap 2. Remove and discard the dust caps from the adapter BNC jacks. 3. Connect this tap’s straight or right angle connector to the BNC connector on the adapter. IMPORTANT To prevent inadvertent reversal of the tap connections (resulting in incorrect LED displays and troubleshooting), check the tap drop cable for a label indicating the attached segment before making your connection. 4.
2-6 Installing Your ControlNet Adapter Module Connecting Programming Terminals to the Network via the NAP You can connect programming terminals to the ControlNet network by connecting to the network access port (NAP). Two methods are shown below.
Installing Your ControlNet Adapter Module Powerup Sequence 2-7 There are three health indicators on the module. The LED on the right (labeled “OK”) is the generic module health indicator. The LED in the middle (labeled “A”) is the health indicator of cable A. On the 1747-ACNR15, the LED on the left (labeled “B”) is the health indicator for cable B. In addition, the alphanumeric display can display module status. The following describes the normal power-up sequence for the adapter module.
2-8 Installing Your ControlNet Adapter Module Publication 1747-UM003A-EN-P
Chapter 3 Planning to Use Your ControlNet Adapter Module Chapter Objectives This chapter explains how the adapter operates on ControlNet and provides information to assist in configuring your system.
3-2 Planning to Use Your ControlNet Adapter Module Overview of Adapter Operation Connections are established between a scanner and an adapter to exchange input and output data on the network. Status information is transferred along with the I/O data and status. 1747-ACN15/ACNR15 adapters support connections to individual modules and rack connections to a group of modules.
Planning to Use Your ControlNet Adapter Module 3-3 Rack and Module Connections Therearetwotypesofscheduledconnectionssupportedbythe1747-ACN15, -ACNR15: the rack connection and the individual module connection. Rack Connections For each rack connection, RSNetWorx maps 8, 16, or 32 input and output bits per slot. Operation Description 8-bit Rack Connections Performed in a deterministic and repeatable manner.
3-4 Planning to Use Your ControlNet Adapter Module Module Connections Moduleconnectionsareperformedinadeterministicandrepeatablemanner. ThisconnectionallowsamemoryandControlNetbandwidthefficientwayto connect to an individual module with more I/O data than could be attempted in the above rack connections, or to transfer M0/M1 file data. Each rack and module connection can be configured with the following connection types: 1.
Planning to Use Your ControlNet Adapter Module 3-5 If we change the default number of words for the input and output values (to 4 and 4) when inserting the connection to the 1747-ACNR15 adapter, Node 2 will produce 4 input words over ControlNet and Node 1 will consume and place those words at addresses I:e.1-4, where the slot 1 inputs correspond to I:e.3 andthe slot2 inputs correspondtoI:e.4. In addition, Node 1 will produce 4outputwordsoverControlNetoriginatingfromaddressesO:e.
3-6 Planning to Use Your ControlNet Adapter Module NOTE The electronic keying option offered by RSNetWorx for rack connections applies to the 1747-ACN15 and -ACNR15 modules only. Missing or misplaced modules are not detected if the moduleinquestionisconfiguredwithinarackconnection. Critical I/O modules that need to be detected when missing or misplaced must be configured with individual module connections.
PrivateMemory Buffers 3-7 DataTable Files Data Update Scheduled Data Transfer Logic Scan Housekeeping Scheduled Data Transfers Planning to Use Your ControlNet Adapter Module Program Scan TheControlNetsystemplacesyourscheduledtransfersinthefirstpartofeach Network Update Interval. Time is automatically reserved for network maintenance.Unscheduledtransfersareperformedduringthetimeremaining in the interval. You reserve a specific amount of time for all scheduled operations. . . .
3-8 Planning to Use Your ControlNet Adapter Module Publication 1747-UM003A-EN-P
Chapter 4 Application Examples Table 4.
4-2 Application Examples Example 1 1747-SCNR ControlNet Scanner Controlling Discrete I/O on ControlNet via a 1747-ACN15 ControlNet Adapter Using a Rack Connection This example is organized into the following sections: • Hardware Setup • Configuring The ControlNet Network with RSNetWorx™ for ControlNet, Revision 2.23.
Application Examples 4-3 Configuring The ControlNet Network with RSNetWorx™ for ControlNet Start RSNetWorx for ControlNet by double clicking on its icon. The following screen appears: At this point, you could configure your ControlNet network off-line and then download it to the network. This example will, instead, go on-line and configure the network. Therefore, click on the on-line icon or click on the Network pull-down menu and select On-line.
4-4 Application Examples The software attempts to communicate with all possible node numbers on the network, from 1 to 99. Click on the Edits Enabled box to allow changes to be made. For this example, the on-line network screen should look like the following, where node 99 is the programming terminal. Node 1 is the 1747-SCNR and node 3 is the 1747-ACN15. The 1747-ACN15 resides in slot 0 of its chassis, while slot 1 contains a 1746-IA16, slot 2 contains a 1746-OB16, and slot 3 contains a 1746-IV16.
Application Examples 4-5 Configuring a Chassis Connection You are now ready to configure the necessary ControlNet connection to read/ write data from the SLC processor to the discrete I/O modules. Right click on the 1747-SCNR and choose Scanlist Configuration. (If you are prompted to enter the edit mode, click YES.
4-6 Application Examples The 1747-SCNR and 1747-ACN15 are shown as nodes 1 and 3 respectively. Under the 1747-ACN15, the 3 I/O modules in slots 1 through 3 of the 1747-ACN15 chassis are listed. In order to establish a 16-bit rack connection to the 1747-ACN15 chassis, right click on the 1747-ACN15 and choose Insert Connection. The following window opens: Note that addresses in the Connection Properties screen above are already filled in.
Application Examples IMPORTANT 4-7 If a rack connection type is changed to a smaller bit configuration e.g. 32-bit to 16-bit, or 16-bit to 8-bit, the unused bits for the new connection remains in their previously programmed states for program mode or lost communications e.g. last state, safe state, reset off. The Connection Name, by default, is Discrete 16-Bit Exclusive Owner and this is the 16-bit rack connection you want. The first available I/O addresses are I:3.1 and O:3.
4-8 Application Examples You have successfully configured a rack connection to the remote chassis to communicate with the discrete I/O modules. At this point, you may also configure the state of the outputs in the remote ControlNet chassis when the controlling processor is placed into the Program mode or if communications are lost to the remote chassis. This is optional. The default is to turn all outputs off when one of the two conditions occur.
Application Examples 4-9 placed in the Program mode or if communications are lost to the ACN15 adapter, the outputs revert to the Safe State data you entered for each output word. Click Apply, then OK to return to the ScanList Configuration window which should look like the following: You have now successfully configured your rack connection to read/write data between the SLC processor and the remote ControlNet chassis.
4-10 Application Examples Create a Ladder Logic Program The final step is to write a ladder program for the SLC processor, including configuring the 1747-SCNR for slot 3 of the processor’s chassis. After downloading the program to your processor, place it into the RUN mode. Your program should now be able to read data from the 1746-IA16 in word I:3.3, write to the 1746-OB16 in word O:3.2 and read data from the 1746-IV16 in word I:3.5.
Application Examples 1747-SCNR ControlNet Scanner Controlling Discrete and Analog I/O on ControlNet via a 1747-ACN15 ControlNet Adapter Using a Rack Connection This example is organized into the following sections: • Hardware Setup • Configuring The ControlNet Network with RSNetWorx™ for ControlNet • Create a Ladder Program Hardware Setup Computer with: • RSLogix 500 Software • RSLinx Software • RSNetWorx Software for ControlNet • 1784-KTCX15 ControlNet PC Card 1747-SCNR The following hardware setup is
4-12 Application Examples Configuring The ControlNet Network with RSNetWorx™ for ControlNet Start RSNetWorx for ControlNet by double clicking on its icon. The following screen appears: At this point, you could configure your ControlNet network off-line and then download it to the network. This example, instead, goes on-line and configure the network. Therefore, click on the on-line icon or click on the Network pull-down menu and select On-line.
Application Examples 4-13 The software attempts to communicate with all possible node numbers on the network, from 1 to 99. Click the Edits Enabled box to allow changes to be made. For this example, the on-line network screen should look like the following, where node 99 is the programming terminal. Node 1 is the 1747-SCNR and node 3 is the 1747-ACN15. The 1747-ACN15 resides in slot 0 of its chassis, while slot 1 contains a 1746-IA16, slot 2 contains a 1746-OB16, and slot 3 contains a 1746-NIO4V.
4-14 Application Examples Configuring a Rack Connection You are now ready to configure the necessary ControlNet connection to read/ write data from the SLC processor to the discrete I/O modules and to the 1746-NIO4V analog module. Right click on the 1747-SCNR and choose Scanlist Configuration. (If you are prompted to enter the edit mode, click YES.
Application Examples 4-15 The 1747-SCNR and 1747-ACN15 are shown as nodes 1 and 3 respectively. Under the 1747-ACN15, the 3 I/O modules in slots 1 through 3 of the 1747-ACN15 chassis are listed. We specify a 32-bit rack connection so that the two words of analog input and two words of analog output data from the 1746-NIO4V module can be transferred via the rack connection. In order to establish a 32-bit rack connection to the 1747-ACN15 chassis, right click on the 1747-ACN15 and choose Insert Connection.
4-16 Application Examples IMPORTANT RSNetWorx allows more than one exclusive owner rack connection type to be configured to a 1747 adapter (e.g. 8-bit exclusive owner, 16-bit exclusive owner, and 32-bit exclusive owner), however only one exclusive owner rack connection can be operational at one time. It is recommended that only one exclusive owner rack connection type be configured to the adapter to avoid contention between multiple connections.
Application Examples NOTE 4-17 There is a 2-word offset for input data for rack connections. Therefore, for this example, the input data for the input module in slot 1 of the remote 1747-ACN15 chassis is written to I:3.3 in the SLC processor’s input image. The starting input address configured in RSNetWorx for this rack connection was I:3.1, but I:3.1 and I:3.2 are used for rack slot status information. Therefore, the actual input data begins after the 2 words of status information. I:3.
4-18 Application Examples You have successfully configured a rack connection to the remote chassis to communicate with the two discrete and one analog I/O modules. At this point you may also configure the state of the outputs in the remote ControlNet chassis when the processor is placed into the Program mode or if communications are lost to the remote chassis. This is optional. The default is to turn all outputs off when one of the two conditions occur.
Application Examples 4-19 Click Apply, then OK. The Connection Properties window closes and the Scanlist Configuration window appears and looks like the following: You have now successfully configured your connection to read/write data between the SLC processor and the remote ControlNet chassis. All that remains is to Save this configuration to the network keeper which, in this case, is the 1747-SCNR. Click on the Save icon or choose the File pull-down menu and select Save.
4-20 Application Examples Create a Ladder Program The final step is to write a ladder program for the SLC processor, including configuring the 1747-SCNR for slot 3 of the processor’s chassis. After downloading the program to your processor, place it into the RUN mode. Your program should now be able to read data from the 1746-IA16 in word I:3.3 and write to the 1746-OB16 in word O:3.3. The analog input data resides in words I:3.7 and I:3.8, while the analog output data must be copied to words O:3.
Application Examples 1747-SCNR ControlNet Scanner Controlling Discrete and Analog I/O on ControlNet via a 1747-ACN15 ControlNet Adapter Using Rack and Module Connections This example is organized into the following sections: • Hardware Setup • Configuring The ControlNet Network with RSNetWorx™ for ControlNet • Create a Ladder Logic Program Hardware Setup Computer with: • RSLogix 500 Software • RSLinx Software • RSNetWorx Software for ControlNet • 1784-KTCX15 ControlNet PC Card 1747-SCNR The following h
4-22 Application Examples Configuring The ControlNet Network with RSNetWorx™ for ControlNet Start RSNetWorx for ControlNet by double clicking on its icon. The following screen appears: At this point, you could configure your ControlNet network off-line and then download it to the network. This example, instead, goes on-line and configure the network. Therefore, click on the on-line icon or click on the Network pull-down menu and select On-line.
Application Examples 4-23 The software attempts to communicate with all possible node numbers on the network, from 1 to 99. Click on the Edits Enabled box allow changes to be made. For this example, the on-line network screen should look like the following, where node 99 is the programming terminal. Node 1 is the 1747-SCNR and node 3 is the 1747-ACN15. The 1747-ACN15 resides in slot 0 of its chassis, while slot 1 contains a 1746-IA16, slot 2 contains a 1746-OB16, and slot 3 contains a 1746-NI8.
4-24 Application Examples Configuring a Rack Connection You are now ready to configure the necessary ControlNet connections to read/ write data from the SLC processor to the discrete I/O modules and to the analog input module. Right click on the 1747-SCNR and choose Scanlist Configuration. (If you are prompted to enter the edit mode, click YES.
Application Examples 4-25 As you can see, the 1747-SCNR and 1747-ACN15 are shown as nodes 1 and 3 respectively. Under the 1747-ACN15, the 3 I/O modules in slots 1 through 3 of the 1747-ACN15 chassis are listed. In order to establish a 16-bit rack connection to the 1747-ACN15 chassis, right click on the 1747-ACN15 and choose ControlNet Configuration. The following window opens: Note that addresses in the Connection Properties screen above are already filled in.
4-26 Application Examples IMPORTANT If a rack connection type is changed to a smaller bit configuration e.g. 32-bit to 16-bit, or 16-bit to 8-bit, the unused bits for the new connection remains in their previously programmed states for program mode or lost communications e.g. last state, safe state, reset off. The Connection Name by default is Discrete 16-Bit Exclusive Owner and this is the 16-bit rack connection you want. The first available I/O addresses are I:3.1 and O:3.
Application Examples 4-27 You have successfully configured a rack connection to the remote chassis to communicate with the two discrete I/O modules. At this point you may also configure the state of the outputs in the remote ControlNet chassis when the processor is placed into the Program Mode or if communications are lost to the remote chassis. This is optional. The default is to turn all outputs off when one of the two conditions occur.
4-28 Application Examples Configuring a Module Connection Next, you need to configure a module connection for the 1746-NI8 8-input analog module. If the previous window is still open, click Apply, then OK to accept the rack connection. Right click on the 1746-NI8 module in the Scanlist Configuration window and select Insert Connection. A Connection Properties window again appears. Choose Exclusive Owner for the Connection Name. In this case choose M-file addresses for the 8-input analog module.
4-29 ClickApply,thenOK.TheConnectionPropertieswindowclosesandtheScanlist Configuration window appears and looks like the following: You have now successfully configured your two connections to read/write data between the SLC processor and the remote ControlNet chassis. All that remainsistoSavethisconfigurationtothenetworkkeeperwhich,inthiscase, is the 1747-SCNR. Clickonthe SaveiconorchoosetheFilepull-downmenuandselectSave. You arepromptedtoOptimizeandre-writescheduleforallconnections.
4-30 Create a Ladder Logic Program The final step is to write a ladder program for the SLC processor, including configuring the 1747-SCNR for slot 3 of the processor’s chassis. After downloading the program to your processor, place it into the RUN mode. Your program should now be able to read data from the 1746-IA16 in word I:3.3 and write to the 1746-OB16 in word O:3.2. The analog input data and channel status will reside in words M1:3.3 through M1:3.
4-31 1747-SCNR ControlNet Scanner Controlling Discrete I/O and Serial Data with a 1746-BAS Module on ControlNet via a 1747-ACN15 ControlNet Adapter Using Rack and Module Connections This example is organized into the following sections: • Hardware Setup • Configuring The ControlNet Network with RSNetWorx™ for ControlNet • Create Ladder Logic and Basic Module Programs Hardware Setup The following hardware setup is referenced throughout this example.
4-32 Configuring The ControlNet Network with RSNetWorx™ for ControlNet Start RSNetWorx for ControlNet by double clicking on its icon. The following screen appears: At this point, you could configure your ControlNet network off-line and then download it to the network. This example, instead, goes on-line and configure the network. Therefore, click on the on-line icon or click on the Network pull-down menu and select On-line.
4-33 The software attempts to communicate with all possible node numbers on the network, from 1 to 99. Click on the Edits Enabled box to allow changes to be made. For this example, the on-line network screen should look like the following, where node 99 is the programming terminal. Node 1 is the 1747-SCNR and node 3 is the 1747-ACN15. The 1747-ACN15 resides in slot 0 of its chassis, while slot 1 contains a 1746-IA16, slot 2 contains a 1746-OB16, and slot 3 contains a Series B 1746-BAS.
4-34 Configuring a Rack Connection You are now ready to configure the necessary ControlNet connections to read/ write data from the SLC processor to the discrete I/O modules and to the Basic module. Right click on the 1747-SCNR and choose Scanlist Configuration. (If you are prompted to enter the edit mode, click YES.) The following screen appears: As you can see, the 1747-SCNR and 1747-ACN15 are shown as nodes 1 and 3 respectively.
4-35 NOTE There is a 2-word offset for input data for rack connections. Therefore, for this example, the input data for the input module in slot 1 of the remote 1747-ACN15 chassis is written to I:3.3 in the SLC processor’s input image. The starting input address configured in RSNetWorx for this rack connection was I:3.1, but I:3.1 and I:3.2 are used for status information. Therefore, the actual input data begins after the 2 words of status information. I:3.
4-36 IMPORTANT RSNetWorx allows more than one exclusive owner rack connection type to be configured to a 1747 adapter (e.g. 8-bit exclusive owner, 16-bit exclusive owner, and 32-bit exclusiveowner),howeveronlyoneexclusiveownerrack connection can be operational at one time. It is recommended that only one exclusive owner rack connection type be configured to the adapter to avoid contention between multiple connections. IMPORTANT If a rack connection type is changed to a smaller bit configuration e.g.
4-37 By default, outputs in all slots in the remote chassis are reset if the processor is placed into the Program mode or if communications are lost for any reason. Two other choices are offered when one of the two conditions occur. They are: • Hold Last Outputs • Outputs to Safe State Hold Last Outputs holds outputs in their last state if one of the two conditions occur. Safe State allows you to choose the exact state of each output.
4-38 Configuring a Module Connection Next, you need to configure a module connection for the 1746-BAS module. If the previous window is still open, click Apply, then OK to accept the rack connection. Right click on the 1746-BAS module in the Scanlist Configuration window and select Insert Connection. A Connection Properties window again appears. Choose Exclusive Owner-Advanced for the Connection Name. In this case, you must choose M-file addresses for this type of connection.
4-39 You must now configure this connection for the 8 I/O words and the 64 M0/M1 file words. Click on the “Advanced” tab in the Connection Properties window.
4-40 By default, the Chunk 1 Output File is the output image file for the Basic module and the Chunk 1 Input File is the input image file for the Basic module. You must then assign the Chunk 2 Output File as the Basic module’s M0 file and the Chunk 2 Input File as the Basic module’s M1 file. The size for each of these files is 64 words. The total number of words transferred bi-directionally between the SLC processor and the Basic module will be 72.
4-41 Safe State data is available under the Configuration Settings tab. For 1746-BAS module connections, it is recommended that outputs be reset to 0 when the SLC processor is placed into the PROGRAM mode or if communications are lost to the 1747-ACN15. The Hold Last State option is not available for the 1746-BAS. Click Apply, then OK.
4-42 You have now successfully configured your two connections to read/write data between the SLC processor and the remote ControlNet chassis. All that remains is to Save this configuration to the network keeper which, in this case, is the 1747-SCNR. Click on the Save icon or choose the File pull-down menu and select Save. You are prompted to Optimize and re-write schedule for all connections. Click OK, then click YES to the subsequent warning message.
4-43 Create Ladder Logic and Basic Module Programs The final step is to write a ladder program for the SLC processor and a BASIC program for the Basic module. After downloading the program to your processor and to your basic module, place the processor into the RUN mode and run your BASIC program as well. Your programs should now be able to read data from the 1746-IA16 in word I:3.3 and write to the 1746-OB16 in word O:3.2.
4-44 When the Basic module is placed into the RUN mode, any data placed into the SLC processor’s data table beginning with N12:0 is sent to the 1747-SCNR, which sends it to the 1747-ACN15 via ControlNet and then to the Basic module. The Basic module sends the data out PRT1 and this data is looped right back in the Basic module’s PRT2. The module sends the data to the 1747-ACN15, which sends it to the SCNR via ControlNet.
4-45 SLC Processor Ladder Program This rung gives the next rung a false-to-true transition every 1 second. 0000 T4:1 TON Timer On Delay Timer T4:1 Time Base 0.01 Preset 100 < Accum 86 < DN EN DN This rung copies up to 64 words (beginning with N12:0) to the SCNR for transfer to the Basic module on ControlNet. 0001 T4:1 COP Copy File Source #N12:0 Dest #M0:3.11 Length 64 DN CALL 23 Output Handshake Bit M0:3.
4-46 Example 5 1747-SCNR ControlNet Scanner Controlling Discrete I/O and Specialty Modules Requiring M0 File Configuration on ControlNet via a 1747-ACN15 ControlNet Adapter Using Rack and Module Connections This example is organized into the following sections: • Hardware Setup • Configuring The ControlNet Network with RSNetworx for ControlNet • Create Ladder Logic Hardware Setup The following hardware setup is referenced throughout this example.
4-47 Configuring The ControlNet Network with RSNetWorx for ControlNet Start RSNetWorx for ControlNet by double clicking on its icon. The following screen should appear: At this point, you could configure your ControlNet network off-line and then download it to the network. This example will, instead, go on-line and configure the network. Therefore, click on the on-line icon or click on the Network pull-down menu and select On-line.
4-48 Thesoftwareattemptstocommunicatewithallpossiblenodenumbersonthe network, from 1 to 99. Click on the Edits Enabled box allow changes to be made. For this example, the on-line network screen should look like the following, where node 99 is the programming terminal. Node 1 is the 1747-SCNR and node 3 is the 1747-ACN15. The 1747-ACN15 resides in slot 0 of its chassis, while slot 1 contains a 1746-IA16, slot 2 contains a 1746-OB16, and slot 3 contains a 1746-HSCE.
4-49 Configuring a Rack Connection You are now ready to configure the necessary ControlNet connections to read/write data from the SLC processor to the discrete I/O modules and to the high speed counter module. Right click on the 1747-SCNR and choose ScanlistConfiguration.(Ifyouarepromptedtoentertheeditmode,clickYES.
4-50 As you can see, the 1747-SCNR and 1747-ACN15 are shown as nodes 1 and 3 respectively. Under the 1747-ACN15, the 3 I/O modules in slots 1 through 3 of the 1747-ACN15 chassis are listed. In order to establish a 16-bit rack connection to the 1747-ACN15 chassis, right click on the 1747-ACN15 and choose ControlNet Configuration. The following window opens: NotethataddressesintheConnectionPropertiesscreenabovearealreadyfilledin.
4-51 IMPORTANT If a rack connection type is changed to a smaller bit configuration e.g. 32-bit to 16-bit, or 16-bit to 8-bit, the unused bits for the new connection remains in their previously programmed states for program mode or lost communications e.g. last state, safe state, reset off. TheConnectionNamebydefaultisDiscrete16-BitExclusiveOwnerandthisisthe 16-bit rack connection you want. The first available I/O addresses are I:3.1 and O:3.1, where the 1747-SCNR is in slot 3 of the processor chassis.
4-52 You have successfully configured a rack connection to the remote chassis to communicate with the two discrete I/O modules. At this point you may also configure the state of the outputs in the remote ControlNet chassis when the processorisplacedintotheProgramModeorifcommunicationsarelosttothe remote chassis. This is optional. The default is to turnall outputs off when one ofthetwoconditionsoccur.Toselectotheroptions,clickontheAdvancedtab in the Connection Properties window.
4-53 Configuring a Module Connection Next, you need to configure a module connection for the 1746-HSCE high speed counter module. If the previous window is still open, click Apply, then OK to accept the rack connection. Rightclickonthe1746-HSCEmoduleintheScanlistConfigurationwindowand selectInsertConnection.AConnectionPropertieswindowagainappears.Choose Exclusive Owner Advanced for the Connection Name. In this case choose M-file addresses for the high speed counter module.
4-54 Since the 1746-HSCE module uses 42 M0 file words for configuration, the usermustentertheconfigurationvaluesundertheConfigurationSettingtabso that the 1747-SCNR scanner can write the configuration values each time a module configuration is made to the HSCE module. Below are the example configurationvaluesforsettingupthe1746-HSCEmoduleinbasiccount-only mode. See your 1746-HSCE User Manual for more information on configuring the module.
4-55 Publication 1747-UM003A-EN-P
4-56 ClickApply,thenOK.TheConnectionPropertieswindowclosesandtheScanlist Configuration window appears and looks like the following: You have now successfully configured your two connections to read/write data between the SLC processor and the remote ControlNet chassis. All that remainsistoSave thisconfigurationtothenetworkkeeperwhich,inthiscase, is the 1747-SCNR. ClickontheSaveiconorchoosetheFilepull-downmenuandselectSave. You arepromptedtoOptimizeandre-writescheduleforallconnections.
4-57 Create a Ladder Logic Program The final step is to write a ladder program for the SLC processor, including configuring the 1747-SCNR for slot 3 of the processor’s chassis. After downloading the program to your processor, place it into the RUN mode. Your program should now be able to read data from the 1746-IA16 in word I:3.3 and write to the 1746-OB16 in word O:3.2. The HSCE input data will reside in words M1:3.3 through M1:3.18, while the HSCE module output data must be copied to word M0:3.3.
4-58 Publication 1747-UM003A-EN-P
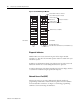
Chapter 5 Troubleshooting Chapter Objectives In this chapter, you will learn how to use the indicators on the module frontplate for troubleshooting the module. This includes: • troubleshooting with the status indicators and status display, including: – health indicators and display mnemonics – ControlNet status indicators Troubleshooting With the Status Indicators and Status Display The module has indicators on the front plate, as shown below.
5-2 Troubleshooting Health Indicators and Display Mnemonics OK LED Display Description Probable Cause Recommended Action Off None Module is not communicating. Power supply fault. Check power supply, and seat adapter firmly in chassis. None Module is not communicating. Defective adapter. Contact Allen-Bradley service. POST Adapter is running Power On Self Test. None None 0000 through 9999 Adapter is running Power On Self Test.
Troubleshooting ControlNet Status Indicators 5-3 The following table explains module status when indicators are: • steady - indicator is on continuously in the defined state. • alternating - the two indicators alternate between the two defined states at the same time (applies to both indicators viewed together). The two indicators are always in opposite states, out of phase. • flashing - the indicator alternates between the two defined states (applies to each indicator viewed independent of the other).
5-4 Troubleshooting Publication 1747-UM003A-EN-P
Appendix A Specifications Description Specification Module Location 1746 I/O chassis, leftmost slot Interconnect Cable Quad shield RG-6 coaxial cable - Refer to the ControlNet Cable System Manual, publication 1786-6.2 for more information. Power Dissipation 5 Watts Thermal Dissipation 17.06 BTU/hr Backplane Current 0.
A-2 Specifications Publication 1747-UM003A-EN-P
Appendix B Understanding Your SLC 500/1746 Control System This appendix provides information on using SLC 500/1746 control systems. Topics include: • • • • • • selecting your SLC 500/1746 control power supply system installation recommendations mounting your control system installing your I/O modules wiring the I/O modules calculating heat dissipation for your control system When configuring a modular system, you must have an individual power supply for each chassis.
B-2 Understanding Your SLC 500/1746 Control System Power Supply Specifications Description: Specification: 1746P1 Line Voltage P2 85 to 132/170 to 265V ac 47 to 63 Hz Typical Line 135 VA Power Reqmnt. 180 VA P3 P4 P5 P6 19.2 to 28.8V dc 85 to 130/170 to 265V ac 47 to 63 Hz 90 to 146V dc 30 to 60V dc 10 to 30V dc 90 VA 240 VA 85 VA 12V dc input: 50 VA 20A 100 VA P7 24V dc input: 75 VA Maximum Inrush Current 20A 45A Internal Current Capacity 2A at 5V dc 5A at 5V dc 3.
Understanding Your SLC 500/1746 Control System B-3 Example for Selecting a 1746 Power Supply Select a power supply for chassis 1 and chassis 2 for the control system below. (The worksheets for this example start on Page B-4.) Chassis 1 Chassis 2 PC ? 1747-AIC ? Slot 0 1 2 3 Slot 0 1 2 3 4 5 6 DH-485 Network Chassis 1 Contains: Table B.1 Chassis 1 Slot Number Description Catalog Number Power Supply at 5V dc (Amps) Power Supply at 24V dc (Amps) 0 Processor Unit 1747-L524 0.35 0.
B-4 Understanding Your SLC 500/1746 Control System Example - Worksheet for Selecting a 1746 Power Supply Procedure 1. For each slot of the chassis that contains a module, list the slot number, the catalog number of the module, and its 5V and 24V maximum currents.
Understanding Your SLC 500/1746 Control System B-5 Worksheet for Selecting a 1746 Power Supply Make copies of this worksheet as needed. For a detailed list of device load currents, refer to the SLC 500 price sheet, product instruction sheet, or appropriate product data. Consider future system expansion when selecting a power supply. Procedure 1. For each slot of the chassis that contains a module, list the slot number, the catalog number of the module, and its 5V and 24V maximum currents.
B-6 Understanding Your SLC 500/1746 Control System This section provides specific recommendations to help you install your SLC 500/1746 components. For general installation guidelines, also refer to the requirements specific to your region. SLC 500 System Installation Recommendations • Europe: Reference the standards found in EN 60204 and your national regulations. • United States: Refer to article 70E of the National Fire Protection Association (NFPA).
Understanding Your SLC 500/1746 Control System B-7 The enclosure should be equipped with a disconnect device.To calculate the heat dissipation of your controller, Refer to Calculating Heat Dissipation for Your Control System on page B-34. Spacing Considerations Up to three chassis can be connected (for a maximum of 30 I/O slots). Follow the recommended minimum spacing shown below to allow for convection cooling within the enclosure.
B-8 Understanding Your SLC 500/1746 Control System Preventing Excessive Heat For most applications, normal convection cooling keeps the adapter components within the specified operating range of 0° to +60° C (+32° to +140° F). Proper spacing of components within the enclosure is usually sufficient for heat dissipation. In some applications, a substantial amount of heat is produced by other equipment inside or outside the enclosure.
Understanding Your SLC 500/1746 Control System ATTENTION ! B-9 Handle the TTL module by its ends, not metallic surfaces. Electrostatic discharges can damage the module. Do not expose the TTL module to electrostatic charges. • Segregate I/O wiring by signal type. Bundle wiring with similar electrical characteristics together. Wires with different signal characteristics should be routed into the enclosure by separate paths.
B-10 Understanding Your SLC 500/1746 Control System Severe Electrical Noise Conditions Normal Electrical Noise Conditions Chassis Mounting Tab Size M4 or M5 (#10 or #12) Hardware 5.2 mm2 (10 AWG) to ground bus Ground Lug Size M4 or M5 (#10 or #12) Internal Star Washer Size M4 or M5 (#10 or #12) Internal Star Washer Tapped Hole (minimum of three threads) Scrape paint off panel to ensure electrical connection between chassis and grounded metal panel.
Understanding Your SLC 500/1746 Control System B-11 This figure shows you how to run ground connections from the chassis to the ground bus. Two acceptable grounding methods are shown; we recommend using a ground bus because it reduces the electrical resistance at the connection. Earth Ground 5.2 mm2 (10 AWG) 2 mm2 (14 AWG) 2 mm2 (14 AWG) 2 mm2 (14 AWG) Preferred Grounding Method 5.
B-12 Understanding Your SLC 500/1746 Control System IMPORTANT If you are using a dc power supply, interrupt the dc side rather than the ac side to avoid the additional delay of power supply turn-on and turn-off. The dc power supply should receive its power directly from the fused secondary of the transformer. Connect the power to the dc input and output circuits through a set of master control relay contacts.
Understanding Your SLC 500/1746 Control System B-13 Emergency-Stop Switches Adhere to the following points concerning Emergency-Stop switches: • Do not program Emergency-Stop switches in the program. Any Emergency Stop switch should turn off all machine power by turning off the master control relay. • Observe all applicable local codes concerning the placement and labeling of Emergency-Stop switches. • Install Emergency-Stop switches and the master control relay in your system.
B-14 Understanding Your SLC 500/1746 Control System Schematic (Using IEC Symbols) L1 L2 230V ac Disconnect Fuse MCR 230V ac Output Circuit Isolation Transformer X1 115V ac X2 Fuse Operation of either of these contacts removes power from the adapter external I/O circuits, stopping machine motion. Emergency-Stop Push Button Overtravel Limit Stop Switch Start Master Control Relay (MCR) Cat. No. 700-PK400A1 Suppressor Cat. No. 700-N24 MCR Suppr MCR MCR 115V ac Output Circuits dc Power Supply.
Understanding Your SLC 500/1746 Control System B-15 Schematic (Using ANSI/CSA Symbols) L1 L2 230V ac Disconnect Fuse MCR 230V ac Output Circuit Isolation Transformer X1 115V ac Fuse X2 Operation of either of these contacts removes power from the adapter external I/O circuits, stopping machine motion. Emergency-Stop Push Button Overtravel Limit Switch Stop Start Master Control Relay (MCR) Cat. No. 700-PK400A1 Suppressor Cat. No. 700-N24 MCR Suppr MCR MCR 115V ac Output Circuits dc Power Supply.
B-16 Understanding Your SLC 500/1746 Control System Loss of Power Source The chassis power supplies are designed to withstand brief power losses without affecting the operation of the system. The time the system is operational during power loss is called “Scan Hold-up time after Loss of Power.” The duration of the power supply hold-up time depends on the number, type and state of the I/O modules, but is typically between 20 ms and 3 s.
Understanding Your SLC 500/1746 Control System B-17 Isolation If there is high frequency conducted noise in or around your distribution equipment, we recommend the use of an isolation transformer in the ac line to the power supply. This type of transformer provides isolation from your power distribution system and is often used as a “step down” transformer to reduce line voltage. Any transformer used with the adapter must have a sufficient power rating for its load.
B-18 Understanding Your SLC 500/1746 Control System Special Considerations The recommendations given previously provide favorable operating conditions for most adapter installations. Your application may involve one or more of the following adverse conditions. Additional measures can be taken to minimize the effect of these conditions. Excessive Line Voltage Variations The best solution for excessive line voltage variation is to correct any feeder problems in your distribution system.
Understanding Your SLC 500/1746 Control System B-19 If you connect a 1746 triac output module to control an inductive load, we recommend that you use varistors for surge suppression. Choose a varistor that is appropriate for the application. The surge suppressors we recommend for triac outputs when switching 120V ac inductive loads are a Harris MOV, part number V220 MA2A, or an Allen-Bradley MOV, Catalog Number 599-K04 or 599-KA04, Series C or later.
B-20 Understanding Your SLC 500/1746 Control System Table B.
Understanding Your SLC 500/1746 Control System B-21 These surge suppression circuits connect directly across the load device. This reduces arcing of the output contacts. (High transient can cause arcing that occurs when switching off an inductive device.) Suitable surge suppression methods for inductive ac load devices include a varistor, an RC network, or an Allen-Bradley surge suppressor.
B-22 Understanding Your SLC 500/1746 Control System 1746-A4 1.1 cm Dia. (0.433 in.) 7.0 cm (2.76 in.) 0.55 cm Dia. (0.217 in.) 17.1 cm (8.73 in.) 14.0 cm (5.51 in) 15.8 cm (6.22 in) 0.55 cm Dia. (0.217 in.) 23.5 cm (10.28 in) 21.5 cm (8.46 in) 4.5 cm 4.5 cm (1.77 in.) (1.77 in) 1.4 cm (0.55 in.) (1) Dimensions with 1746-P1 power supply. (2) Dimensions with 1746-P2, 1746-P3, 1746-P5, 1746-P6, or 1746-P7 power supply. (3) Dimensions with 1746-P4 power supply. 1746-A7 1.1 cm Dia. (0.433 in.) 0.
Understanding Your SLC 500/1746 Control System B-23 1746-A10 1.1 cm Dia. (0.433 in.) 0.55 cm Dia. (0.217 in.) 14.0 cm (5.51 in.) 5.5 cm (2.17 in.) ➌ ➋ ➊ 14.0 cm (5.51 in.) 15.8 cm (6.22 in.) 17.1 cm (6.73 in.) 0.55 cm Dia. (0.217 in.) 14.0 cm (5.51 in.) 48.1 cm (18.94 in.) 45.5 cm (17.91 in.) 1.4 cm (0.55 in.) 43.5 cm (17.13 in.) (1) Dimensions with 1746-P1 power supply. (2) Dimensions with 1746-P2, 1746-P3, 1746-P5, 1746-P6, or 1746-P7 power supply.
B-24 Understanding Your SLC 500/1746 Control System Link Coupler (AIC) R 2.74 (0.11) 146 (5.75) R 5.5 (0.22) 172 (6.75) 159 (6.24) 137 (5.41) 14 (0.55) 7.1 (0.28) 38 (1.50) Right Side View Front View Dimensions are in millimeters (inches) Publication 1747-UM003A-EN-P 4.3 (0.17) 5.5 Dia. (0.
Understanding Your SLC 500/1746 Control System Installing Your I/O Module B-25 This section describes the features of an I/O module, defines sinking and sourcing, and provides installation instructions for an I/O module. Features of an SLC 500 I/O Module Below is an example of a combination I/O module.
B-26 Understanding Your SLC 500/1746 Control System Definition of Sinking and Sourcing Sinking and sourcing are terms used to describe a current signal flow relationship between field input and output devices in a control system and their power supply. • Field devices connected to the positive side (+V) of the field power supply are sourcing field devices. • Field devices connected to the negative side (dc Common) of the field power supply are called sinking field devices.
Understanding Your SLC 500/1746 Control System Field Device B-27 Input + DC Input Circuit dc Power Supply – DC Com Sinking Device with Sourcing Input Module Circuit The field device is on the negative side of the power supply between the supply and the input terminal. When the field device is activated, it sinks current from the input circuit.
B-28 Understanding Your SLC 500/1746 Control System Sourcing Device with Sinking Output Module Circuit The field device is on the positive side of the power supply between the supply and the output terminal. When the output is activated, it sinks current from the field device. VDC + Field Device DC Power Supply Out DC Output Circuit – DC Com Inserting I/O Modules The procedure for installing I/O modules is similar to the procedure for installing the 1747-ACN15/-ACNR15 module. Follow the steps below.
Understanding Your SLC 500/1746 Control System B-29 3. Slide the module into the chassis until the top and bottom tabs lock into place. 4. Insert the wire tie in the slots. 5. Route the wires down and away from the module, securing them with the wire tie.
B-30 Understanding Your SLC 500/1746 Control System OUTPUT INPUT Wire Tie Wires leading to output and input devices 6. Cover all unused slots with the Card Slot Filler, Catalog Number 1746-N2, to keep the chassis free from dust and debris. Removing I/O Modules ATTENTION Disconnect power before attempting to install, remove, or wire modules. ! 1. Disconnect power. 2. Press and hold the module release located on each self-locking tab and slide the module out of the chassis slot. 3.
Understanding Your SLC 500/1746 Control System Wiring the I/O Modules B-31 The following are general recommendations for wiring I/O devices. ATTENTION Before you install and wire I/O devices, disconnect power from the controller and any other source to the I/O devices.
B-32 Understanding Your SLC 500/1746 Control System Using Removable Terminal Blocks The Removable Terminal Block (RTB) is provided on all 12-point and 16-point discrete I/O modules and analog modules. They allow for faster and more convenient wiring of the I/O modules. The RTBs and modules are color-coded as follows: Table B.
Understanding Your SLC 500/1746 Control System B-33 Installing the RTB Below are guidelines for installing the RTB. 1. Be sure the color of the RTB matches the color band on the module. ATTENTION Inserting a wired RTB on an incorrect module can damage the module circuitry when power is applied. ! 2. Write the appropriate slot, chassis, and module type on the RTB label. ATTENTION Disconnect power before attempting to install or remove I/O modules or their terminal blocks. ! 3. Disconnect power. 4.
B-34 Understanding Your SLC 500/1746 Control System Terminal Block Release Screws Maximum Torque = 0.7 to 0.9 Nm (6 to 8 in-lb.) The following terms are used throughout this section. Familiarize yourself with them before proceeding further into the section. Calculating Heat Dissipation for Your Control System Watts per point - maximum heat dissipation that can occur in each field wiring point when energized. Minimum watts - amount of heat dissipation that can occur when there is no field power present.
Understanding Your SLC 500/1746 Control System B-35 Once you have determined which way you will calculate the heat dissipation of your modules, Refer to Example - Worksheet for Calculating Heat Dissipation on page B-40. This worksheet shows you how to calculate the heat dissipation for the example 1747-ACN15/-ACNR15 system on Page B-39. Once you feel comfortable with the layout of the worksheet, go to the worksheet on Page B-41 and fill it out for your control system.
B-36 Understanding Your SLC 500/1746 Control System Table B.6 Output Module Heat Dissipation 1746-OB16 0.388 1.400 7.60 1746-OB16E 0.150 0.675 3.07 1746-OBP8 0.300 0.675 3.08 1746-OBP16 0.310 1.250 6.26 1746-OG16 0.033 0.900 1.50 1746-OV8 0.775 0.675 6.90 1746-OV16 0.388 1.400 7.60 1746-OVP16 0.310 1.250 6.26 1746-OW4 0.133 1.310 1.90 1746-OW8 0.138 2.590 3.70 1746-OW16 0.033 5.170 5.70 1746-OX8 0.825 2.590 8.60 Table B.
Understanding Your SLC 500/1746 Control System B-37 Table B.8 Speciality Module Heat Dissipation 1746-NIO4V Not Applicable 3.040 3.100 1746-NO4I Not Applicable 4.960 5.000 1746-NO4V Not Applicable 3.780 3.800 1746-NI8 Not Applicable consult factory 1746-NI16 Not Applicable consult factory 1746-NR4 Not Applicable consult factory 1746-NT4 Not Applicable consult factory 1747-KE Not Applicable 3.750 3.800 Table B.
B-38 Understanding Your SLC 500/1746 Control System Determining the Power Supply Dissipation Use the graphs below for determining the power supply dissipation in step 2 of the worksheet.
Understanding Your SLC 500/1746 Control System B-39 Heat Dissipation Calculation Example If your controller consists of the following hardware components, calculate heat dissipation as shown in the worksheet on Page B-41. Chassis 2 Chassis 1 DTAM Peripheral Device Slot 0 1 2 3 Slot 1 2 3 3 User Power to Peripheral The following table details the total watts dissipated by the modules and peripheral devices in the above SLC 500 controller. Table B.
B-40 Understanding Your SLC 500/1746 Control System Example - Worksheet for Calculating Heat Dissipation Procedure: Chassis 1 Chassis 2 1. Calculate the heat dissipation for each chassis without the power supply A. Write in the watts (calculated watts or total watts) dissipated by the processor, I/O and specialty modules, and any peripheral devices attached to the processor. Then, for each chassis, add these values together.
Understanding Your SLC 500/1746 Control System B-41 Worksheet for Calculating Heat Dissipation Procedure: Chassis 1 Chassis 2 1. Calculate the heat dissipation for each chassis without the power supply A. Write in the watts (calculated watts or total watts) dissipated by the processor, I/O and specialty modules, and any peripheral devices attached to the processor. Then, for each chassis, add these values together.
B-42 Understanding Your SLC 500/1746 Control System Publication 1747-UM003A-EN-P
Glossary The following list defines common terms used in this manual. ComplementaryModule-Amodulethatperformsanoppositefunction;an input module complements an output module and vice versa Configuration Manager node - The node responsible for distributing ControlNet configuration data to all nodes on the network ControlNet network - A communication architecture that allows the exchange of messages between Allen-Bradley products and certified third-party products.
Glossary 2 Segment - Trunkline sections connected via taps with terminators at each end; a segment does not include repeaters. Tap -A component that connectsproducts to the ControlNettrunkline cable. A tap is required for each node and for both sides of each repeater. Terminator- A 75-ohm resistor (mounted in a BNC plug) placed on the ends of segments to prevent reflections from occurring at the ends of cables. Trunkline - The bus or central part of a cable system.
Index A Allen-Bradley contacting for assistance P-2 support P-2 C calculating heat dissipation for the SLC 500 control system B-34 calculated watts B-34 maximum watts B-34 power supply loading table B-35 common power source B-15 input states on power down B-16 loss of power source B-16 other types of line conditions B-16 common techniques used in this manual P-1 components hardware 1-1 connectors ControlNet 1-3 contacting Allen-Bradley for assistance P-2 contactors (bulletin 100), surge suppressors for B-1
Index 2 common power source B-15 power requirements 2-2 power supplies calculating power supply loading B-35 power supply specifications B-1 programming terminal connecting to network 2-6 publications, related P-1 Purpose of this Manual P-1 R related publications P-1 relays, surge suppressors for B-19 removable terminal blocks (RTB) installing B-33 removing B-32 selecting an enclosure B-6 spacing your enclosures B-7 special considerations B-18 wiring layout B-8 special considerations B-18 SLC 500 system
Back Cover Publication 1747-UM003A-EN-P - July 2000 2 Supersedes Publication 1764-6.1 - February 1999 and 1764-6.1-DU1 - September 1999 © 2000 Rockwell International Corporation. Printed in the U.S.A.