Allen Bradley SLC 500t Analog Input Module (Cat. No.
Important User Information Because of the variety of uses for the products described in this publication, those responsible for the application and use of this control equipment must satisfy themselves that all necessary steps have been taken to assure that each application and use meets all performance and safety requirements, including any applicable laws, regulations, codes and standards.
Table of Contents Important User Information . . . . . . . . . . . . . . . . . . . . . . . . -1 Preface . . . . . . . . . . . . . . . . . . . . . . . . . . . . . . . . . . . . . . . P-1 Who Should Use this Manual . . . . . . . . . . . . . . . . . . . . . . . . . . . Purpose of this Manual . . . . . . . . . . . . . . . . . . . . . . . . . . . . . . . . Contents of this Manual . . . . . . . . . . . . . . . . . . . . . . . . . . . . . Related Documentation . . . . . . . . . . . . . . . . . . . . . . . . .
ii Table of Contents Terminal Wiring . . . . . . . . . . . . . . . . . . . . . . . . . . . . . . . . . . . . . Terminal Block . . . . . . . . . . . . . . . . . . . . . . . . . . . . . . . . . . . . Wiring Single Ended and Differential Inputs . . . . . . . . . . . . . . . Wiring Guidelines . . . . . . . . . . . . . . . . . . . . . . . . . . . . . . . . . . Input Devices . . . . . . . . . . . . . . . . . . . . . . . . . . . . . . . . . . . . . . . Wiring Input Devices to the 1746 NI8 . . . . . . . . . . . .
Table of Contents iii User Defined Limits Data Format to Real" Units . . . . . . . . . . . . . . Channel Status Checking . . . . . . . . . . . . . . . . . . . . . . . . . . . . . . Input Type Status (Bits 0-2) . . . . . . . . . . . . . . . . . . . . . . . . . . Data Format Type Status (Bits 3-5) . . . . . . . . . . . . . . . . . . . . . Open Circuit Type Status (Bits 6 and 7) . . . . . . . . . . . . . . . . . . Channel Filter Frequency (Bits 8-10) . . . . . . . . . . . . . . . . . . . .
iv Table of Contents Channel Configuration Worksheet (With Settings Established for Channels 0-4) . . . . . . . . . . . Program Set Up and Operation Summary . . . . . . . . . . . . . . . . . Program Listing . . . . . . . . . . . . . . . . . . . . . . . . . . . . . . . . . . . Data File . . . . . . . . . . . . . . . . . . . . . . . . . . . . . . . . . . . . . . . . 8-6 8-7 8-8 8-10 Specifications . . . . . . . . . . . . . . . . . . . . . . . . . . . . . . . . . . A-1 Electrical Specifications . . . . .
Preface Read this preface to familiarize yourself with the rest of the manual. This preface covers the following topics: • who should use this manual • the purpose of this manual • contents of this manual • related documentation • common techniques used in this manual • Allen-Bradley support Who Should Use this Manual Use this manual if you are responsible for the design, installation, programming, or maintenance of an automation control system that uses Allen-Bradley small logic controllers.
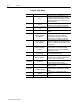
P–2 Preface Contents of this Manual Chapter Title Content Preface Describes the purpose, background, and scope of this manual. Also specifies the audience for whom this manual is intended and gives directions to using Allen Bradley support services. Provides listing of related documentation. 1 Overview Provides a hardware and system overview. Explains and illustrates the theory behind the input module.
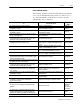
Preface P–3 Related Documentation The following documents contain information that may be helpful to you as you use Allen-Bradley SLC products. To obtain a copy of any of the Allen-Bradley documents listed, contact your local Allen-Bradley office or distributor. For Document Number Read This Document An overview of the SLC 500 family of products SLC 500t System Overview 1747 2.
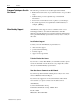
P–4 Preface Common Techniques Used in this Manual Allen Bradley Support The following conventions are used throughout this manual: • Bulleted lists such as this one provide information, not procedural steps. • Numbered lists provide sequential steps or hierarchical information. • Text in this font indicates words or phrases you should type. • Key names appear in bold, capital letters within brackets (for example, [ENTER]).
Chapter 1 Overview This chapter describes the 1746-NI8 analog input module and explains how the SLC 500t processor gathers analog input from the module. Included is information about: • the module’s hardware and diagnostic features • an overview of system operation General Description The module receives and stores digitally converted analog data into its image table for retrieval by all fixed and modular SLC 500 processors.
1–2 Overview Important: Status words are only available when the module is configured for Class 3. Hardware Features The module fits into any slot, except the processor slot (0), in either an SLC 500 modular system or an SLC 500 fixed system expansion chassis (1746-A2). The module contains a removable terminal block providing connection for eight analog input channels, which is specifically designed to interface with analog current and voltage input signals.
Overview 1–3 General Diagnostic Features The 1746-NI8 module contains diagnostic features that can help you identify the source of problems that may occur during power-up or during normal channel operation. These power-up and channel diagnostics are explained in chapter 7, Module Diagnostics and Troubleshooting. System Overview The module communicates to the SLC 500 processor through the parallel backplane interface and receives power from the SLC 500 power supply through the backplane.
1–4 Overview The SLC processor reads the converted analog data from the module at the end of the program scan, or when commanded by the ladder program. The processor and module determine that the backplane data transfer was made without error, and the data is used in your ladder program. A graphic representation of this is shown below.
Chapter 2 Quick Start for Experienced Users This chapter can help you to get started using the 1746-NI8 analog input module. We base the procedures here on the assumption that you have an understanding of SLC 500 products. You should understand electronic process control and be able to interpret the ladder logic instructions required to generate the electronic signals that control your application.
2–2 Quick Start Procedures 1. Check the contents of shipping box. Reference Unpack the shipping box making sure that the contents include: • analog input module (Catalog Number 1746 NI8) • removable terminal block (factory installed) If the contents are incomplete, call your local Allen Bradley representative for assistance. 2. Ensure that your chassis and power supply support the 1746 NI8 module.
Quick Start 4. Insert the 1746 NI8 module into the chassis. ! 2–3 Reference ATTENTION: Never install, remove, or wire modules with power applied to the chassis or devices wired to the module. Make sure system power is off; then insert the module into your 1746 chassis. In this example procedure, local slot 1 is selected.
2–4 Quick Start 6. Configure the system. Reference Configure your system I/O for the particular slot the 1746 NI8 is in (slot 1 in this example). Enter the module ID code. The ID code is 3526 for Class 1 interface, and 12726 for Class 3 interface. See chapter 4 for more information on Class 1 and Class 3 interfaces. Important: All programming software does not support configuration for Class 3 operation. • Advanced Programming Software (APS) supports Class 3 configuration.
Quick Start 2–5 1746 NI8 Module Output Image - Channel Configuration Class 1 Class 3 O:1.0 channel 0 configuration word bit mapped field • • O:1.1 channel 1 configuration word bit mapped field • • O:1.2 channel 2 configuration word bit mapped field • • O:1.3 channel 3 configuration word bit mapped field • • O:1.4 channel 4 configuration word bit mapped field • • O:1.5 channel 5 configuration word bit mapped field • • O:1.
2–6 Quick Start 9. Write the ladder program. Reference Write the remainder of the ladder logic program that specifies how your analog input data will be processed for your application. In this procedure the module is located in slot 1. 15 14 13 12 11 10 9 8 7 6 5 4 3 2 1 0 Bit Number 0 0 0 0 0 0 0 0 0 0 0 0 0 0 0 0 Channel 0 Data Word (variable input data) 1746 NI8 Module Input Image - Data Word 10. Class 1 Class 3 I:1.0 channel 0 data word 16 bit integer • • I:1.
Quick Start Check that the module is operating correctly. 11. Reference (Optional) If the Module Status LED is off, or if the Channel 0 LED is off or blinking, refer to chapter 7. Class 3 Interface - Monitor the status of input channel 0 to determine its configuration setting and operational status. This is useful for troubleshooting when the blinking channel LED indicates that an error has occurred. The example below shows the configuration for channel 0 with no errors.
Chapter 3 Installation and Wiring This chapter tells you how to: • avoid electrostatic damage • determine the chassis power requirement for the module • choose a location for the module in the SLC chassis • set the channels for voltage or current analog input • install the module • wire the module’s terminal block • wire input devices Electrostatic Damage Electrostatic dischar ge can damage semiconductor devices inside this module if you touch backplane connector pins.
3–2 Installation and Wiring Module Location in Chassis Modular Chassis Considerations Fixed Controller Compatibility Table Place your 1746-NI8 module in any slot of an SLC 500 modular, or modular expansion chassis, except for the extreme left slot (slot 0) in the first chassis. This slot is reserved for the processor or adapter modules.
Installation and Wiring 3–3 General Considerations Most applications require installation in an industrial enclosure to reduce the effects of electrical interference. Analog inputs are highly susceptible to electrical noise. Electrical noise coupled to the analog inputs will reduce the performance (accuracy) of the module. Group your modules to minimize adverse effects from radiated electrical noise and heat. Consider the following conditions when selecting a slot for the analog input module.
3–4 Installation and Wiring Module Installation and Removal When installing the module in a chassis, it is not necessary to remove the terminal block from the module. However, if the terminal block is removed, use the write-on label located on the side of the terminal block to identify the module location and type. Terminal Block Removal SLOT ____ • ! RACK ____ MODULE _______________ ATTENTION: Never install, remove, or wire modules with power applied to the chassis or devices wired to the module.
Installation and Wiring 3–5 Module Installation Procedure 1. Align the circuit board of the analog input module with the card guides located at the top and bottom of the chassis. 2. Slide the module into the chassis until both top and bottom retaining clips are secured. Apply firm even pressure on the module to attach it to its backplane connector. Never force the module into the slot. 3. Cover all unused slots with the Card Slot Filler, Catalog Number 1746-N2.
3–6 Installation and Wiring Module Removal Procedure 1. Press the releases at the top and bottom of the module and slide the module out of the chassis slot. 2. Cover all unused slots with the Card Slot Filler, Catalog Number 1746-N2. Terminal Wiring The 1746-NI8 module contains an 18-position, removable terminal block. The terminal pin-out is shown below. ATTENTION: Disconnect power to the SLC before attempting to install, remove, or wire the removable terminal wiring block.
Installation and Wiring 3–7 Wiring Single Ended and Differential Inputs The diagram below shows typical wiring for the module. Important: • • • • • • • • • • • Follow these guidelines when wiring the module. Use shielded communication cable (Belden 8761) and keep length as short as possible. Connect only one end of the cable shield to earth ground. Connect the shield drain wires for channels 0-3 to the top shield terminal. Connect the shield drain wires for channels 4-7 to the bottom shield terminal.
3–8 Installation and Wiring Wiring Schematic for Single ended Analog Input Connections When wiring single ended analog input devices to the analog input module, the number of total wires necessary can be limited by jumpering all IN-" terminals together. Note that differential inputs are more immune to noise than single ended inputs. Power Supply NI8 Transmitter + - + Signal IN 0 + IN 0 - Transmitter + Important: The module does not provide loop power for analog inputs.
Installation and Wiring 3–9 Wiring Guidelines ATTENTION: To prevent shock hazard, care should be taken when wiring the module to analog signal sources. Before wiring any analog module, disconnect power from the SLC 500 system and from any other source to the analog module. ! Follow the guidelines below when planning your system wiring. • To limit noise, keep signal wires as far away as possible from power and load lines.
3–10 Installation and Wiring Wiring Input Devices to the 1746 NI8 After the analog input module is properly installed in the chassis, follow the wiring procedure below using Belden 8761 cable. ! ATTENTION: Care should be taken to avoid connecting a voltage source to a channel configured for current input. Improper module operation or damage to the voltage source can occur. Cable (Cut foil shield and drain wire.
Chapter 4 Preliminary Operating Considerations This chapter explains how the analog input module and the SLC 500 processor communicate through the module’s input and output image. It lists the preliminary setup and operation required before the module can function in a 1746 I/O system.
4–2 Preliminary Operating Considerations Class 1 and Class 3 Interface The 1746-NI8 analog input module has multiclass interface capabilities. Class 1 is the standard configuration. The module can be configured through the user program for Class 3 which enables user-defined data scaling and monitoring of channel status words.
Preliminary Operating Considerations 4–3 Class 3 Memory Map Bit 15 SLC 5/0X Data Files Slot e Output Scan Input Image Output Image Output Image 12 Words Output Image Slot e Analog Input Module Image Table Address Bit 0 Channel 0 Configuration Word Word 0 O:e.0 Channel 1 Configuration Word Word 1 Channel 2 Configuration Word Word 2 O:e.1 O:e.2 Channel 3 Configuration Word Word 3 O:e.3 Channel 4 Configuration Word Word 4 O:e.
4–4 Preliminary Operating Considerations Example – If you want to configure channel 2 on the analog module located in slot 4 in the chassis, your address would be O:4.2. File Type Word O:4.2 Element Delimiter Word Delimiter Slot Chapter 5, Channel Configuration, Data, and Status, gives you detailed bit information about the data content of the configuration word.
Preliminary Operating Considerations Module Update Time 4–5 The module update time is defined as the time required for the module to sample and convert the input signals of all enabled input channels and provide the resulting data values to the SLC processor. Module update time can be calculated by adding the the sum of all enabled channel sample times (0.75 msec per channel). The 1746-NI8 module sequentially samples the channels in a continuous loop.
4–6 Preliminary Operating Considerations Channel Turn On, Turn Off, and Reconfiguration Times The table below gives you the turn-on, turn-off, and reconfiguration times for enabling or disabling a channel. ➀ Description Duration Turn On Time The time it takes to set the status bit (transition from 0 to 1) in the status word, after setting the enable bit in the configuration word.
Preliminary Operating Considerations Channel Filter Frequency Selection 4–77 The module uses a digital low pass filter that provides noise rejection for the input signals. The digital filter is programmable, allowing you to select from eight filter frequencies for each channel. Selecting a low value (i.e., 1 Hz) for the channel filter frequency provides the best noise rejection for a channel.
4–8 Preliminary Operating Considerations The cut-off frequency for each input channel is defined by its filter frequency selection. Choose a filter frequency so that your fastest changing signal is below that of the filter’s cut-off frequency. The cut-off frequency should not be confused with update time. The cut-off frequency relates how the digital filter attenuates frequency components of the input signal.
Preliminary Operating Considerations 4–9 The graph below shows the aliasing characteristic at a filter frequency of 10 Hz with one channel enabled. 10 Hz Filter Frequency with One Channel Enabled Transfer Function Response (dB) 0 -20 -40 -60 100 101 102 Input Frequency (Hz) 103 104 1333 Hz The graph below shows the aliasing characteristic at a filter frequency of 10 Hz with eight channels enabled.
4–10 Preliminary Operating Considerations Noise Rejection Rejection of common mode noise is inherent in the hardware design of the module. Common Mode Rejection is better than –75 dB for common mode DC signals and better than –100 dB for common mode 50 Hz and 60 Hz AC signals. The module performs well in the presence of common mode noise as long as the signals applied to the user terminals do not exceed the common mode voltage rating (±10.5 Volts) of the module.
5 Chapter Channel Configuration, Data, and Status This chapter examines the channel configuration word and the channel status word bit by bit, and explains how the module uses configuration data and generates status during operation. It gives you information about how to: • configure a channel • scale the channel data • check a channel’s status Channel Configuration The channel configuration word is a part of the 1746-NI8 module’s output image as shown below.
5–2 Channel Configuration, Data, and Status Channel Configuration Procedure The channel configuration word consists of bit fields, the settings of which determine how the channel will operate. See the chart below and the descriptions that follow for configuration information. Appendix B contains a configuration worksheet.
Channel Configuration, Data, and Status 5–3 Select Input Type (Bits 0-2) The input type bit field lets you configure the channel for the type of input device you have connected to the module. Valid input is an analog voltage or current that provides a signal within one of the specified ranges. Determine the input device type for a channel and enter its respective 3-digit binary code in bit field 0–2 of the channel configuration word. You must also set the DIP switches of the module for voltage or current.
5–4 Channel Configuration, Data, and Status Important: The processor may continue receiving data values for a period of time after the open circuit condition occurs until when the condition is flagged. The module indicates an open circuit within one module scan times. The module response time is shown below. Module Response to Open Circuit Number of Channels Enabled Response Time (maximum) 1 0.75 msec 2 1.50 msec 3 2.25 msec 4 3.00 msec 5 3.75 msec 6 4.50 msec 7 5.25 msec 8 6.
Channel Configuration, Data, and Status 5–5 While the channel enable bit is cleared (0), the channel data word and status word values are cleared. After the channel enable bit is set, the channel data word and status word remain cleared until the module sets the channel status bit (bit 11) in the channel status word. (Refer to Channel Status on page 5–11.) Unused Bits (Bits 12-15) Bits 12–15 are not defined. Ensure these bits are always set to zero.
5–6 Channel Configuration, Data, and Status Channel Data Word Values for Scaled Data Input Type Signal Range Scaled for PID Proportional Counts (default) NI4 Data Format ±10V dc -10.00V to +10.00V 0 to 16383 -32768 to 32767 -32768 to 32767 0-5V dc 0.0V to +5.00V 0 to 16383 -32768 to 32767 0 to 16384 1-5V dc +1.00V to +5.00V 0 to 16383 -32768 to 32767 3277 to 16384 0-10V dc 0.0V to +10.00V 0 to 16383 -32768 to 32767 0 to 32767 0-20 mA 0.0 mA to 20.
Channel Configuration, Data, and Status Voltage/Current Range Decimal Representation Number of Significant Bits 0 to 20 mA 0 to 16,384 14 bits 4 to 20 mA 3,277 to 16,384 13.67 bits -20 mA to +20 mA -16,384 to +16,384 15 bits 0 to 1 mA 0 to 1000 10 bits 5–7 Resolution per LSB 1.22070 uA 1 uA ➀ ➀ This data format is not supported by the 1746 NI4 module, but is available for the 1746 NI8 module.
5–8 Channel Configuration, Data, and Status Scaling Examples The following scaling examples show how to convert the channel data word from the configured data type to “real” units. “Real” units are the values being measured such as temperature and pressure. To perform the scaling, you must know the defined voltage or current range for the channel’s input type. The lowest possible value for an input type is SLOW, and the highest possible value is SHIGH.
Channel Configuration, Data, and Status 5–9 Scaled-for-PID to “Real” Units Situation: A transducer is being used to measure temperature. The 4–20 mA signal is proportional to 100–500°C (212–932°F). The channel data word is in scaled-for-PID format. The channel data = 5500. Find: “Real” units equivalent in °F.
5–10 Channel Configuration, Data, and Status 1746-NI4 Data Format Units to “Real” Units Situation: A transducer is being used to measure flow rate. The –10V dc to +10V dc signal is proportional to 0–100 GPM. The channel data word is in 1746-NI4 data format. The channel data = 10000. Find: “Real” units equivalent in GPM.
Channel Configuration, Data, and Status Channel Status Checking 5–11 If the module is in Class 3 mode, there are an additional 8 input image words available for status information. The channel status word is a part of the module’s input image. Input words 8–15 correspond to and contain the configuration status of channels 0–7. You can use the data provided in the status word to determine if the input configuration data for any channel is valid per your configuration in O:e.0 through O:e.7.
5–12 Channel Configuration, Data, and Status Channel 0-7 Status Word (I:e.8 through I:e.
Channel Configuration, Data, and Status 5–13 Explanations of the status conditions follow. Input Type Status (Bits 0-2) The input type bit field indicates what type of input signal you have configured for the channel. This field reflects the input type defined in the channel configuration word. The input field is cleared when the channel is disabled. Data Format Type Status (Bits 3-5) The data format bit field indicates the data format you have defined for the channel.
5–14 Channel Configuration, Data, and Status Open Circuit Error (Bit 12) The open circuit error bit is set (1) whenever the channel detects an open circuit condition at its input. The open circuit error is active for the 4–20 mA input type only. The open circuit error state will always take precedence over the out-of-range error states. There will never be an out-of-range error when an open circuit is detected.
Chapter 6 Ladder Logic Configuration Examples Earlier chapters explained how the configuration word defines the way a channel operates. This chapter shows the programming required to enter the configuration word into the processor memory. It also provides you with segments of ladder logic specific to unique situations that might apply to your programming requirements.
6–2 Ladder Logic Configuration Examples Procedure 1. Create integer file N10. Integer file N10 should contain eight elements (N10:0 through N10:7). 2. Enter the configuration parameters for all eight analog input channels into a source integer data file N10. See Appendix B for the channel configuration worksheet. 3. Program a rung in your ladder logic to copy the contents of integer file N10 to the eight consecutive output words of the 1746-NI8 analog module beginning with word O:3.0.
Ladder Logic Configuration Examples Interfacing to the PID Instruction 6–3 The analog input module was designed to interface directly to the SLC 5/02t or later processor PID instruction without the need for an intermediate scale operation. Example - Use 1746-NI8 channel data as the process variable in the PID instruction. 1. Select scaled-for-PID as the data format in the channel configuration word. 2. Specify the 1746-NI8 channel data word as the process variable for the PID instruction.
6–4 Ladder Logic Configuration Examples Monitoring Channel Status Bits (Class 3 Mode Only) This example shows how you could monitor the open circuit error bits of each channel and set an alarm in the processor if one of the channels opens. An open circuit error can occur if the analog input device breaks, or one of the sensor wires gets cut or disconnected from the terminal block. Program Listing Initialize 1746 NI8 First Pass Bit COP Copy File Source #N10:0 Dest #O:3.
Chapter 7 Module Diagnostics and Troubleshooting This chapter describes troubleshooting using the channel status LEDs as well as the module status LED. It explains the types of conditions that might cause an error to be reported and gives suggestions on how to resolve the problem. Major topics include: • module operation vs. channel operation • power-up diagnostics • channel diagnostics • LED indicators • troubleshooting flowchart • replacement parts • contacting Allen-Bradley Module Operation vs.
7–2 Module Diagnostics and Troubleshooting A failure of any channel diagnostic test causes the faulted channel status LED to blink. All channel faults are indicated in bits 12–15 of the channel’s status word. Channel faults are self-clearing. When the fault conditions are corrected, the channel status LED will stop blinking and resume steady illumination. Important: If you clear (0) a channel enable bit (11) all channel status information is reset. LED Indicators The module has nine LEDs.
Module Diagnostics and Troubleshooting 7–3 Channel Status LEDs (Green) The channel status LED is used to indicate channel status and related error information contained in the channel status word. This includes conditions such as: • normal operation • channel-related configuration errors • open-circuit errors • out-of-range errors All channel errors are recoverable errors and after corrective action, normal operation resumes.
7–4 Module Diagnostics and Troubleshooting Module Status LED (Green) The module status LED is used to indicate module-related diagnostic or operating errors. These non-recoverable errors may be detected at power-up or during module operation. Once in a module error state, the 1746-NI8 module no longer communicates with the SLC processor. Channel states are disabled, and data words are cleared.
Module Diagnostics and Troubleshooting Troubleshooting Flowchart Check LEDs on module. Module Status LED off Module Status LED on Channel Status LED(s) blinking Module fault condition Normal module operation Fault condition Check to see that module is seated properly in chassis. Cycle power. End 7–5 Channel Status LED off. Channel Status LED on. Channel is not enabled. Channel enabled and working properly Enable channel if desired by setting channel config. word (bit 11 = 1). Retry.
7–6 Module Diagnostics and Troubleshooting Replacement Parts Contacting Allen Bradley The 1746-NI8 module has the following replaceable parts: Part Part Number Replacement Terminal Block 1746 RT25G Replacement Terminal Cover 1746 R13 1746 NI8 User Manual 1746 6.8 If you need to contact Allen-Bradley for assistance, please have the following information available when you call: • a clear statement of the problem including a description of what • • • • Publication 1746 6.
Chapter 8 Application Examples This chapter provides two application examples to help you use the analog input module. They are defined as a: • basic example • supplementary example The basic example builds on the configuration word programming provided in chapter 6 to set up one channel for operation. This setup is then used in a typical application to display a current (amperage) value. The supplementary example demonstrates how to perform a dynamic configuration of five of the eight available channels.
8–2 Application Examples Channel Configuration Configure channel 0 of the 1746-NI8 module with the following setup: • 4–20 mA input type • engineering units data format • zero data word in the event of an open circuit • 10 Hz input filter to reject high frequency noise and provide rejection of 60 Hz line noise ÉÉÉÉÉÉÉ ÉÉÉÉÉÉÉ ÉÉÉÉÉÉÉ 15 14 13 12 Channel Configuration Worksheet (With Settings Established for Channel 0) 11 10 9 8 1 1 0 0 7 6 0 0 5 0 4 3 2 1 0 Bit Number 0 0 1 0 1
Application Examples 8–3 Program Listing Rung 2.0 Initialize the 1746 NI8 Module Channel 0 MOV MOVE Source N10:0 First Pass Bit S:1 ] [ 15 Dest O:3.0 SCP Scale w/Parameters Input I:3.0 0< Input Min. 3500 3500 < Input Max. 20500 20500 < Scaled Min. 0 0< Scaled Max. 100 100 < Output N7:0 0< Rung 2.1 TOD TO BCD Source Rung 2.2 Convert the scaled channel 0 data word to BCD and write this to the LED display. If channel 0 is ever disabled, a zero is written to the display.
8–4 Application Examples Supplementary Example Application Setup - Display Amps, PSI, and Liquid Level This example shows how to display current, pressure, and liquid level at one annunciator panel. The motor current draw is displayed in amps. The tank pressure is displayed in psi. The liquid level in the holding tank is displayed in inches. A three-position selector switch allows the operator to choose between displaying the current draw for L1, L2, or L3 of the three-phase motor.
Application Examples 8–5 Channel Configuration Configuration setup for current transducers: • channels 0, 1, and 2 • 4–20 mA input type • engineering units data format • zero data word in the event of an open circuit • 10 Hz input filter to reject high frequency noise and provide 60 Hz line noise rejection Configuration setup for pressure transducer: • channel 3 • 4–20 mA input type • engineering units data format • zero data word in the event of an open circuit • 10 Hz input filter to reject high frequen
8–6 Application Examples Channel Configuration Worksheet (With Settings Established for Channels 0-4) ÉÉÉÉÉÉÉ ÉÉÉÉÉÉÉ ÉÉÉÉÉÉÉ 15 14 13 12 11 10 9 8 7 6 5 4 3 2 1 0 Bit Number 0 0 0 0 1 1 0 0 0 0 0 0 0 1 0 1 Channel 0 - N10:0 0 0 0 0 1 1 0 0 0 0 0 0 0 1 0 1 Channel 1 - N10:1 0 0 0 0 1 1 0 0 0 0 0 0 0 1 0 1 Channel 2 - N10:2 0 0 0 0 1 1 0 0 0 0 0 0 0 1 0 1 Channel 3 - N10:3 0 0 0 0 1 1 0 0 0 0 0 0 0 0 1 1 Cha
Application Examples 8–7 Program Set Up and Operation Summary 1. Set up one configuration word in memory for each channel. The table below shows the configuration word allocation summary. Channel Configuration Word Value 0 N10:0 L1 (amps) 1 N10:1 L2 (amps) 2 N10:2 L3 (amps) 3 N10:3 pressure (psi) 4 N10:4 liquid level (inches) 2. When the position of the three-position selector changes, convert the appropriate scaled data word to BCD and send the data to the LED display.
8–8 Application Examples Program Listing The first rung of this program sends the channel setup information to the 1746-NI8 module. The next four rungs send the scaled data to the LED display based on the position of the selector switch. 0000 0001 First Pass Bit S2:1 ] [ 15 Scale the data word containing the current values from L1, L2, and L3. Initialize the 1746 NI8 Module Channels 0-4 COP Copy File Source #N10:0 Dest #O:1.0 Length 5 SCP Scale w/Parameters Input I:1.0 0< Input Min.
Application Examples 8–9 If the selector switch is in the L1 position, convert the scaled data word to BCD format and send the value to the LED display. 0002 I:6.0 ] [ 0 I:6.0 ]/[ 1 I:6.0 ]/[ 2 TOD To BCD Source Dest 0003 If the selector switch is in the L2 position, convert the scaled data word to BCD format and send the value to the LED display. TOD I:6.0 I:6.0 I:6.0 To BCD ] [ ]/[ ]/[ Source 0 1 2 Dest N7:0 0< O:2.0 0000h < N7:1 0< O:2.
8–10 Application Examples 0007 Scale the data word from the level sensor. Then convert the scaled data word to BCD format and send the value to the LED display. SCP Scale w/Parameters Input I:1.4 0< Input Min. 3500 3500 < Input Max. 20500 20500 < Scaled Min. 6 6< Scaled Max. 120 120 < Output N7:4 0< TOD To BCD Source 0008 N7:4 0< O:4.0 0000h < Dest 0009 If the value of the level sensor is less than 12 inches, energize the High Level Warning Light.
Appendix A Specifications This appendix lists the specifications for the 1746-NI8 Analog Input Module. Electrical Specifications Description Specification Backplane Power Consumption 200 mA at 5V dc 100 mA at 24V dc 3.4W maximum (1.0W @ 5V dc, 2.
A–2 Variable Content TTL:Chap Environmental Specifications Description Specification Storage Temperature 0°C to 55°C (32°F to 131°F) in any slot except slot 0 0°C to 60°C (32°F to 140°F) in right most slot of chassis -40°C to +85°C (-40°F to +185°F) Relative Humidity 5% to 95% (without condensation) Certification UL listed CSA approved CE compliant for all applicable directives Hazardous Environment Classification Class I Division 2 Hazardous Environment Operating Temperature Input Specificatio
Appendix B Configuration Worksheet ÉÉÉÉÉÉÉ ÉÉÉÉÉÉÉ ÉÉÉÉÉÉÉ 15 14 13 12 The following worksheet is provided to help you configure each of the channels on your module. See Chapter 5 for detailed configuration information.
Appendix C Converting from 1746 NI4 to 1746 NI8 This information is provided for those who are replacing two 1746-NI4 modules with one 1746-NI8 module. Module ID Code The module identification code is a unique number encoded for each 1746 I/O module. The code defines for the processor the type of I/O or specialty module residing in a specific slot in the 1746 chassis. Using your programming device, configure the slot with the appropriate ID code. In this example, the 1746-NI8 is in slot 3.
Variable Content TTL:Chap C–2 Addressing Addressing is changed from two modules with 4 channels to one module with 8 channels. The input addressing is shown below. 1746 NI4 Input Addressing SLOT 0 1 2 N I 4 N I 4 3 4 • • • • 5 I:3.0 - Slot 3, Channel 0 Data Word I:3.1 - Slot 3, Channel 1 Data Word I:3.2 - Slot 3, Channel 2 Data Word I:3.3 - Slot 3, Channel 3 Data Word 6 1746 NI8 Input Addressing I:3.0 - Slot 3, Channel 0 Data Word N I 8 SLOT 0 1 2 Publication 1746 6.
Variable Content TTL:Chap Channel Configuration ÉÉÉÉÉÉÉ ÉÉÉÉÉÉÉ ÉÉÉÉÉÉÉ 15 14 13 12 C–3 For the 1746-NI4, input selection (voltage or current) is made via a switch. For the 1746-NI8, input selection (voltage or current) is made via a switch and a configuration word is used to define the other operating parameters for the module. The 1746-NI4 does not employ a configuration word. To configure the 1746-NI8 for the same input type as the 1746-NI4, use the following configuration word.
Appendix D Two's Complement Binary Numbers The SLC 500 processor memory stores 16-bit binary numbers. Two’s complement binary is used when performing mathematical calculations internal to the processor. Analog input values from the analog modules are returned to the processor in 16-bit two’s complement binary format. For positive numbers, the binary notation and two’s complement binary notation are identical.
D–2 Variable Content TTL:Chap Negative Decimal Values In two’s complement notation, the far left position is always 1 for negative values. The equivalent decimal value of the binary number is obtained by subtracting the value of the far left position, 32768, from the sum of the values of the other positions. In the figure below (all positions are 1), the value is 32767 – 32768 = –1.
Glossary The following terms and abbreviations are used throughout this manual. For definitions of terms not listed here refer to Allen-Bradley’s Industrial Automation Glossary, Publication AG-7.1. A/D - Refers to the analog to digital converter inherent to the module. The converter produces a digital value whose magnitude is proportional to the instantaneous magnitude of an analog input signal.
G–2 Glossary dB - (decibel) A logarithmic measure of the ratio of two signal levels. data word - A 16-bit integer that represents the value of the analog input channel. The channel data word is valid only when the channel is enabled and there are no channel errors. When the channel is disabled the channel data word is cleared (0). digital filter - A filter implemented in firmware, using discrete, sampled data of the input signal.
Glossary G–3 normal mode rejection - (differential mode rejection) A logarithmic measure, in dB, of a device’s ability to reject noise signals between or among circuit signal conductors. output image - The output from the SLC processor to the 1746-NI8 module. The output image contains the module configuration information. Each output word configures a single channel. remote configuration - A control system where the chassis can be located several thousand feet from the processor chassis.
Index Symbols -3 dB frequency.
I–2 Index D examples basic application example, 8-1 how to address configuration word, 4-4 how to address data word, 4-4 how to address status word, 4-4 how to use PID instruction, 6-3 scaling the data word, 5-8 supplementary application example, 8-4 using alarms to indicate status, 6-4 data type descriptions, 5-6 data word, 4-4 addressing, 4-4 converting to other units, 5-6 definition, G-2 module input image, 2-6, 5-5 scaling examples, 5-8 values for engineering units, 5-5 values for scaled data, 5-6 d
Index input image, 2-6 See also status word and data word definition, G-2 input response to slot disabling, 4-6 input specifications, A-2 input types, A-2 installation, 3-1, 3-5 equipment required, 2-1 getting started, 2-1 heat and noise considerations, 3-3 location in chassis, 2-3, 3-2 L LEDs, 1-2 channel status indicators, 1-2 module status indicator, 1-2 state tables, 7-2 I–3 O open-circuit, 7-3 defining conditional state of channel data, 5-3 downscale enable, 5-3 upscale enable, 5-3 zero, 5-3 error
I–4 Index S T scaled-for-PID, 5-6 terminal pinout diagram, scaling, definition, G-3 scaling input data. See input data scaling scan time, G-2 self-locking tabs, 1-2 shield connections, 3-6, 3-9 slot disabling, 4-6 software, 2-4, 4-1, C-1 specifications, A-1 electrical, A-1 environmental, A-2 input, A-2 physical, A-1 start-up instructions, 2-1 status bit channel enable, 1-3 fault condition, 1-3 time to reset, 4-6 time to set, 4-6 status LED.
Allen Bradley, a Rockwell Automation Business, has been helping its customers improve productivity and quality for more than 90 years. We design, manufacture and support a broad range of automation products worldwide. They include logic processors, power and motion control devices, operator interfaces, sensors and a variety of software. Rockwell is one of the world's leading technology companies. Worldwide representation.