
supporting Sequence of Events
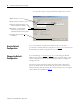
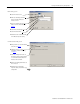
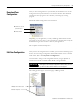
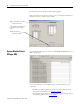

Table Of Contents
- 1732E-UM002A-EN-E 1732E EtherNet/IP ArmorBlock Supporting Sequence of Events User Manual
- Important User Information
- Table of Contents
- Preface
- Chapter 1 - About 1732E ArmorBlock Modules
- Chapter 2 - Module Overview
- Chapter 3 - Use the Module in an ArmorBlock System
- Chapter 4 - Install Your Module
- Chapter 5 - Configure the Module for Your EtherNet/IP Network
- Chapter 6 - Configure the Module Using RSLogix 5000
- Introduction
- Set Up the Hardware
- Create the Example Application
- Configure Your I/O Module
- Overview of the Configuration Process
- Add a New Bridge and Module to Your RSLogix 5000 Project
- Use the Default Configuration
- Change the Default Configuration
- Download Your Configuration
- Edit Your Configuration
- Access Module Data in RSLogix 5000
- Configure RSLogix 5000 and the 1756-EN2T Communication Module for CIP Sync
- Chapter Summary and What’s Next
- Chapter 7 - Module Features
- Introduction
- Determine Module Compatibility
- Module Features That Can Be Configured
- Chapter Summary and What’s Next
- Chapter 8 - Using the Module
- Chapter 9 - Interpret Status Indicators
- Chapter 10 - Troubleshoot the Module
- Appendix A - ArmorBlock 2 Port Ethernet Module Specifications
- Appendix B - Module Tags
- Appendix C - 1732E EtherNet/IP ArmorBlock Supporting Sequence of Events Data Tables
- Appendix D - Connect to Networks via Ethernet Interface
- Appendix E - 1732E ArmorBlock I/O Embedded Web Server
- Glossary
- Index
- How Are We Doing?
- Back Cover
Publication 1732E-UM002A-EN-P - March 2010
36 Configure the Module Using RSLogix 5000
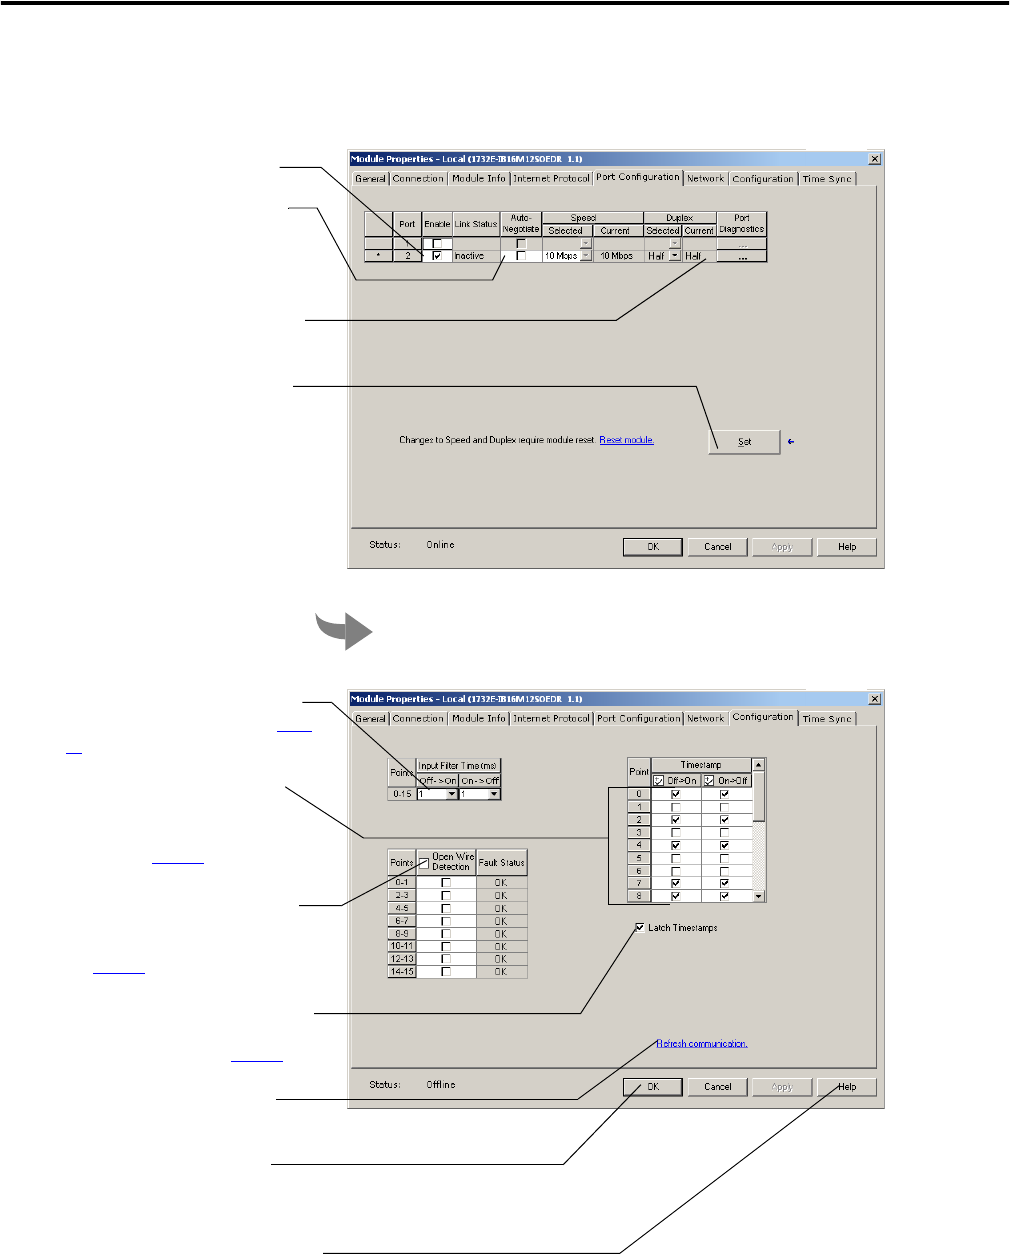
This screen is grayed out unless you are
online with the controller and module. On this
screen, you can:
A. Enable or disable external ports.
B. Select Auto-negotiate on enabled
ports. If Auto-negotiate is disabled
then select the correct speed and
duplex.
C. Click Port Diagnostics to display the
Port Diagnostics dialog.
D. If you make changes in Step A or
Step B then click Set. Changes will
not take effect until you reset the
module or cycle the power to the
module.
E. Click the Configuration tab to see the
next screen.
F. Click OK to close the Module
Properties dialog and download your
configuration.
On this screen, you can:
A. Set the Input Filter Times. For more
information on Input Filters, see page
46
B. Enable Timestamp Capture for all
input points or for specific points. For
more information on Timestamp
Capture, see page 43
.
C. Enable Open Wire Detection for all
points or for specific points. For more
information on Open Wire Detection,
see page 45
.
D. Click on the box to enable Timestamp
Latching. For more information on
Timestamp Latching, see page 44
.
E. Click Refresh communication to
update the content.
F. Click OK to close the Module
Properties dialog and download your
configuration.
G. Click Help to access the RSLogix 5000
Add-On Profile help for descriptions of
tabs that are not required for setting
up your module.