Medium Voltage AC Drive Bulletin 1557 User Manual
Important User Information Read this document and the documents listed in the Additional Resources section about installation, configuration, and operation of this equipment before you install, configure, operate, or maintain this product. Users are required to familiarize themselves with installation and wiring instructions in addition to requirements of all applicable codes, laws, and standards.
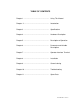
TABLE OF CONTENTS Chapter 1 .......................................................... Using This Manual Chapter 2 ......................................................... Introduction Chapter 3 .......................................................... Specifications Chapter 4 .......................................................... Hardware Description Chapter 5 .......................................................... Description of Operation Chapter 6 ..........................................
1557-UM050F-EN-P – June 2013
USING THIS MANUAL 1-1 Manual Objectives This manual is intended for use by personnel familiar with Medium Voltage and variable speed solid-state drive equipment. The manual contains material which will allow the user to operate, maintain, and troubleshoot the drive system.
1-2 USING THIS MANUAL REPAIR OR REPAIR/EXCHANGE PROCEDURE For your convenience, Rockwell Automation and Rockwell Automation Global Technical Services(GTS), provide an efficient and convenient method of returning equipment eligible for repair or repair/exchange. A Product Service Report (P.S.R.) number is required to return any equipment for repair. This may be obtained from your area Rockwell Automation Distributor, Sales Office or Area Support Division.
INTRODUCTION CHAPTER 2 The Bulletin 1557 drive is a Pulse Width Modulated Current Source Machine side converter (PWM - CSI). It is designed to supply 3 phase currents to standard induction motor loads. The Bul. 1557 MV (medium voltage) drive converts 3 phase 50/60 Hz input power to an adjustable AC frequency current source for speed control of AC squirrel cage motors. The solid state technology used in the design is of proven reliability.
2-2 INTRODUCTION An Input contactor with fused isolating switch is optional on the 1557 drive and is only supplied when specified or if the customer does not have an existing full voltage starter. The standard 1557 drive is a tachless design. A tachometer is recommended for applications requiring an output frequency lower than 6 hertz or applications with a starting torque greater than 30%. A drive isolation transformer or AC line reactor is required with each drive.
SPECIFICATIONS CHAPTER 3 The electrical and environmental specifications of the Bulletin 1557 MV Drive are provided below: Input Voltages: 2300Vac ± 10%, 3-Phase 3300Vac ± 10%, 3-Phase 4160Vac ± 10%, 3-Phase 6900Vac ± 10%, 3-Phase Input Frequency: 50/60Hz ± 3Hz Efficiency: 97% at full load (minimum) Output Voltage: 0 to 2300Vac, 3-Phase 0 to 3300Vac, 3-Phase 0 to 4160Vac, 3-Phase 0 to 6900Vac, 3-Phase Output Frequency: 6Hz to 75Hz (Without Tach) 0.2Hz to 75 Hz (With Tach) Speed Regulation: 0.
3-2 1557-UM050F-EN-P – June 2013 SPECIFICATIONS
HARDWARE DESCRIPTION 4-1 Hardware Overview The basic drive consists of two cabinets; the D.C. link/control cabinet and the converter cabinet. An input contactor cabinet is optional. (See Figure 4.1) Figure 4.
4-2 HARDWARE DESCRIPTION DC Link Control Cabinet The D.C. link/control cabinet is 44 inches wide. The top section has a panel with operator interface devices mounted on a door within a door. A fully vented door is in the bottom position. Access to the low voltage control compartment is gained through the hinged low voltage panel. All low voltage compartments contain the following elements: 4.2 (A) 4.2 (B) 4.2 (C) 4.2 (D) 4.2 (E) 4.2 (F) 4.
HARDWARE DESCRIPTION 4-3 D.C. Link Reactor The D.C. link reactor is floor mounted and may be shipped separately and installed on site in larger drives. Motor Filter Capacitors Located behind the low voltage compartment, the motor filter capacitors are accessible when the upper medium voltage door is opened. There are 3 capacitors for low horsepower drives and 6 for larger drives. The capacitors are liquid filled and mounted on rails. The metal cases of the capacitors are grounded to the cabinet.
4-4 HARDWARE DESCRIPTION Line side converter Components The line side converter is located in the lower half of the converter cabinet. The line side converter consists of three identical cells; each cell consists of the following: 4.3 (A) -line side converter heatsink stack -Silicon Controlled Line side converter (SCR) thyristors -heatsinks -clamp 4.3 (B) -snubber capacitors 4.3 (C) -snubber resistors 4.3 (D) -voltage sharing/diagnostic resistors 4.3 (E) -gate driver circuit boards 4.
HARDWARE DESCRIPTION 4-5 Machine side converter Components The machine side converter is located in the upper half of the converter cabinet. The machine side converter consists of three identical cells. each cell consists of the following: 4.4 (A) -machine side converter heatsink stack assemblies -Gate Turn Off (GTO) thyristors -heatsinks -clamp 4.4 (B) -snubber resistors 4.4 (C) -snubber capacitors 4.
4-6 HARDWARE DESCRIPTION Voltage Feedback Circuit Boards Voltage feedback boards are located in the converter cabinet on the far left side mounted on a vertical glass polyester channel. The boards consist of series connected resistors for sensing input voltage, DC link voltage, and output voltage. Cooling Fans There are several different arrangements of cooling fans. Fans are required to remove heat from the drive to ensure proper operation of its components.
DESCRIPTION OF OPERATION CHAPTER 5 Introduction ......................................................................................................................... 1 Speed Command ................................................................................................................ 3 Skip Speeds ........................................................................................................................ 5 Speed Ramp ...............................................................
1557-UM050F-EN-P – June 2013
DESCRIPTION OF OPERATION 5-1 Introduction The Bulletin 1557 is an adjustable speed ac drive in which motor speed control is achieved through control of the motor torque. The motor speed is measured and the torque is adjusted as required to make the measured speed equal to the speed command. The stator frequency is determined by the motor and load and the drive synchronizes itself to the motor.
1557-UM050F-EN-P – June 2013 Speed Commands Figure 5.1 SKIP SPEEDS SPEED RAMP Flux Feedback (Pxxx) Indicates a read/write parameter with a linear number of xxx. (Vxxx) Indicates a read only variable with a linear number of xxx.
DESCRIPTION OF OPERATION 5-3 Speed Command The function of the speed command block is to select one of 12 possible speed command inputs to serve as the drive speed command. Bits 12-15 of the Logic Command are used to select the Speed Command Input from the following list: 2 analog inputs (0-10V) 3 preset speed commands 6 SCANbus ports 1 preset jog speed command The two analog speed command inputs accept 0-10V signals. The range of each of the analog inputs is defined by two parameters.
1557-UM050F-EN-P – June 2013 A/D Speed Command A/D Speed cmd 9 min (P45) SCANport input (V398) Speed cmd 9 max (P46) Speed cmd 8 min (P43) Machine AI1 Speed cmd 8 max (P44) Speed cmd 0 min (P41) Line AI1 Speed cmd 0 max (P42) Analog input 1M (V355) Analog input 1L (V353) 10V 0 32767 (P40) Preset jog speed (V276) Speed Command in Speed cmd max (P48) Speed cmd min (P47) Logic command bits 12 - 15 (spd cmd select) (V258) 1111 (15) 1110 (14) 1101 (13) 1100 (12) 1011 (11) 1010 (10)
DESCRIPTION OF OPERATION 5-5 Skip Speeds Four skip speeds are provided which may be used to prevent the drive from continuously operating at certain speeds, usually to avoid exciting mechanical resonance. Each of the four skip speed zones is defined by two parameters that specify its center point and width. Skip speed zones that overlap are merged. After skip speed processing, the speed command input has its sign changed if reverse rotation is selected, or is set to zero if there is no run request.
from speed command limit 1557-UM050F-EN-P – June 2013 Skip speed 1 (P49) Skip speed band 1 (P53) Skip speed band 3 (P55) Skip speed band 4 (P56) Skip speed 3 (P51) Skip speed 2 Skip speed 4 (P50) (P52) Skip speed band 2 (P54) -1 Logic status bit 2 (V258) (Forward command) Skip Speeds Logic status bit 1 (V258) (Running) 0 Speed command (V277) 5-6 DESCRIPTION OF OPERATION
DESCRIPTION OF OPERATION 5-7 Speed Ramp The function of the speed ramp is to control the rate of change of the drive speed reference. Independent four section ramps are provided for acceleration and deceleration. Each ramp is defined by four speed points which are specified by parameters Ramp Speed 1 to 4 which are the same for both accelerating and decelerating, and four time intervals which are specified by parameters Acceleration Time 1 to 4 and Deceleration Time 1 to 4.
1557-UM050F-EN-P – June 2013 Speed Ramp Ramp speed 1 (P73) Ramp speed 2 (P74) Ramp speed 3 (P75) Ramp speed 4 (P76) Accel time 1 (P65) Accel time 2 (P66) Accel time 3 (P67) Accel time 4 (P68) Decel time 4 (P65) Decel time 3 (P66) Decel time 2 (P67) Decel time 1 (P68) Speed Reference (V278) 5-8 DESCRIPTION OF OPERATION
DESCRIPTION OF OPERATION 5-9 Speed Control The function of the speed control block is to determine the torque current command. The inputs are the speed reference from the speed ramp, and the stator frequency and slip frequency from the motor model. Either tach feedback is used, or the slip frequency is subtracted from the stator frequency to determine the motor speed, which is then made negative if the motor is rotating in reverse.
1557-UM050F-EN-P – June 2013 Speed Control Stator frequency (V337) Slip frequency (V343) Tach feedback (V348) from sync transfer Speed reference (V278) 0 1 Speed error (V290) Trq command 1 (P87) Trq command 0 (P86) Speed fdbk filter (P110) Sync spdref Logic status bit 3 (V258) (Forward rotation) Speed Feedback Mode (P89) -1 SPEED FEEDBACK FILTER Total Inertia (P82) Trq rate limit (P83) RATE LIMIT Start mode L Total leakage (P130) Filter capacitor (P133) Trq limit braking (P85) - Icq
DESCRIPTION OF OPERATION 5-11 Flux Control The function of the flux control block is to determine the magnetizing current command. The inputs are flux feedback and stator frequency from the motor model, speed feedback from the speed control block, and line voltage from the current control block.
1557-UM050F-EN-P – June 2013 Flux Control Flux feedback (V306) Flx cmd base spd (P100) Flx cmd no load (P103) Torque reference (V291) Speed feedback (V289) V line (V324) FLUX COMMAND PROGRAMMING Base Speed (P98) Lm Lm+2Ls' FLUX LIMITING Flx ref step (P102) - T rotor (P132) L total leakage (P130) L magnetizing (P131) Flxreg bandwidth (P97) Flux error (V307) FLUX Isd REGULATOR command 1 (V309) L magnetizing (P131) 0 Isd command 0 (V308) Filter capacitor (P133) Logic status bit 1 (V258) (
DESCRIPTION OF OPERATION 5-13 Flux Control for Synchronous Motor Most of the magnetization for a synchronous motor is supplied by the rotor field winding, unlike an induction motor where all of the magnetizing current is supplied through the stator. However, control of the motor flux through the field current is very slow because of the large time constant of the dc field winding and the current and voltage limitations of the field supply.
5-14 DESCRIPTION OF OPERATION Current Control The function of the current control block is to determine the firing angles of the line and machine converters. The inputs are the torque and flux producing components of the dc link current command from the speed control and flux control blocks respectively, and the dc link current and line voltage from the line converter feedback. The square root of the sum of the squares of Ix Command and Iy Command is calculated to determine the dc link current command.
V line (V324) I dc feedback (V322) Idc Command Test (P119) Ix (V312) Iy (V294) 2 2 X + Y Idc test mode Idc ref step (P120) Idc reference (V321) -1 COS L DC link (P114) T DC link (P115) L commutation (P117) Curreg bandwidth (P113) CURRENT Idc REGULATOR error (V323) 90 Degrees -1 - 0.99 pu Alpha Machine (V328) 0.
5-16 DESCRIPTION OF OPERATION Line Converter Feedback The function of the line converter feedback block is to convert the raw voltage and current feedback signals to the form required by the drive control software. It represents most of the analog portion of the line side Drive Control Board. Since identical hardware is used for both converters, some functions are not used on one or the other.
I1 I3 phase currents V line (V324) VN Line VP Frequency - - V3 phase to V2 ground voltages - I2 - - VDC - - - 3 -1 3 -1 V31 V23 V12 - D/A 0 D/A - I23 I12 INTEGRATORS - D/A L commutation (P117) D/A - - - I3 I2 I1 F31 F23 F12 I DC FLX F/D A/D A/D Hardware V1 Software VNG I DC Feedback (V322) DESCRIPTION OF OPERATION 5-17 Line Converter Feedback 1557-UM050F-EN-P –June 2013
5-18 DESCRIPTION OF OPERATION Machine Converter Feedback The function of the machine converter feedback block is to convert the raw voltage and current feedback signals to the form required by the drive control software. It represents most of the analog portion of the machine side Drive Control Board. Since identical hardware is used for both converters, some functions are not used on one or the other.
I3 phase currents I1 VN VP - - V3 phase to V2 ground voltages - I2 - - VDC - - - 3 -1 3 -1 V31 V23 V12 - D/A R stator (P129) D/A - I23 I12 INTEGRATORS - D/A L total leakage (P130) D/A - - -1 F31 F23 F12 FLX A/D F/D A/D A/D Hardware V1 A/D Software VNG Is beta Is alpha Stator Frequency (V337) Flux from voltage (V342) V neutral motor (V347) DESCRIPTION OF OPERATION 5-19 Machine Converter Feedback 1557-UM050F-EN-P –June 2013
5-20 DESCRIPTION OF OPERATION Motor Model The function of the motor model block is to calculate the motor current, voltage, flux, torque, power, and slip frequency. After the three phase to two phase conversion described in the machine converter feedback section, the resulting stator current feedback signals (alpha and beta) are converted from analog to digital form. They are then transformed from the stationary reference frame to the rotor flux reference frame that rotates at stator frequency.
Speed feedback (V259) Flx from voltage (V342 Stator frequency (V337) Is beta Is alpha VECTOR ROTATOR Isq (V339) Isd (V338) T rotor (P132) Flx from current (V341 FDBK SELECT L magnetizing (P131) STATOR VOLTAGE CALCULATION Slip frequency (V343) Flux feedback L total leakage (P130) ROTOR FLUX CALCULATION R Stator (P129) 2 2 X + Y Motor power (V346) Torque (V345) Flux feedback (V306) V stator (V344) I stator (V340) DESCRIPTION OF OPERATION 5-21 Motor Model 1557-UM050F-EN-P –June 2013
5-22 DESCRIPTION OF OPERATION Line Converter Protection Except for the dc link overcurrent and overvoltage detection, the line converter protection is implemented entirely in software. Adjustable parameters specifying the trip level and time delay are provided for each fault (see Chapter 6, Parameter and Variables Description). The dc link current and line voltage feedback are obtained as described in the section on line converter feedback.
Idc feedback (V322) V Line (V324) Idc feedback (V322) Line O/L delay (P164) Line O/L trip (P163) 1.10 Line U/V trip (P167) Line O/V trip (P165) Line O/C trip (P161) 1.04 pu 0.
5-24 DESCRIPTION OF OPERATION Machine Converter Protection Except for the hardware overcurrent and dc link overvoltage detection, the machine converter protection is implemented entirely in software. Adjustable parameters specifying the trip level and time delay are provided for each fault. The motor current and voltage feedback are obtained as described in the motor model section.
I stator (V340) Motor O/L trip (P179) Motor O/V trip (P181) Motor O/C trip (P177) Motor O/L delay (P180) V stator (V344) I stator (V340) 1.04 pu 0.
5-26 DESCRIPTION OF OPERATION Analog Outputs A total of twelve programmable analog outputs is provided, six on each of the two Drive Control boards. The analog outputs are 8-bit, non-isolated, with a range of -10V to +10V. The arrangement of analog outputs is different for the original Drive Control boards 80165-018 and the new 18-Pulse Drive Control boards 80190-118.
analog variable 6L analog variable 5L Analog scale 6L (P198) Analog scale 5L (P198) analog variable 4L analog variable 3L analog variable 2L analog variable 1L Analog offset 6L (P193) Analog offset 5L (P193) -10.00V 9.92V -10.00V 9.92V -10.00V 9.92V -10.00V 9.92V -10.00V 9.92V Analog output 6L (V357) -10.00V 9.
5-28 DESCRIPTION OF OPERATION Test Modes The Bulletin 1557 drive is provided with five test modes that are selected by parameter Test Mode in the Feature Select group. When Test Mode is set to the default value of zero, the drive is in the normal operating mode. If the value of this parameter is changed when the drive is running, the change will not take affect until the drive is stopped. Setting Test Mode to 1 selects the gate test mode.
DESCRIPTION OF OPERATION 5-29 Synchronous Transfer Synchronous transfer is an optional feature of the Bulletin 1557 ac drive which allows a motor to be transferred between the drive and a fixed frequency supply in either direction without stopping and with a very short interruption of power to the motor. Compared to a simple non-synchronous transfer in which power to the motor is interrupted for a significant length of time, the transient drop in motor speed is much less with synchronous transfer.
5-30 DESCRIPTION OF OPERATION Transfer to Bypass When the motor is running on the drive and a synchronous transfer to bypass is required, the transfer takes place as described below: 1. Before a transfer to bypass is requested, the drive must be given control of the open bypass contactor. Since the drive is running, it will already have control of the output contactor.
DESCRIPTION OF OPERATION 5-31 Transfer to Drive The drive must synchronize itself with the motor voltage while the motor is still running on bypass, in order to perform the transfer to drive before the motor flux decays. The output contactor must therefore be closed with the motor still connected to the line in order to pre-charge the output filter capacitors. When the motor is running on bypass and a transfer to drive is required, the transfer takes place as described below: 1.
1557-UM050F-EN-P – June 2013 Slip frequency (V343) Line flux angle Transfer to Drive Sync lead angle (P226) - Sync reg gain (P225) SYNCXFER REGULATOR 0 -3 Hz 3 Hz Sync error max (P228) Syncxfer enabled Sync spdref Sync time (P229) TIME DELAY Shut off drive to speed control Sync off delay (P227) TIME DELAY close bypass contactor 5-32 DESCRIPTION OF OPERATION
DESCRIPTION OF OPERATION 5-33 Thyristor Diagnostics Bulletin 1557 Drive The Bulletin 1557 ac drive tests for open or shorted thyristors both when it is started and continuously while running. The method used to detect failed thyristors is different for starting and for running, but the same hardware is used in both situations.
5-34 DESCRIPTION OF OPERATION Machine Converter If no open or shorted thyristors are detected, the line converter is gated at a firing angle of 90 degrees with the machine converter gating off in order to apply a voltage to the dc link.
DESCRIPTION OF OPERATION 5-35 Thyristor Diagnostics Bulletin 1557M Mini Drive There are two differences between the Bulletin 1557M mini drive and the larger 1557 drives which affect the way thyristor failures can be detected. First, there are no thyristors connected in series, and second, there is no feedback from the gate drivers.
5-36 DESCRIPTION OF OPERATION Flying Start The 1557 drive is capable, with certain restrictions, of restarting a motor that is not stationary but is already rotating. This is a so-called flying start. In normal operation, the output of the drive is synchronized with the motor flux, which is derived from the stator voltage and current feedback.
DESCRIPTION OF OPERATION 5-37 Tachometer/Encoder Option The optional tachometer/encoder provides two significant enhancements to the drive control: 1. Provides an accurate measurement of motor speed at all times 2. Extends closed loop speed and torque control down to nearly zero speed. A pulse tachometer, also called a pulse generator or incremental encoder, produces a pulse train output with a frequency proportional to shaft speed.
5-38 1557-UM050F-EN-P – June 2013 DESCRIPTION OF OPERATION
PARAMETER AND VARIABLE DESCRIPTIONS 6-1 Parameter and Variable Descriptions Firmware Revisions 4.72 & 5.32 Important Notice: With the introduction of the new 18-pulse control boards, the Drive Control firmware has been split into two parallel versions. Firmware revisions below 5.00 can only be used in the original Drive Control board 80165-108-51. Firmware revision 5.00 and above can only be used in the new 18-Pulse Drive Control board 80190-118-51.
6-2 PARAMETER AND VARIABLE DESCRIPTIONS Automatic Restart Delay [Auto restart dly] Linear number: 3 Minimum value 0.000 sec Maximum value: 10.000 sec Default value: 0.000 sec This parameter specifies the time interval after a line voltage outage during which the drive will automatically restart if the line voltage is restored, assuming that the drive was running at the time of the outage. The drive will restart only if control power is maintained during the outage.
PARAMETER AND VARIABLE DESCRIPTIONS 6-3 Speed Command Select [Speed cmd select] Linear number 7 Minimum value: 0 Maximum value: 15 Default value: N/A This parameter specifies the source of the drive speed command. It is not saved and is set to either 1 (Local) or 9 (Remote) at power up depending on the state of the Local/Remote digital input.
6-4 PARAMETER AND VARIABLE DESCRIPTIONS Drive Control Firmware Revision Number [Drive contrl FRN] Linear number: 15 Minimum value: 0.00 Maximum value: 99.99 Default value: N/A This parameter specifies the revision of firmware installed in the Drive Control boards. Changing the value of this parameter has no effect. Prior to Rev 4.60/5.10, this parameter was called simply “Firmware Revision”. Communications Processor Firmware Revision Number [Comm proc FRN] Linear number: 16 0.
PARAMETER AND VARIABLE DESCRIPTIONS 6-5 Capacitor Frequency [Capacitor freq] Linear number : 28 Minimum value: 50 Hz Maximum value: 60 Hz Default value: 60 Hz This parameter specifies the rated nameplate frequency of the motor filter capacitors (50 Hz or 60 Hz). This parameter has been included to eliminate the requirement to recalculate the capacitor kvar when the capacitor rated frequency is not the same as line frequency.
6-6 PARAMETER AND VARIABLE DESCRIPTIONS Rated Motor rpm [Rated motor rpm] Linear number: 26 Minimum value: 150.0 rpm Maximum value: 3600.0 rpm Default value: 1185.0 rpm This parameter specifies the rated full load speed of the motor in rpm. It is equal to synchronous speed for a synchronous motor and slightly less than synchronous speed for an induction motor. A “rated rpm” warning will be displayed if this parameter is entered incorrectly.
PARAMETER AND VARIABLE DESCRIPTIONS 6-7 3 Speed Command Parameters Preset Speed Command 1-3 [Preset speed 1-3] Linear numbers: 33-35 Minimum value: 0.5 Hz Maximum value: 90.0 Hz Default values: 30.0/40.0/50.0 Hz These three parameters specify preset speed commands that can be selected by the logic command word. Preset Jog Speed [Preset jog speed] Linear number: 40 1 Hz Minimum value: Maximum value: 60 Hz Default value: 6.
6-8 PARAMETER AND VARIABLE DESCRIPTIONS Speed Command 9 Minimum [Speed cmd 9 min] Linear number: 45 Minimum value: 127.0 Hz Default value: 6.0 Hz This parameter specifies the value of speed command corresponding to a digital speed command input of 0.
PARAMETER AND VARIABLE DESCRIPTIONS 6-9 Skip Speed Band 1-4 [Skip spd band 1-4] Linear numbers: 53-56 Minimum value: 0.0 Hz Maximum value: 2.0 Hz Default value: 0.0 Hz These four parameters specify the width of the skip speed zones. 5 Speed Ramp Parameters Acceleration Time 1 [Accel time 1] Linear number: 65 Minimum value: 0 sec Maximum value: 999 sec Default value: 5 sec This parameter specifies the time for the speed reference to increase from zero to Ramp Speed 1.
6-10 PARAMETER AND VARIABLE DESCRIPTIONS Deceleration Time 4 [Decel time 4] Linear number: 72 Minimum value: 0 sec Maximum value: 999 sec Default value: 3 sec This parameter specifies the time for the speed reference to decrease from Ramp Speed 4 to Ramp Speed 3. Ramp Speed 1 [Ramp speed 1] Linear number: 73 5.0 Hz Minimum value: Maximum value: 6.0 Hz Default value: 5.
PARAMETER AND VARIABLE DESCRIPTIONS 6-11 Ramp Test Step [Ramp test step] Linear number: 80 Minimum value: 0.0 Hz Maximum value: 30.0 Hz Default value: 0.0 Hz This parameter specifies the magnitude of the step that is added to the speed command to demonstrate the response of the speed ramp.
6-12 PARAMETER AND VARIABLE DESCRIPTIONS Torque Limit Braking [Trq lmt braking] Linear number: 85 Minimum value: 0.00 Maximum value: 1.50 Default value: 0.80 This parameter specifies the maximum value of the torque command when braking or generating. A value of 1.00 corresponds to rated motor torque. Prior to Rev 4.60/5.00, this parameter was scaled in per unit based on the motor rated kVA and was about 10% lower. Torque Command 0 [Trq command 0] Linear number: 86 Minimum value: 0.00 Maximum value: 1.
PARAMETER AND VARIABLE DESCRIPTIONS 6-13 Speed Feedback Mode [Speed fdbk mode] Linear number: 89 Minimum value: 0 Maximum value: 1 Default value: 0 This parameter specifies the type of speed feedback used. 0 stator frequency with slip compensation 1 tachometer/encoder The drive automatically switches to stator frequency feedback when a tach loss fault occurs. If the tach loss fault is successfully cleared the drive switches back to tach feedback mode.
6-14 PARAMETER AND VARIABLE DESCRIPTIONS Torque Command Minimum [Trq command min] Linear number: 92 Minimum value: 0.00 Maximum value: 1.50 Default value: 1.50 This parameter specifies the minimum initial value of the torque reference when the speed regulator is enabled. When starting a drive without tach feedback, the actual motor torque is measured and the torque reference is set to an appropriate value before enabling the speed regulator.
PARAMETER AND VARIABLE DESCRIPTIONS 6-15 7 Flux Control Parameters Flux Regulator Bandwidth [Flxreg bandwidth] Linear number: 97 Minimum value: 1 r/s Maximum value: 30 r/s Default value: 10 r/s This parameter specifies the small signal bandwidth of the flux control loop. It is used in the calculation of the flux regulator gain. The maximum bandwidth possible for stable flux control tends to decrease as motor size increases. Base Speed [Base speed] Linear number: 98 Minimum value: 30.
6-16 PARAMETER AND VARIABLE DESCRIPTIONS If Command Bandwidth [If cmd bandwidth] Linear number: 104 Minimum value: 0.1 r/s Maximum value: 10.0 r/s Default value: 1.0 r/s This parameter specifies the bandwidth of the field current command for synchronous motors. It should be set to a value that is less than the bandwidth of both the flux regulator and the field current control. This parameter was added in Rev 5.00 and is not present in 4.xx.
PARAMETER AND VARIABLE DESCRIPTIONS 6-17 Commutation Inductance [L commutation] Linear number: 117 Minimum value: 0.00 pu Maximum value: 0.50 pu Default value: 0.10 pu This parameter specifies the commutating inductance of the line converter. This is roughly equal to the impedance of the supply, including the isolating transformer if present, expressed in the per unit system of the drive.
6-18 PARAMETER AND VARIABLE DESCRIPTIONS Magnetizing Inductance [L magnetizing] Linear number: 131 Minimum value: 1.00 pu Maximum value: 15.00 pu Default value: 4.00 pu This parameter specifies the per unit motor magnetizing inductance. Typical values of this parameter are in the range 2.0 pu to 6.0 pu for induction motors and 1.0 pu to 2.0 pu for synchronous motors. Magnetizing inductance can change significantly with changes in load and flux. This parameter can be set manually or by autotuning.
PARAMETER AND VARIABLE DESCRIPTIONS 6-19 10 Converter Parameters Series Thyristor Line [Series thy line] Linear number: 145 Minimum value: 1 Maximum value: 6 Default value: 1 This parameter specifies the number of series thyristors in each of the 6 legs of the line converter. Series Thyristor Motor [Series thy motor] Linear number: 146 Minimum value: 1 Maximum value: 6 Default value: 1 This parameter specifies the number of series GTO thyristors in each of the 6 legs of the machine converter.
6-20 PARAMETER AND VARIABLE DESCRIPTIONS CT Burden Line [CT burden line] Linear number: 151 Minimum value: 1.0 ohms Maximum value: 1000.0 ohms (FRN 5.xx) 6300.0 ohms (FRN 4.xx) Default value: 15.0 ohms This parameter specifies the value of the scaling resistors for the line current feedback. To determine the required value for the scaling resistors, first calculate the equivalent scaling resistance using the following formula: R= 1.768VxC .T .
PARAMETER AND VARIABLE DESCRIPTIONS 6-21 Pulse Number [Pulse number] Linear number: 153 Minimum value: 6 Maximum value: 18 (FRN5.xx) 12 (FRN4.xx) Default value: 6 This parameter specifies the pulse number (6, 12, or 18) of the line converter. If this parameter is changed, the control power must be turned off and on before the new value takes effect. Warning: Setting this parameter to the wrong value may cause multiple failures of line converter thyristors.
6-22 PARAMETER AND VARIABLE DESCRIPTIONS Current Feedback Rated Line [I fbk rated line] Linear number: 159 Minimum value: 0.500 V Maximum value: 2.500 V Default value: N/A This parameter specifies the rated line current feedback in volts rms calculated from the line CT ratio and burden and the rated motor current. It is not saved and is recalculated when any of the parameters affecting its value are changed. The nominal value is 1.768 V. A warning will be displayed if this parameter is out of range.
PARAMETER AND VARIABLE DESCRIPTIONS 6-23 Line Overvoltage Trip [Line O/V trip] Linear number: 165 Minimum value: 0.00 pu Maximum value: 1.50 pu Default value: 1.20 pu This parameter specifies the level the line voltage must exceed before a line overvoltage fault is indicated. Line Overvoltage Delay [Line O/V delay] Linear number: 166 Minimum value: 0.000 sec Maximum value: 10.000 sec Default value: 0.
6-24 PARAMETER AND VARIABLE DESCRIPTIONS Ground Fault Overcurrent Delay [Gnd flt O/C dly] Linear number: 172 Minimum value: 0.000 sec Maximum value: 1.000 sec Default value: 0.050 sec This parameter specifies the time the ground fault current signal must remain above the trip level before a ground fault overcurrent is indicated. Line dc link Over Voltage Trip [Line DC O/V trip] Linear number: 173 Minimum value: 0.10 pu Maximum value: 1.47 pu Default value: 1.
PARAMETER AND VARIABLE DESCRIPTIONS 6-25 12 Motor Converter Protection Parameters Motor Overcurrent Trip [Motor O/C trip] Linear number: 177 Minimum value: 0.00 pu Maximum value: 2.00 pu Default value: 1.50 pu This parameter specifies the level the motor current must exceed before a motor overcurrent fault is indicated. Motor Overcurrent Delay [Motor O/C delay] Linear number: 178 Minimum value: 0.000 sec Maximum value: 0.100 sec Default value: 0.
6-26 PARAMETER AND VARIABLE DESCRIPTIONS Motor Unbalance Delay [Motor U/B delay] Linear number: 184 Minimum value: 0.00 sec Maximum value: 10.00 sec Default value: 2.00 sec This parameter specifies the time the motor current unbalance must remain above the trip level before a motor unbalance fault is indicated. This parameter was added in Rev 5.30 and is not present in 4.xx.
PARAMETER AND VARIABLE DESCRIPTIONS 6-27 Ground Fault Overvoltage Delay [Gnd flt O/V dly] Linear number: 190 Minimum value: 0.000 sec Maximum value: 5.000 sec Default value: 0.500 sec This parameter specifies the time the motor neutral to ground voltage must remain above the trip level before a ground fault overvoltage is indicated. Motor Stall Delay [Mtr stall delay] Linear number: 191 Minimum value: 0.00 sec Maximum value: 10.0 sec Default value: 2.
6-28 PARAMETER AND VARIABLE DESCRIPTIONS 13 Analog Output Parameters Analog Offset 4L [Analog offset 4L] Linear number 201 Minimum value: -10.00 V Maximum value: 9.92 V Default value: 0.00 V This parameter specifies the offset voltage for analog output 4L. This parameter was added in Rev 5.00 and is not present in 4.xx. Analog Offset 5L [Analog offset 5L] Linear number: 193 Minimum value: -10.00 V Maximum value: 9.92 V Default value: 0.00 V This parameter specifies the offset voltage for analog output 5L.
PARAMETER AND VARIABLE DESCRIPTIONS 6-29 Analog Scale 5L [Analog scale 5L] Linear number: 197 Minimum value: 0.000 Maximum value: 10.000 Default value: 1.000 This parameter specifies the multiplication scale factor for analog output 5L. If this output is used to drive an analog voltmeter, the scale factor can be calculated using the following formula: Analog Scale 5L = 4096V meter .reading .at.10.Volts Analog Scale 6L [Analog scale 6L] Linear number: 198 Minimum value: 0.000 Maximum value: 10.
6-30 PARAMETER AND VARIABLE DESCRIPTIONS 14 External Fault Parameters A total of sixteen external fault inputs are provided. All sixteen can be sent from an external device via Remote I/O. Any of the first eight external faults can use discrete hardware inputs instead. The first three hardware fault inputs are standard and the remaining five require the optional discrete I/O. The class of each of the external faults is specified by a corresponding parameter.
PARAMETER AND VARIABLE DESCRIPTIONS 6-31 Autotune Idc Bandwidth [Autotune Idc BW] Linear number: 126 Minimum value: 10 r/s Maximum value: 100 r/s Default value: 50 r/s This parameter specifies the bandwidth of the current regulator during autotuning of the dc link time constant. A lower bandwidth is used during autotuning than during normal operation because a slower response can be measured more accurately. Autotune Speed Command [Autotune spd cmd] Linear number: 94 Minimum value: 20.
6-32 PARAMETER AND VARIABLE DESCRIPTIONS Autotune dc Link Time Constant [Autotune Tdc] Linear number: 128 Minimum value: 0.000 sec Maximum value: 0.160 sec Default value: 0.000 sec This parameter specifies the value of dc link time constant determined during autotuning. If the dc link time constant measurement is successful, then parameter "T dc link" in "P Current Control" is set equal to the value of this parameter.
PARAMETER AND VARIABLE DESCRIPTIONS 6-33 Autotune Inertia [Autotune inertia] Linear number: 144 Minimum value: 0.00 sec Maximum value: 100.00 sec Default value: 0.00 sec This parameter specifies the value of total system inertia measured during autotuning. If the inertia measurement is successful, then parameter "Total inertia" in "P Speed Control" is set equal to the value of this parameter. If the inertia measurement fails, then parameter "Total inertia" is not changed.
6-34 PARAMETER AND VARIABLE DESCRIPTIONS Synchronous Transfer Time [Sync xfer time] Linear number: 230 Minimum value: 0.1 min. Maximum value: 57.0 min. Default value: 1.0 min. This parameter specifies the time allowed for completion of a synchronous transfer. If transfer is not complete within this time, the drive will stop with a “sync transfer failed” fault. If the “sync transfer failed” fault is disabled, the transfer request will be cancelled and the drive will continue to run at the commanded speed.
PARAMETER AND VARIABLE DESCRIPTIONS 6-35 Tachometer Pulses Per Revolution [Tach pulse/rev] Linear number: 234 Minimum value: 120 Maximum value: 4096 Default value: 360 This parameter specifies the number of pulses produced by the tachometer in one revolution. This parameter is not used for absolute encoders. Tachometer Loss Trip [Tach loss trip] Linear number: 235 Minimum value: 0.0 Hz Maximum value: 10.0 Hz Default value: 2.
6-36 PARAMETER AND VARIABLE DESCRIPTIONS Encoder Reverse [Encoder reverse] Linear number: 239 Minimum value: 0 Maximum value: 1 Default value: 0 This parameter specifies the direction of rotation of an absolute position encoder. If the parameter is set to 1, the drive firmware reverses the output of the encoder. The encoder rotation should be reversed if a “Tach rotation” warning occurs and cannot be cleared when the drive is running (the warning can always be cleared when the drive is stopped).
PARAMETER AND VARIABLE DESCRIPTIONS 6-37 Direction Mask [Direction mask] Linear number: 244 Minimum value: 00 Hex Maximum value: FF Hex Default value: FF Hex This parameter specifies which adapters can issue forward/reverse commands. Jog Mask [Jog mask] Linear number: 245 Minimum value: 00 Hex Maximum value: FF Hex Default value: FF Hex This parameter specifies which adapters can issue jog commands.
6-38 PARAMETER AND VARIABLE DESCRIPTIONS Variable Descriptions The drive variables are described in this section. The variable descriptions are arranged in the functional groups used by the programming terminal. Each description begins with the full name of the variable, followed by the name displayed on the programming terminal. The linear number of the variable is given followed by the minimum and maximum values showing the position of the decimal point and the units if applicable.
PARAMETER AND VARIABLE DESCRIPTIONS 6-39 Logic Status 1 [Logic status 1] Linear number: 258 Minimum value: 0000 Hex Maximum Value: FFFF Hex Analog Output Scaling: NA This variable is the value of logic status 1, the status word that has the same definition for all drives.
6-40 PARAMETER AND VARIABLE DESCRIPTIONS Local Discrete Inputs [Local inputs] Linear number: 260 Minimum value: 0000 Hex Maximum Value: FFFF Hex Analog Output Scaling: N/A This variable is the value of the 16 local discrete digital inputs.
PARAMETER AND VARIABLE DESCRIPTIONS 6-41 Pass Code [Pass code] Linear number: 262 Minimum value: 0 Maximum value: 65535 Analog Output Scaling: N/A This variable is the encoded value of the terminal pass number. If the terminal pass number is lost or corrupted, the value of the pass number can be determined from the encoded value by consulting the factory. 19 Speed Command Variables Speed Command 0 [Speed command 0] Linear number: 273 Minimum value: -100.0 Hz Maximum value: 100.
6-42 PARAMETER AND VARIABLE DESCRIPTIONS 20 Speed Control Variables Speed Feedback [Speed feedback] Linear number: 289 Minimum value: -100.0 Hz Maximum value: 100.0 Hz Analog Output Scaling: 1.0 V = 12.8 Hz This variable is the calculated speed feedback after filtering. The speed feedback is positive for forward rotation and negative for reverse rotation. Speed Error [Speed error] Linear number: 290 Minimum value: -10.00 Hz Maximum value: 10.00 Hz Analog Output Scaling: 1 V = 0.
PARAMETER AND VARIABLE DESCRIPTIONS 6-43 PWM Pulse number [PWM pulse number] Linear number: 295 Minimum value: 1 Maximum value: 361 Analog Output Scaling: NA This variable indicates the number of pulses per cycle for the active PWM mode. Synchronizing Regulator Error [Sync reg error] Linear number: 297 Minimum value: -180 degrees Maximum value: +180 degrees Analog Output Scaling: 1.
6-44 PARAMETER AND VARIABLE DESCRIPTIONS Isd Command 1 [Isd command 1] Linear number: 309 Minimum value: -1.000 pu Maximum value: 1.000 pu Analog Output Scaling: 5.0 V = 1.0 pu This variable is the closed loop correction component of the D-axis stator current command. It is the output of the flux regulator and may be positive or negative. Isd Command [Isd command] Linear number: 310 Minimum value: -1.000 pu Maximum value: 1.000 pu Analog Output Scaling: 5.0 V = 1.
PARAMETER AND VARIABLE DESCRIPTIONS 6-45 Idc Feedback [Idc feedback] Linear number: 322 Minimum value: 0.000 pu Maximum value: 2.000 pu Analog Output Scaling: 5.0 V = 1.0 pu This variable is the measured dc link current feedback. Idc Error [Idc error] Linear number: Minimum value: Maximum value: Analog Output Scaling: This variable is the dc reference. 323 -2.000 pu 2.000 pu 5.0 V = 1.
6-46 PARAMETER AND VARIABLE DESCRIPTIONS 23 Motor Model Variables Stator Frequency [Stator frequency] Linear number: 337 Minimum value: 0.0 Hz Maximum value: 100.0 Hz Analog Output Scaling: 1.0 V = 12.8 Hz This variable is the measured stator frequency of the motor. It is positive for both directions of rotation. Isd [Isd] Linear number: 338 Minimum value: -2.000 pu Maximum value: 2.000 pu Analog Output Scaling: 5.0 V = 1.
PARAMETER AND VARIABLE DESCRIPTIONS 6-47 V Stator [V stator] Linear number: 344 Minimum value: 0.000 pu Maximum value: 1.500 pu Analog Output Scaling: 5.0 V = 1.0 pu This variable is the calculated stator voltage magnitude. It varies with both speed and torque and if the flux command is set correctly should be about 1.0 pu at rated speed and rated load. The stator voltage may be less than 1.0 pu at rated speed if the load torque is less than rated or the line voltage is low.
6-48 PARAMETER AND VARIABLE DESCRIPTIONS 24 Analog I/O Variables Analog Input 1L [Analog input 1L] Linear number: 353 Minimum value: -10.00 V Maximum value: 9.99 V Analog Output Scaling: 1.0 V = 1.0 V This variable is the value in volts of analog input 1L (analog speed command 0). Analog Input 1M [Analog input 1M] Linear number: 355 Minimum value: -10.00 V Maximum value: 9.99 V Analog Output Scaling: 1.0 V = 1.0 V This variable is the value in volts of analog input 1M (analog speed command 8).
PARAMETER AND VARIABLE DESCRIPTIONS 6-49 Analog Output 4M [Analog output 4M] Linear number: 366 Minimum value: -10.00 V Maximum value: 9.92 V Analog Output Scaling: 1.0 V = 1.0 V This variable is the nominal value in volts of the variable assigned to analog output 4M after scaling and offset addition. This variable was added in Rev 5.00 and is not present in 4.xx. Prior to Rev 4.60/5.
6-50 PARAMETER AND VARIABLE DESCRIPTIONS Ground Fault Current [Gnd flt current] Linear number: 367 Minimum value: 0.0 A Maximum value: 10.0 A Analog Output Scaling: 1.0 V = 1.28 A This variable is the measured ground fault current from the optional ground fault current transformer. The ground fault CT is used only for drives without an input isolation transformer, and measures the zero sequence input current of the drive (not the motor current).
PARAMETER AND VARIABLE DESCRIPTIONS 6-51 Fault Flags 1M [Fault flags 1M] Linear number: 370 Minimum value: 0000 Hex Maximum value: FFFF Hex Analog Output Scaling: N/A This variable is the machine converter class 1 fault flags.
6-52 PARAMETER AND VARIABLE DESCRIPTIONS Fault Flags External [Fault flags ext] Linear number: 372 Minimum value: 0000 Hex Maximum value: FFFF Hex Analog Output Scaling: N/A This variable is the external fault flags. Unlike the other faults, the fault message and the class of each of these faults is user definable.
PARAMETER AND VARIABLE DESCRIPTIONS 6-53 Warning Flags B [Warning flags B] Linear number: 374 Minimum value 0000 HEX Maximum value: FFFF Hex Default Value: N/A This variable is the non-maskable drive warning flags.
6-54 PARAMETER AND VARIABLE DESCRIPTIONS Autotune Warning [Autotune warn] Linear number: 377 Minimum value: 0000 Hex Maximum value: FFFF Hex Analog Output scaling: NA This variable is the autotune warning flags.
PARAMETER AND VARIABLE DESCRIPTIONS 6-55 Local Owner [Local owner] Linear number: 386 Minimum value: 00 Hex Maximum value: FF Hex Analog Output Scaling: N/A This variable indicates which adapter has exclusive local control of the drive. Start Owner [Start owner] Linear number: 387 Minimum value: 00 Hex Maximum value: FF Hex Analog Output Scaling: N/A This variable indicates which adapters are issuing a start command.
6-56 PARAMETER AND VARIABLE DESCRIPTIONS SCANport Output [SCANport output] Linear number: 399 Minimum value: -4500 rpm Maximum value: 4500 rpm Analog Output Scaling: 10 V = 4096 rpm This variable is the SCANport output, and indicates the motor speed in rpm. Prior to Rev 4.60/5.00 this variable was located in the Analog I/O group with a linear number of 366.
PARAMETER AND VARIABLE DESCRIPTIONS 6-57 Parameters and Variables Listed by Group Categories: 1 - rating or configuration parameter set at the factory 2 - application parameter set at the factory or at commissioning 3 - tuning parameter set at commissioning S - synchronous drive parameter not used for induction motors All other parameters are normally left at the default setting.
6-58 4 PARAMETER AND VARIABLE DESCRIPTIONS Skip Speed Parameters Name Minimum Maximum Default Units 49 50 51 52 53 54 55 56 Skip Speed 1 Skip Speed 2 Skip Speed 3 Skip Speed 4 Skip Speed Band 1 Skip Speed Band 2 Skip Speed Band 3 Skip Speed Band 4 6.0 6.0 6.0 6.0 0.0 0.0 0.0 0.0 90.0 90.0 90.0 90.0 2.0 2.0 2.0 2.0 90.0 90.0 90.0 90.0 0.0 0.0 0.0 0.0 Hz Hz Hz Hz Hz Hz Hz Hz 5 Speed Ramp Parameters Name Minimum Maximum Default Units Cat.
PARAMETER AND VARIABLE DESCRIPTIONS 7 6-59 Flux Control Parameters Name Minimum Maximum Default Units Flux Regulator Bandwidth Base Speed Flux Command Base Speed Flux Reference Step Flux Command No Load I Field Command Bandwidth Icd Command Gain 1 30.0 0.300 0.000 0.300 0.1 0.0 30 100.0 1.500 0.100 1.500 **0.600 10.0 1.0 10 60.0 0.900 0.000 0.700 1.0 0.5 r/s Hz pu pu pu r/s Current Control Parameters Name Minimum Maximum Default Units Cat.
6-60 11 161 162 163 164 165 166 167 168 169 170 171 172 173 174 175 176 PARAMETER AND VARIABLE DESCRIPTIONS Line Converter Protection Parameters Name Minimum Maximum Default Units Line Overcurrent Trip Line Overcurrent Delay Line Overload Trip Line Overload Delay Line Overvoltage Trip Line Overvoltage Delay Line Undervoltage Trip Line Undervoltage Delay DC Link Overcurrent Trip DC Link Overcurrent Delay Gnd Flt Overcurrent Trip Gnd Flt Overcurrent Delay Line DC Overvoltage Trip Line DC Overvoltage De
PARAMETER AND VARIABLE DESCRIPTIONS 14 6-61 External Fault Parameters Name Minimum Maximum Default 209 210 211 212 213 214 215 216 217 218 219 220 221 222 223 224 External Fault 1 External Fault 2 External Fault 3 External Fault 4 External Fault 5 External Fault 6 External Fault 7 External Fault 8 External Fault 9 External Fault 10 External Fault 11 External Fault 12 External Fault 13 External Fault 14 External Fault 15 External Fault 16 1 1 1 1 1 1 1 1 1 1 1 1 1 1 1 1 3 3 3 3 3 3 3 3 3 3 3 3 3 3 3
6-62 17 PARAMETER AND VARIABLE DESCRIPTIONS Control Mask Parameters Name Minimum Maximum Default 241 242 243 244 245 247 248 249 Logic Mask Local Mask Start Mask Direction Mask Jog Mask Fault Reset Mask Speed Command Mask Sync Transfer Mask 00H 00H 00H 00H 00H 00H 00H 00H FFH FFH FFH FFH FFH FFH FFH FFH FFH FFH FFH FFH FFH FFH FFH FFH 18 Status Variables Name Minimum Maximum 1.
PARAMETER AND VARIABLE DESCRIPTIONS 21 6-63 Flux Control Variables Name Minimum Maximum 1.0V = Units 305 306 307 308 309 310 311 312 314 Flux Reference Flux Feedback Flux Error Isd Command 0 Isd Command 1 Isd Command Icd Command Ix Command I Field Command 0.000 0.000 -1.500 0.000 -1.000 -1.000 0.000 -1.000 0.000 1.500 1.500 1.500 1.000 1.000 1.000 1.000 1.000 1.000 0.2 0.2 0.2 0.2 0.2 0.2 0.2 0.2 0.1 pu pu pu pu pu pu pu pu pu 22 Current Control Variables Name Minimum Maximum 1.
6-64 24 PARAMETER AND VARIABLE DESCRIPTIONS Analog I/O Variables Name Minimum Maximum 1.0V = Units 353 355 356 357 358 359 360 361 362 363 364 365 366 367 368 Analog Input 1L Analog Input 1M Analog Input 2M Analog Output 5L Analog Output 6L Analog Output 5M Analog Output 6M Current Meter Voltage Meter Speed Meter Power Meter Analog Output 4L Analog Output 4M Gnd Flt Current Control Board Temperature -10.00 -10.00 -10.00 -10.00 -10.00 -10.00 -10.00 0 0 -4500 -7500 -10.00 -10.00 0.0 -40 9.99 9.99 9.
OPERATOR INTERFACE TERMINAL PV-550 REV E CHAPTER 7 OPERATOR INTERFACE TERMINAL TABLE OF CONTENTS Chapter Objectives ..........................................................................................................1 Terminology.....................................................................................................................1 Overview .........................................................................................................................3 Keypad ................
CHAPTER 7 OPERATOR INTERFACE TERMINAL PV-550 REV E How To: ...........................................................................................................................9 Obtain Help ........................................................................................................9 Related Topics ...................................................................................................10 Help On Help ..............................................................................
OPERATOR INTERFACE TERMINAL PV-550 REV E CHAPTER 7 Message Prompting ...........................................................................................32 Store/Retrieve Drive Configuration (EEPROM) .................................................32 Initialize .................................................................................................33 Save ......................................................................................................33 Load .........................
CHAPTER 7 OPERATOR INTERFACE TERMINAL PV-550 REV E Advanced Screen Operations ............................................................................50 Communications Statistics .................................................................................50 Protocol Analyzer ...............................................................................................51 Print Screen........................................................................................................
OPERATOR INTERFACE TERMINAL PV-550 REV E 7-1 Chapter Objectives This chapter describes how you use the terminal to modify and obtain information contained within the drive. In this chapter you will learn how to: Modify information associated with the initial drive setup. View: View & Reset Alarm Conditions. Request printouts of the information in the drive. Perform diagnostic trending. Modify the operation of the terminal. - drive variables, - drive parameters, - drive status.
7-2 OPERATOR INTERFACE TERMINAL PV-550 REV E EEPROM – Electrically Erasable Programmable Read Only Memory. This is memory which is not affected by loss of power. It is used for long term storage of data such as parameters. Flash – A type of memory technology which will indefinitely store information and is unaffected by power loss. It is used for storage of firmware, parameters and data files. PCMCIA – A standard for flash memory cards. Personal Computer Memory Card International Association.
OPERATOR INTERFACE TERMINAL PV-550 REV E 7-3 Overview The terminal used on the Bulletin 1557 Medium Voltage Drive is that of the PanelView 550 (Figure 1). This terminal however does not behave as a PanelView, as only the hardware for the terminal has been utilized. The PanelView software has been replaced with unique software to tailor it to the requirements of the Medium Voltage Drive.
7-4 OPERATOR INTERFACE TERMINAL PV-550 REV E Cursor (Selection) Keys The cursor keys are normally used to select an item on the display. When an item on the display is selected, that item will be displayed in reverse video. To change the selection, press the key in the desired direction. On selection screens which have more then one page, the page will automatically change when the cursor is moved beyond the displayed list. Some displays such as the Utility screen, use these keys to modify the data value.
OPERATOR INTERFACE TERMINAL PV-550 REV E Screen Name 7-5 Page Number Selected Item Softkeys Heartbeat Figure 2 – Screen Components The upper left hand corner contains the name of the screen (ie. DISPLAY GROUP:). Knowing the name of the screen will assist you in the orientation of the menu system. On some screens to the right of the screen name, will be the name of the selected item from the previous screen as shown in Figure 3. Some screens have more then one page associated with them.
7-6 OPERATOR INTERFACE TERMINAL PV-550 REV E The remainder of the screen shows the data from the drive. The presentation of the data is dependent on the screen. Screens which allow an item to be selected show the current selection in reverse video. An example of this is shown in Figure 2 in which the P_Nameplate group is selected. Information Windows Numerous screens require communications with the drive in order to function. At times, the duration of this activity will be noticeable to you.
OPERATOR INTERFACE TERMINAL PV-550 REV E 7-7 Figure 4 – Communications Error Figure 5 – Communications Error Language Changing When the language used by the drive changes, (either via the terminal or an external device), the terminal must do considerable work. The database strings are all invalidated, the character set for the server is changed and all strings used by the terminal are linked to the new language. During this possibly lengthy process, the “Language Changing ...” message is displayed.
7-8 OPERATOR INTERFACE TERMINAL PV-550 REV E F6 - Alarms The F6 'Softkey' will always get you to the Alarm Summary Screen. A new alarm will cause this key to flash in reverse video. F8 - Next Page When a screen is capable of displaying data which requires more then one page, this 'Softkey' will be active. The 'Softkey' will increment the page number being viewed. F9 - Previous Page When a screen is capable of displaying data which requires more then one page, this 'Softkey' will be active.
OPERATOR INTERFACE TERMINAL PV-550 REV E 7-9 Top Level Menu This screen (Figure 6) represents the main menu from which all other screens (and the operations which they perform) are activated. To activate an operation, simply press the function key corresponding to the 'Softkey' shown on the screen. A screen for that operation will be displayed. Refer to the section entitled "How To:" for information about the various operations which may be performed.
7-10 OPERATOR INTERFACE TERMINAL PV-550 REV E Figure 7 – Typical Help Screen Related Topics All of the help screens will have additional topics relating to the help currently being displayed. These topics are highlighted just above the Softkeys. Additional topics are selected via the [cursor left] and [cursor right] keys. Figure 7 shows the additional topic of "SOFTKEYS" selected. To access this information, press the [enter] key. The help for the additional topic will be displayed as in Figure 8.
OPERATOR INTERFACE TERMINAL PV-550 REV E 7-11 Figure 9 – Help on Help Modify Terminal Operation (Utility) The utility operation of screens change the characteristics of the terminal. Within this operation you will: Set the clock and calendar Change the delay for the display backlight shutoff Change the contrast of the display Define the meters which will be displayed on the Top Level Menu View the revision levels of all software in the drive system.
7-12 OPERATOR INTERFACE TERMINAL PV-550 REV E Changing Backlight Delay The display of the terminal is only readable with the aid of a backlight. In order to preserve the life of the lamp which provides this, the back lighting is automatically shut off after a duration of inactivity on the keypad. The backlight is restored by pressing any key. The pressed key will not have any other affect on the terminal when pressed with the backlight off. To change the duration of the delay press the [F2] key.
OPERATOR INTERFACE TERMINAL PV-550 REV E 7-13 Setting Date The calendar setting controls the date stamp which the drive uses on the information contained on the alarm summary screen. To change the date, press the [F4] key. The year position of the calendar will be in reverse video. Press the [cursor up] or [cursor down] keys to change the value by a resolution of 1 unit. Press the [cursor left] and [cursor right] keys to change the value by a resolution of 10 units.
7-14 OPERATOR INTERFACE TERMINAL PV-550 REV E This will begin the selection process of a tag as described in the section entitled "Select a Parameter/Variable". When you have completed the selection process, the selected tag will be assigned to the meter (ie. Link Inductance). The name of the meter will have been changed to a default string as shown in Figure 12 for meter 2. Figure 12 – Default Text after Selection The text consists of 8 characters.
OPERATOR INTERFACE TERMINAL PV-550 REV E 7-15 The changes made do not take affect until you press [F10] and exit the screen. Any time prior to this you may cancel all of the changes made after coming to the screen by pressing the [F7] key. The result of selecting the Link Inductance tag for meter 2 (in our example) is shown in Figure 15 after the METERS screen was exited.
7-16 OPERATOR INTERFACE TERMINAL PV-550 REV E To modify the user definable text string, press the [F8] key. (If nothing happens then you have not gained the required access to make changes. Exit to the Top Level Menu screen and refer to the section entitled "Enter/Modify a Password (Access)" to gain access). A screen typical of Figure 17 will be displayed. To modify the text refer to the section entitled "Edit Text", noting the following exception.
OPERATOR INTERFACE TERMINAL PV-550 REV E 7-17 Via Groups This is the default screen (Figure 19) used in the selection a of parameter or variable. It shows all the groups which are accessible for the operation currently being performed. For example: if you are selecting a parameter, groups containing variables will not be shown. If more then one page of groups exist, press the [F8] and [F9] keys to view the other pages. Press the [cursor up] or [cursor down] keys to select the desired group, (ie.
7-18 OPERATOR INTERFACE TERMINAL PV-550 REV E Figure 21 – Selecting via a Letter Figure 22 – Selecting the Name from a List From the SELECT LETTER screen (Figure 21) the tag may also be selected via a code by pressing the [F5] key. Via Code This method of selecting a tag is initiated from the SELECT LETTER screen (Figure 21) by pressing the [F5] key. It allows you to select the tag, given that you know the tag code associated with the desired tag. Every parameter and variable (ie.
OPERATOR INTERFACE TERMINAL PV-550 REV E Figure 24 – Valid Tag Code 7-19 Figure 25 – Invalid Tag Code When the [enter] key is pressed for a valid tag code (ie. Figure 24) the selected tag will be used to continue the operation for which the selection process was being used if that tag is appropriate for the operation. For example: if you are performing a parameter modification operation, but have selected a variable tag code, you will be unable to exit the screen with this variable.
7-20 OPERATOR INTERFACE TERMINAL PV-550 REV E Figure 27 – Typical Text Edit Screen The screen shown in Figure 27 is typical of all screens using the edit text operation. All screens have the F3, F4 and F5 keys in common (if applicable). Once in the 'editing field' all operations are performed on the character in reverse video. Pressing the [cursor left] and [cursor right] keys will move to the next character position in the string.
OPERATOR INTERFACE TERMINAL PV-550 REV E 7-21 Configure the Drive In order to tailor the drive to your motor and application, a number of elements must be defined in the drive. The section describes how you will set or 'configure' these elements of the drive, via this terminal. You will learn how to: Change a parameter setting. Assign a variable or parameter to an Analog Port. Selectively enable or disable (ie. Mask) certain faults. Define your own faults attached to external inputs.
7-22 OPERATOR INTERFACE TERMINAL PV-550 REV E Figure 28 – Enter the Password Enter the password value using the data entry keys. The value can be any number between 0 and 65535. As the number is entered via the keys [0]-[9], the value will be shown by a place holder (ie. * in the editing field), as shown in Figure 28. The value may be edited by using the [backspace] key. When the value has been typed in, press the [enter] key.
OPERATOR INTERFACE TERMINAL PV-550 REV E 7-23 The default value for the password is zero (0), or simply pressing the [enter] key. This value can be changed from the ACCESS screen. Press the [F9] key. The PASSWORD CHANGE screen shown in Figure 31 is displayed. Enter the current password value via the data keys [0]-[9] and press the [enter] key. As in the ACCESS screen, the entered value is shown via place holders and may be edited with the [backspace] key.
7-24 OPERATOR INTERFACE TERMINAL PV-550 REV E Figure 34 – Incorrect Password Entered Figure 35 – Invalid New Password Verification Drive Setup This section describes how to: - select an alternate language, - enter data to a drive parameter - assign a tag to an analog port, - enable and disable a fault via a mask, - assign text to be associated with an external fault input, - define the tags to be accessible by a PLC. You will access the "SETUP" screen from the Top Level Menu by pressing the [F8] key.
OPERATOR INTERFACE TERMINAL PV-550 REV E 7-25 Figure 37 – Unrestricted Mode Restricted mode means that you are restricted to only viewing the drive setup, you can not make any changes. Unrestricted mode means you have full unrestricted access to any data in the drive the terminal is capable of accessing. You must be in this mode to perform the setup operations. At powerup, the terminal is in Restricted mode.
7-26 OPERATOR INTERFACE TERMINAL PV-550 REV E Modify Parameters To change a parameter, press the [F7] key on the SETUP screen. This will begin the selection process of a parameter as described in the section entitled "Select a Parameter/Variable". The selection process to change a parameter can also be initiated while displaying the members of a parameter group on the DISPLAY screen (Figure 57) by pressing the [F7] key.
OPERATOR INTERFACE TERMINAL PV-550 REV E 7-27 The value may be edited the same as a value entered from the numeric keypad. The new value is not sent to the drive until you exit the screen with the [F10] key. Prior to this you can modify the new value by repeating the above procedure, or you can cancel the change by pressing the [F7] key. The CANCEL operation returns the new value to that of the actual value.
7-28 OPERATOR INTERFACE TERMINAL PV-550 REV E Fault Masks A number of the faults within the drive may be selectively enabled or disabled by you. To view or modify the current fault mask settings, press the [F4] key on the SETUP screen. A typical screen as shown in Figure 42 shows all of the user maskable faults. Associated with each fault is the state of the mask. If OFF, it means the fault is disabled and will not occur. The normal state is ON or enabled.
OPERATOR INTERFACE TERMINAL PV-550 REV E 7-29 The state of the fault masks which you are currently viewing is defined to the right of the screen name, ie. FAULTS OVERVIEW: DISABLED or FAULTS OVERVIEW: ENABLED. To change the state of fault masks currently displayed, press the [F7]. Each press of the [F7] key will toggle the screen to show the masks in the other state.
7-30 OPERATOR INTERFACE TERMINAL PV-550 REV E User Definable Faults The drive contains a number of external fault inputs. You can custom define the text associated with these inputs, which will be used on the alarm screen and the fault mask screens. To define the text, press the [F5] key on the SETUP screen. A screen typical of Figure 49 will be seen.
OPERATOR INTERFACE TERMINAL PV-550 REV E 7-31 PLC The drive can be optionally connected to a PLC via a RIO (Remote Input/Output) adapter. The drive appears to the PLC as a rack of information. The tags which are associated with each of the words within a rack can be defined. To setup the PLC link, press [F3] on the SETUP screen. This will display a screen as shown in Figure 52 or 53. The PLC setup consists of eight words of input and eight words of output. These are shown on separate screens.
7-32 OPERATOR INTERFACE TERMINAL PV-550 REV E Message Prompting All the changes you made while you were configuring the drive are stored in volatile memory of the drive. This means that when power to the drive is lost, so will be the changes. To permanently store the changes, the contents of the memory must be stored to EEPROM memory. When you exit a group of screens on which you have changed the drive data, you will be prompted as in figure 54 to save the data.
OPERATOR INTERFACE TERMINAL PV-550 REV E 7-33 Initialize The drive contains a default set of parameters and setup information. This can form a basis for configuring the drive. To initialize the drive with the default set of data, press the [F3] key. The screen will appear as in Figure 55, indicating the operation you are about to perform. The screen then will ask you to confirm the operation. Press the [F8] key to proceed, or the [F9] key to abort.
7-34 OPERATOR INTERFACE TERMINAL PV-550 REV E Display Variables & Parameters The variables and the parameters of the drive can be displayed, continually showing the value contained in the drive. From the Top Level Menu, press the [F4] key. The DISPLAY GROUP screen of Figure 56 is displayed. The screen shows one or more pages of groups which can be displayed. Using the [cursor up] and [cursor down] keys select the group you wish to display and press the [enter] key.
OPERATOR INTERFACE TERMINAL PV-550 REV E Figure 58 – Custom Display Screen 7-35 Figure 59 – Assign a Variable/Parameter The changes take affect immediately, however are not saved until you press [F10] and exit the screen. Any time prior to this you may cancel all the changes made after coming to the screen by pressing the [F7] key. View Drive Status The status of the drive is viewed by pressing the [F7] key from the Top Level Menu.
7-36 OPERATOR INTERFACE TERMINAL PV-550 REV E Figure 61 – Typical Alarm Summary Screen The screen shows all alarms in chronological order which are currently registered in the drive along with a time and date stamp defining when the alarm occurred, (ie. Overtemp1 occurred at 9:06:28 am on March 10). To aid in trouble shooting, a time and date stamp is also provided, indicating the last time the drive was started and stopped normally (ie. not due to an alarm).
OPERATOR INTERFACE TERMINAL PV-550 REV E 7-37 Request Printouts When the drive contains the optional printer, you can obtain hard copies of the data which you are able to view on the terminal. The printouts are requested from the PRINTER screen. Press [F3] while displaying the Top Level Menu. The screen typical of Figure 63 is displayed. It shows the current status of the printer (A-B part # 80025-290-01) and the type of reports which are available.
7-38 OPERATOR INTERFACE TERMINAL PV-550 REV E Figure 64 – Diagnostic Trend Main Menu From this screen, additional screens are accessible to perform the diagnostic trending functions. The screen shows the current status of the trend, (Unprogrammed, Running, Triggered). To define a trend, press the [F8] key to display the setup screen, shown in Figure 65. Figure 65 – Diagnostics Setup Screen Figure 66 – Assigning a Tag to a Trace From this screen, the tags to be monitored are assigned to a trace.
OPERATOR INTERFACE TERMINAL PV-550 REV E 7-39 Setting the Trigger Once you have assigned a tag to Trace 1, you may proceed to set the trigger value. Two items of information are required, the trigger condition and the trigger value. These are selected for modification by pressing the [F2] and [F3] keys respectively. (If nothing happens then you have not gained the required access to make changes. Press the [F8] key and refer to the section entitled "Enter/Modify a Password (Access)" to gain access).
7-40 OPERATOR INTERFACE TERMINAL PV-550 REV E Starting the Trace The changes do not take affect, and the trend is not started until you press [F10] and exit the screen. Any time prior to this you may cancel all the changes made after coming to the screen by pressing the [F7] key. When you exit the screen, the trend is started and the screen such as Figure 68 will show the trigger condition and the status. The trend may also be started by pressing the [F7] key on the DIAGNOSTICS screen.
OPERATOR INTERFACE TERMINAL PV-550 REV E 7-41 Flash Memory Transfers Flash memory is used to store data in a non-volatile environment, that is it is not lost when power is removed. The terminal contains flash memory in two forms. The first is built into the terminal. This form of flash is used to store the terminal‟s firmware and parameters from the drive. This information can also be stored on a removable flash memory card.
7-42 OPERATOR INTERFACE TERMINAL PV-550 REV E From this screen, additional screens are used to perform the various functions involving the flash memory. The screen shows the current mode of operation. Any operations which will alter the contents of the flash memory or of the drive require the drive to be placed into „Unrestricted‟ Mode. In „Restricted‟ mode you may view the contents of the flash card. To change modes, press the [F8] key. Refer to the section “Enter/Modify a Password (Access)”.
OPERATOR INTERFACE TERMINAL PV-550 REV E 7-43 View a Directory The directory of a flash card is shown by pressing the [F7] key on the TRANSFER screen. The directory shows the filename and extension, along with a date and time stamp of when the file was created. A screen typical of Figure 73 will be shown. Figure 73 – Typical Directory This DIRECTORY screen is used by any screen or operation which requires a filename to be entered or picked from the directory.
7-44 OPERATOR INTERFACE TERMINAL PV-550 REV E Figure 74 – Typical File Selection An existing filename can be used as a basis for the new filename by first selecting that filename. Press the [F2] key. The filename can now be edited. Refer to the section entitled “Edit Text” for further details. When complete, pressing the [Enter] key will proceed with the operation. Loading Programs (Firmware) Firmware is the program which is run in the terminal to provide all the functionality described in this manual.
OPERATOR INTERFACE TERMINAL PV-550 REV E 7-45 Figure 75 – Load New Firmware The screen will then ask you to confirm the operation. Press the [F8] key to proceed, or the [F9] key to abort. Performing a DOWNLOAD FIRMWARE operation will overwrite the existing firmware which is currently running. An aborted download or one which failed prior to starting the download may be restarted by pressing the [F3] key. To select or enter a different filename, press the [F7] key.
7-46 OPERATOR INTERFACE TERMINAL PV-550 REV E Parameter Transfers The parameters which the drive uses are stored within the drive itself. The terminal is used to review and modify these parameters. When a Drive Control Board is changed, it is necessary to re-enter the parameters into the new board. The terminal can simplify this process by reading all the parameters from the old Drive Control Board and storing them either in the terminal or on a flash card.
OPERATOR INTERFACE TERMINAL PV-550 REV E 7-47 Figure 77 – Transfer Stored Parameters Download from Terminal The parameters stored in the terminal are downloaded to the drive by pressing the [F3] key. A screen similar to that shown in Figure 77 will be shown (except the operation will show “MEMORY TO DRIVE”). To confirm the operation, press the [F8] key to proceed, or the [F9] key to abort. Performing a “MEMORY TO DRIVE” transfer will overwrite the active parameters in the drive.
7-48 OPERATOR INTERFACE TERMINAL PV-550 REV E Download from Memory Card The parameters are read from a memory card and written to the drive by pressing the [F2] key. The terminal will enter the DIRECTORY screen from which an existing parameter filename can be selected or entered. Refer to the sections entitled “Select a filename” and “Enter a filename”.
OPERATOR INTERFACE TERMINAL PV-550 REV E 7-49 Loading Language Modules In order to use a language in the terminal, it must first be loaded into the terminal from the flash card. From the TRANSFER screen, press the [F5] key. The terminal will enter the DIRECTORY screen from which an existing language module filename can be selected or entered, Figure 79. Refer to the sections entitled “Select a filename” and “Enter a filename”.
7-50 OPERATOR INTERFACE TERMINAL PV-550 REV E Advanced Screen Operations A number of advanced functions have been incorporated into the terminal. These operations are not required to operate the drive. They are meant as service tools for trained technicians and have been included here only for completeness. All operations are accessed via a two key sequence.
OPERATOR INTERFACE TERMINAL PV-550 REV E 7-51 To reset the above counters, press the [F8] key. The BUFFERS show the current contents (in hexadecimal) of the Transmit (TX) and Receive (RX) buffers contained in the terminal. These buffers are circular in nature. The Psh (push) and Pop values indicate the location in the buffer where the next character will be loaded or unloaded respectively. If the values are equal, then the buffer is empty.
7-52 OPERATOR INTERFACE TERMINAL PV-550 REV E Memory Dump The memory dump allows any directly accessible memory (ie. memory which is directly addressable and does not require access through a port) to be monitored. It is called from any screen (except the PRINTER screen), by pressing the [F10] key and the [cursor left] key at the same time. Figure 85 – Data Segment Memory Dump The initial screen, (Figure 85) shows the data segment by default. Each screen shows the segment (in hex) which is being viewed.
OPERATOR INTERFACE TERMINAL PV-550 REV E 7-53 The value may be edited via the [cursor left] key which acts as a backspace to remove the last digit entered. The value is accepted by pressing either the [enter] or [F7] key. The edited segment:offset can be aborted by pressing the [delete] key. To accept the segment:offset value entered, press the [enter] key. The screen will show the data at the entered address, as shown in Figure 87.
7-54 OPERATOR INTERFACE TERMINAL PV-550 REV E Terminal Menu Hierarchy Chart The screens of the terminal are used to form a menu driven system to access the various operations in the drive. The hierarchy of this menu system is shown in Figures 88 and 89. What does it show? The chart shows the relationship between screens and a particular operation. It also shows the path to reach a particular screen.
OPERATOR INTERFACE TERMINAL PV-550 REV E 7-55 Example As an example of using the chart, we will modify a parameter while displaying it, starting from the Top Level Menu referred to in the chart as the MAINMENU screen. This example assumes you have read the previous sections of this manual. The example will concentrate more on the flow of screens and how it relates to the chart, rather then the actual operations being performed by each screen. The symbols refer to those of the chart.
7-56 OPERATOR INTERFACE TERMINAL PV-550 REV E Figure 88 – Menu Hierarchy 1557-UM050F-EN-P – June 2013
OPERATOR INTERFACE TERMINAL PV-550 REV E 7-57 Figure 89 – Menu Hierarchy 1557-UM050F-EN-P – June 2013
7-58 OPERATOR INTERFACE TERMINAL PV-550 REV E PanelView 550 PCMCIA Memory Card Installation Data Description: The memory card slides into the card slot located on the back side of the PanelView terminal. These instructions show how to insert the card in the PanelView terminal. ATTENTION: The memory card should be kept free from moisture, extreme temperatures, and direct sunlight. Failure to observe this caution could result in damage to the card.
OPERATOR INTERFACE TERMINAL PV-550 REV E 7-59 2. Position the card vertically so the key slot is facing the right side of the terminal. KEY SLOT 3. Insert the card into the card slot and push until the card is firmly seated. ATTENTION: Do not force the card into the slot. Forcing the card into the slot may damage the connector pins.
7-60 1557-UM050F-EN-P – June 2013 OPERATOR INTERFACE TERMINAL PV-550 REV E
INSTALLATION CHAPTER 8 TABLE OF CONTENTS Safety and Codes ............................................................................................... 1 Unpacking and Inspection .................................................................................. 1 Transportation and Handling .............................................................................. 1 Storage ..............................................................................................................
INSTALLATION 8-1 Safety and Codes WARNING: The Canadian Electrical Code (CEC), National Electrical Code (NEC), or local codes outline provisions for safely installing electrical equipment. Installation MUST comply with specifications regarding wire type, conductor sizes, branch circuit protection and disconnect devices. Failure to do so may result in personal injury and/or equipment damage.
8-2 INSTALLATION WARNING: Care must be exercised when using either a forklift or the pipe rolling technique for positioning purposes to ensure that the equipment is not scratched, dented or damaged in any manner. Always exercise care to stabilize the drive during handling to guard against tipping and injury to personnel. NOTE: It cannot be sufficiently stressed how important it is that the customer installation duties are performed correctly.
INSTALLATION 8-3 Figure 8.1 – Overhead Lifting Rod or Pipe Rollers: SEE FIGURE 8.2 This method is only suitable when there are no inclines and the drive is being moved on one floor level. 1. Boards 2" x 6" or equivalent and at least one foot longer than the drive must be placed under the shipping skid. 2. Carefully ease the shipping platform over the roller pipes until the drive weight is borne on the roller pipes. 3. The drive can be rolled to its designated location. Steady the load to prevent tipping.
8-4 INSTALLATION Figure 8.2 – Rod or Pipe Rollers Fork Lift Trucks: A single fork lift truck may be used on drives not exceeding ten feet in length if the lift truck has sufficient lifting capacity. Larger drives can be moved with two forklift trucks operating in tandem. 1. Insert forks into openings of shipping skids from the rear of the drive. 2. Carefully balance the drive on the forks because the drives are usually heavier at one side. 3.
INSTALLATION 8-5 D) Only persons familiar with the function of the drive should have access to the equipment. E) The losses in the drive produce a definite heat dissipation depending on the unit size, which tends to warm the air in the room. Attention must be given to the room ventilation and cooling requirements to ensure that the proper environmental conditions are met. F) Operational altitude is 3300 feet (1km) maximum without derating.
8-6 INSTALLATION Figure 8.3 – Fan Hood Installation (Rotron Type Fans shown) Access to the fan terminal blocks is gained by removal of the top plate of the ventilation hood. After installation of ventilation hoods, replace the hardware from the lifting angles in the appropriate threaded holes at the top of the drive. This prevents dust entering the drive through these holes.
INSTALLATION 8-7 Figure 8.4 – Typical Drive Floor Plan The drive isolation switch and contactor may be located remotely from the drive, in which case; Kirk key interlocks or their equivalent must be used to interlock the drive and its isolating switch. It is the responsibility of the installer to ensure that all required interlocks are installed and function properly. Grounding Practices The purpose of grounding is to: A) B) C) D) Provide for safety of Personnel.
8-8 INSTALLATION Ground Bus The drive ground bus is accessible from its cover plates at each end of the drive. It is the responsibility of the installer to ensure that the drive is grounded properly. Low Voltage Wiring A low voltage ( 110 volts/ 60 Hz ) power supply is required for drive auxiliary components. Terminal blocks are accessible when the medium voltage door containing the low voltage compartment is in the fully open position.
INSTALLATION 8-9 POWER WIRING SELECTION The following tables identify general wire selections that will be encountered when installing the Bulletin 1557 drive system. General Notes: Adherence to the following recommended field power cabling insulation levels for Medium Voltage Drives will help to ensure trouble free start-up and operation. The cable insulation level must be increased over that which would be supplied for an Across-the-line application with the same rated line to line voltage.
8-10 INSTALLATION 4160V Medium Voltage Drives Pulse # Cabling Source Isolation Transformer or Line Reactor From To Tx.
INSTALLATION 8-11 The following table, Table 8.9, identifies general wire categories that will be encountered when installing the Bulletin 1557 drive system. Each category has an associated wire group number that is used in the following sections to identify the wire to be used. Application and signal examples along with the recommended type of cable for each group are provided.
8-12 INSTALLATION The wire sizes must be selected individually, observing all applicable safety and CEC or NEC regulations. The minimum permissible wire size does not necessarily result in the best operating economy. The minimum recommended size for the wires between the drive and the motor is the same as that used if a main voltage source connection to the motor was used. The distance between the drive and motor may affect the size of the conductors used.
COMMISSIONING CHAPTER 9 TABLE OF CONTENTS Introduction ........................................................................................................................... 1 Recommended Tools and Equipment .................................................................................... 1 Pre-Power Checks ........................................................................................................... 2-12 Line Reactor versus Isolation Transformer .....................................
COMMISSIONING 1557-UM050F-EN-P – June 2013 CHAPTER 9
COMMISSIONING 9-1 Introduction This chapter will assist the user in start-up of a Bulletin 1557 drive. This chapter contains reference material with information regarding: Recommended tools Pre-Power checks Verification of proper control voltages Gating checks Tuning (Autotuning as well as manual tuning) WARNING: Servicing energized industrial control equipment can be hazardous. Severe injury or death can result from electrical shock, burn, or unintended actuation of control equipment.
9-2 COMMISSIONING Pre-Power Checks 1. 2. Verify that all installation guidelines have been met per Chapter 8. Record all information, on the Medium Voltage Checklist listed below.
COMMISSIONING 9-3 TACHOMETER NAMEPLATE DATA MANUFACTURER PPR TYPE/MODEL GEAR RATIO ISOLATION TRANSFORMER \ LINE REACTOR NAMEPLATE DATA ISOLATIONTRANSFORMER SERIAL NUMBER LINE REACTOR SERIAL NUMBER MANUFACTURER TEMP RISE PRI VOLT SEC VOLT KVA / AMPS PRIMARY CONNECTIONS TYPE/MODEL SECONDARY CONNECTIONS TAP SETTINGS IMPEDANCE DC LINK NAMEPLATE DATA MANUFACTURER and SERIAL NUMBER TYPE/MODEL AMPERES INDUCTANCE INSULATION CLASS THERMISTORS TEMP RISE CONNECTED NOT CONNECTED 1557-UM050F-EN
9-4 COMMISSIONING ADDITIONAL INFORMATION HARMONIC FILTER DATA FIFTH EACH CAP KVAR FARADS QUANTITY CAPACITOR FREQUENCY FUSE RATING AND TYPE REACTOR SIZE: AMP MILLI HENERIES REACTOR TAP CONN CT/RATIO OVERLOAD ELEMENTS SMP FLA SETTING SEVENTH EACH CAP KVAR FARADS QUANTITY CAPACITOR FREQUENCY FUSE RATING AND TYPE REACTOR SIZE: AMP REACTOR SERIAL NUMBER / MILLI HENERIES REACTOR TAP CONN CT/RATIO OVERLOAD ELEMENTS SMP FLA SETTING ELEVENTH EACH CAP KVAR FARADS QUANTITY CAPACITOR FREQUENCY F
COMMISSIONING 9-5 ADDITIONAL INFORMATION (cont.
9-6 COMMISSIONING ADDITIONAL INFORMATION AUXILIARY COOLING BLOWER MOTOR (IF ANY) HP/KW VOLTS PHASE FLC RPM S.F.
COMMISSIONING 3. 9-7 Record all information pertaining to revision levels on the chart below.
9-8 COMMISSIONING FAULT MASKS Line selftst Firmware rev Line param External 1 [512] Line s/w w/d External 2 [513] Line h/w w/d External 3 [514] Line s/w o/c External 4 [515] Line h/w o/c External 5 [516] Line ac o/v External 6 [517] Line dc o/v External 7 [518] Line phasing External 8 [519] Ground fault External 9 [520] Ln thy open External 10 [521] Ln thy short External 11 [522] Ac cntrl pwr External 12 [523] Ln unbalance External 13 [524] Input open External 14 [525] Pulse
COMMISSIONING 9-9 Analog Outputs Port 1 – Analog 1L Port 2 – Analog 2L Port 3 – Analog 3L Port 4 – Analog 4L Port 5 – Analog 1M Port 6 – Analog 2M Port 7 – Analog 3M Port 8 – Analog 4M Port 9 – Analog 5L Port 10 – Analog 6L Port 11 – Analog 5M Port 12 – Analog 6M PLC Inputs Port1 – Link A1 Port 2 – Link A2 Port 3 – Link B1 Port 4 – Link B2 Port 5 – Link C1 Port 6 – Link C2 Port 7 – Link D1 Port 8 – Link D2 PLC Outputs Port 1 – Link A1 Port 2 – Link A2 Port 3 – Link B1 Port 4 – Link B2 Port 5 – Link C1 P
9-10 COMMISSIONING Temperature Feedback Board Dip Switch Settings (Nominal Setting is 85C) SWITCH TFB1 TFB2 TFB3 TFB4 TFB5 TFB6 TFB7 TEMP IN C DIP1 85 DIP2 90 DIP3 95 DIP4 100 RIO Communication Module Dip Switch Settings (1203-GD1 / 1336 GM1) SWITCH 1 DIP1 DIP2 DIP3 DIP4 DIP5 DIP6 DIP7 DIP8 KEY 1557-UM050F-EN-P – June 2013 X = ON O = OFF 2 3
COMMISSIONING 9-11 External Fault Messages EXTERNAL FAULT 1 [512] 2 [513] 3 [514] 4 [515] 5 [516] 6 [517] 7 [518] 8 [519] 9 [520] 10 [521] 11 [522] 12 [523] 13 [524] 14 [525] 15 [526] 16 [527] FAULT MESSAGE 1557-UM050F-EN-P – June 2013
9-12 4. COMMISSIONING The following mechanical checks should be carried out and the drive is inspected for shipping damage. a. Torque all bolts and screws as required. b. Check all wires and lugs for signs of stress and wear c. Make sure all grounds are permanent and secure d. Check all phasing to the drive. This is especially important if the system is a 12 or 18 pulse or has bypass. 5. Check all interlocks and Kirk Key switches.
COMMISSIONING 9-13 Line Reactor versus Isolation Transformer Displaced Neutral Voltage Current source inverters (CSI) create a displaced neutral voltage. The CSI drive uses a large DC link inductor, and as a result, there is a phase shift in the neutral voltage between the rectifier and the inverter.
9-14 COMMISSIONING Meggering the 1557 Drive NOTE: THIS IS NOT A HI-POT PROCEDURE NOTE: Prior to performing the megger test, the following must be completed to prevent poor megger readings and damage to the drive control boards. The following procedure is to be used during the commissioning the 1557. Meggering the drive allows you to find any ground faults without damaging the drive. 1. Disconnect any incoming power sources.
COMMISSIONING 9-15 LOGIC POWER SUPPLY TESTS 1. Remove all the gate driver power supply leads, and all power supply connections to the printed circuit cards. 2. Inspect the low voltage terminal block, measure the 120/240 Volt supply voltages to be sure they are in limits. Record the voltages. 3.
9-16 COMMISSIONING Rectifier Power Supply Readings 6- or 12-pulse Bridge BOARD COMBINATION 80165-178-52 with 80165-158-51/53/54 80165-698-52 with 80165-158-51/53/54 POSITIVE RAIL TP4 to TP15 +22.50V to +23.00V +22.50V to +23.00V NEGATIVE RAIL TP3 to TP15 -5.0V to -6.0V -5.0V to -6.5V NOTE: Adjust the voltage at TP4 first and then verify that the voltage at TP3 is within the range described. Voltage Drift Limits The maximum allowable drift range for the positive rail is between+27.25 V and +18.
COMMISSIONING 9-17 Rectifier Power Supply Readings 18-pulse Bridge BOARD COMBINATION 80165-178-52 with 80165-158-51/53/54 80165-698-52 with 80165-158-51/53/54 POSITIVE RAIL TP4 to TP15 +22.50V to +23.00V +22.50V to +23.00V NEGATIVE RAIL TP3 to TP15 -5.0V to -6.0V -5.0V to -6.5V NOTE: Adjust the voltage at TP4 first and then verify that the voltage at TP3 is within the range described. Voltage Drift Limits The maximum allowable drift range for the positive rail is between +27.25 V and +18.
9-18 COMMISSIONING Inverter Power Supply Readings 800 / 1500 AMP G.T.O. BOARD COMBINATIONS POSITIVE RAIL NEGATIVE RAIL TP5 to TP15 TP3 to TP15 80165-178-51 with 80165-138-53/54 +7.5V to +8.8V -12.45V to -12.55V 80165-698-51 with 80165-138-53 +7.5V to +9.0V -12.45V to -12.55V 80165-698-51 with 80165-138-54 +7.5V to +10.0V -12.45V to -12.55V NOTE: Adjust the voltage at TP3 first and then verify that the voltage at TP5 is within the range described.
COMMISSIONING 9-19 Configuring the Drive From the information collected, on the Medium Voltage Checklist, enter all nameplate parameters in the drive, through the operator terminal. This may be accomplished by pressing the "SETUP" (F8) softkey from the PanelView 550 main screen. The named boxes at the bottom of the screen correspond with the F1 through F10 keys on the PanelView terminal. During the course of modifying the parameters the PanelView 550 may prompt you to save the parameters entered.
9-20 To assign external panel meters or analog ports, press the "SETUP" (F8) softkey from the top level main menu.. From the SETUP menu in the figure press the "ANALOG" (F2) softkey. There are two pages of assignments shown below in the figures. Use the arrow keys to select a port and from the menu's displayed after, select a variable to assign to it. From the main screen, press the "SETUP" (F8) softkey. Then press the "PARAMS" (F7) softkey.
COMMISSIONING 9-21 To calculate the scale factor for the meter, take the meter full scale over the drive analog output scaling as seen below. Scale Factor = Analog Output Scale Meter Scale See the parameter and variable description in Chapter 6 for more information. For example, a 0 to 5000 RPM meter would have a scale factor of Speed Scale Factor = 4096 = .8192 5000 It will be necessary to verify other information regarding the drive. From the converter screen, check the following entries: a.
9-22 COMMISSIONING Standard I/O Checks The drive is shipped with a number of input and output termination’s for auxiliary equipment to be attached to. This will appear on the drive drawing shipped with the drive. a. b. c. d. All start and stop circuits should be verified. All configurable alarms circuits should be checked. All status indicators should be checked for operation. All speed inputs to the drive should be checked for accuracy and calibration. Gating Checks 1.
COMMISSIONING 3. 9-23 For each SCR in the Line side converter section verify that the gating signal, gate to cathode, is identical to that shown below.
9-24 COMMISSIONING Monitor each GTO gate cathode of the Machine Side Converter section and verify that the signal is identical to that shown below.
COMMISSIONING 9-25 Application of Medium Voltage ATTENTION: Medium voltage power levels must be applied to the drive to perform the following start-up procedure. To avoid electric shock hazard, or damage to equipment, only qualified service personnel should perform the following procedure. Thoroughly read and understand the procedure before beginning. If an event does not occur while performing this procedure, DO NOT PROCEED. Remove power, and lock out the source. Confirm discharge of stored energy.
9-26 COMMISSIONING Tuning Procedure The Bulletin 1557 medium voltage drive must be tuned to the motor and load to which it is connected. There are six drive functions that require tuning.
COMMISSIONING 9-27 Commutation Inductance Manual Tuning 1. Set parameter "Test mode" in “P Feature Select“ to 2 to enter dc current test mode. Current Control Parameter Screen 2. Set parameter "Idc command test" in “P Current Control” to 0.400 pu. 3. Set parameter "L commutation" in “P Current Control” to an initial value of 0.05 pu. 4. Connect an oscilloscope to the test points labeled V12 and F12 on the line converter control board.
9-28 COMMISSIONING COMMUTATION INDUCTANCE TUNED CORRECTLY COMMUTATION INDUCTANCE INCORRECTLY TUNED 10. Set parameter "Idc command test" to 0.800 pu. The dc current will increase and the commutation notches will become much larger. 11. Repeat steps 6 to 9. The higher current will produce a more accurate measurement of the commutation inductance. 12.
COMMISSIONING 3. 9-29 Start the drive. The step response of the current regulator is measured and the dc link time constant is adjusted to produce a critically damped response. This test may take up to two minutes to perform. When the desired response has been achieved the drive shuts off. The current regulator bandwidth is set back to its normal value and parameter "Autotune select" is set to zero. Parameter "Autotune Tdc" indicates the results of the test.
9-30 COMMISSIONING 9. Adjust the scope to trigger on the rising edge of the dc current reference and observe the dc current feedback on the other channel. The step response will probably have noticeable overshoot, indicating that the dc link time constant is set too low. 10. Adjust parameter "T dc link" until the current feedback rises to about 63% of its final value in 10 ms as shown in the figure. The overshoot should now be quite small. Increasing “T dc link“ causes the rise time to increase.
COMMISSIONING 3. 9-31 Commutation Inductance and Current Regulator It is possible to autotune the commutation inductance and current regulator at the same time using the following procedure: 1. Set parameter “Autotune Select” in “P Autotune” to 3. The drive will go into dc current test mode. 2. Start the drive. The commutation inductance autotuning is performed and then the current regulator autotuning is performed without stopping. When both tests are complete the drive shuts off.
9-32 5. COMMISSIONING Leakage Inductance Parameter “ L total leakage “ is used in the hardware reconstruction of the rotor flux. If this parameter is not adjusted correctly, the resulting distortion in the flux feedback may cause speed feedback or motor synchronization errors. Leakage inductance must be tuned during commissioning because it is effected not only by motor parameters but also by cable length. Leakage inductance can be measured with the motor stationary.
COMMISSIONING 6. 9-33 Flux Regulator For the flux regulator, different tuning procedures are used for induction motors and synchronous motors. Induction Motor Flux Regulator The tuning of the flux regulator for an induction motor is determined by three parameters: 1. Flxreg bandwidth in "P Flux Control" 2. L magnetizing in "P Motor Model" 3. T rotor in "P Motor Model" "Flxreg bandwidth" should be set to the default value for almost all applications.
9-34 COMMISSIONING L magn low - indicates that the measured value of magnetizing inductance is less then 1.0 pu. This warning is intended to draw attention to an unusually low value of magnetizing inductance. This may occur if the motor is much larger than the drive and the nameplate parameters do not correspond to the actual motor ratings. In this case, the measured magnetizing inductance is probably correct and parameter "L magnetizing" should manually be set equal to "Autotune Lm".
COMMISSIONING 9-35 Synchronous Motor Flux Regulator This section applies only to firmware revision 5.10 and higher. Before the flux regulator can be tuned, the analog output for the field current reference must be set up. Configuring the Field Current Reference Excitation for the synchronous motor is provided by a current regulated field supply, either a dc supply for a slip ring machine, or a three phase ac supply for a brushless machine.
9-36 COMMISSIONING Tuning the Flux Regulator The tuning of the flux regulator for a synchronous machine is determined by four parameters: 1. Flxreg bandwidth in "P Flux Control" 2. L magnetizing in "P Motor Model" 3. T rotor in "P Motor Model" 4. Lmd in “P Motor Model” "Flxreg bandwidth" should be set to the default value for almost all applications. "L magnetizing", “Lmd”, and "T rotor" are usually unknown and must be measured.
COMMISSIONING 9-37 If the flux regulator Autotuning is successful, then parameter "L magnetizing" in "P Motor Model" is set equal to "Autotune Lm", parameter "T rotor" in "P Motor Model" is set equal to "Autotune T rotor", and parameter “Lmd” in “P Motor Model” is set equal to “Autotune Lmd”. If the flux regulator autotuning fails then parameters "L magnetizing", “Lmd”, and "T rotor" are not changed and a warning is issued indicating the cause of the failure.
9-38 COMMISSIONING Reg in limit - indicates that the torque command was greater than "Torque limit motoring" or "Torque limit braking". The measured inertia value is invalid. Parameter "Autotune trq stp" or parameter "Autotune spd cmd" must be set to a lower value and the test repeated. Tuning abort - indicates that the deviation in motor speed was greater than 10 Hz. The measured inertia value is invalid. Parameter "Autotune trq stp" must be set to a lower value and the test repeated.
COMMISSIONING 9-39 CORRECTLY TUNED SPEED REGULATOR 8. Set parameter "Spdreg bandwidth" to the normal operating value. Confirm that the response time is equal to the inverse of the speed regulator bandwidth and that there is minimal overshoot. For example, if the speed regulator bandwidth is set to 2 rad/sec, the speed should rise to 63% of its final value in 0.5 second. 9. Set parameter "Speed ref step" to zero and stop the drive.
9-40 COMMISSIONING Application Setup Once the drive has been tuned, it will be necessary to configure the drive for operation in its environment. There are several parameters associated with the use of the drive for specific applications. See the Functional description in Chapter 5 for more information involving setting of the acceleration and deceleration profiles and other individual functions. Saving Parameters Save all parameters as entered into the drive E² memory.
TROUBLESHOOTING CHAPTER 10 TABLE OF CONTENTS Introduction ................................................................................................................ 1 Recommended Tools and Equipment ............................................................................. 1 Documenting Shutdowns ................................................................................................ 2 Printed Circuit Card Replacement ....................................................................
CHAPTER 10 TROUBLESHOOTING TABLE OF CONTENTS (cont.) Replacing Snubber Resistors................................................................. 31 Replacing DI/DT Reactors ..................................................................... 31 Replacing Cooling Fans ......................................................................... 32 Meggering Procedure ................................................................................................... 33 Drive Fault Terminology ...............
TROUBLESHOOTING 10-1 Introduction This chapter will assist the user in the troubleshooting of a Bulletin 1557 drive. This chapter contains reference material with information regarding: • • • Printed circuit card replacement Power semiconductor testing Power Semiconductor replacement WARNING: Servicing energized industrial control equipment can be hazardous. Severe injury or death can result from electrical shock, burn, or unintended actuation of control equipment.
10-2 TROUBLESHOOTING Documenting Shutdowns Any faults, warnings, or messages displayed on panel view should be thoroughly documented by the user prior to reset those messages. This will assist maintenance personnel in correcting problems and ensuring they do not recur. Printed Circuit Card Replacement The replacement of printed circuit boards should be handled in a careful and deliberate manner. There some precautions that should be taken. Remove all power to the drive.
TROUBLESHOOTING 10-3 Line Side Control Board Replacement The following procedure must be followed when the Line Side Drive Control Board (80165-018-51) is replaced. 1. Record the drive setup: A) complete parameter list, B) fault masks, C) fault messages, and D) PLC links. This should be done on a drive commissioning form or with the use of the door mounted drive printer (if the drive has this option).
10-4 TROUBLESHOOTING 7. Ensure that the message reads completed and not failed. If you encounter a failed message retry the initialize. 8. Save the default parameters to EEPROM memory. If you do not, the initialized parameters will not be saved permanently and the next time power is cycled these new parameters will be lost.. 9. Press the F8 function key (YES) to acknowledge the save. Ensure that the operation status is completed and not failed. If you get a failed message retry the save operation.
TROUBLESHOOTING 10-5 BULLETIN 1557 LINE SIDE (DCB2) and MACHINE SIDE (DCB1) CONTROL BOARD OSCILLOSCOPE MONITORING TEST POINTS CONNECTION LINE SIDE CONTROL BOARD MACHINE SIDE CONTROL BOARD V12 / TP1 V23 / TP2 V31 / TP3 LINE VOLTAGE, VAB LINE VOLTAGE,VBC LINE VOLTAGE, VCA MOTOR VOLTAGE, VAB MOTOR VOLTAGE, VBC MOTOR VOLTAGE, VCA VDC / TP4 DC LINK VOLTAGE DC LINK VOLTAGE F12 / TP5 F23 / TP6 F31 / TP7 RECONSTRUCTED LINE VOLTAGE RECONSTRUCTED LINE VOLTAGE RECONSTRUCTED LINE VOLTAGE MOTOR FLUX MOTOR F
10-6 TROUBLESHOOTING Test Point Waveforms LINE SIDE CONTROL BOARD V12 / V23 / V31 Line Voltage 50% Speed 25% Torque MACHINE SIDE CONTROL BOARD V12 / V23 / V31 Line Voltage 50% Speed 25% Torque LINE SIDE CONTROL BOARD VDC DC Link Voltage 50% Speed 25% Torque MACHINE SIDE CONTROL BOARD VDC DC Link Voltage 50% Speed 25% Torque LINE SIDE CONTROL BOARD F12 / F23 / F31 Reconstructed Line Voltage 50% Speed 25% Torque MACHINE SIDE CONTROL BOARD F12 / F23 / F31 Motor Flux 50% Speed 25% Torque 1 2.
TROUBLESHOOTING 10-7 Test Point Waveforms LINE SIDE CONTROL BOARD FLX Rectified Line Voltage 50% Speed 25% Torque MACHINE SIDE CONTROL BOARD FLX Rectified Motor Flux 50% Speed 25% Torque LINE SIDE CONTROL BOARD I1 / I2 / I3 Line Current 50% Speed 25% Torque MACHINE SIDE CONTROL BOARD I1 / I2 / I3 Motor Current 50% Speed 25% Torque LINE SIDE CONTROL BOARD IDC DC Link Current 50% Speed 25% Torque MACHINE SIDE CONTROL BOARD IDC Rectified Motor Current 50% Speed 25% Torque 1557-UM050F-EN-P – June 2013
10-8 TROUBLESHOOTING Firmware Change-out Procedure The following procedure must be followed when the drive firmware is replaced or being upgraded. 1. Record drive setup, complete parameter list and fault masks, PLC links, and external faults messages of original drive setup. This should be done on one of the commissioning forms or with a drive printer (if the drive has that option). 2.
TROUBLESHOOTING 10-9 9. Ensure that the message on Panelview reads Operation Status as completed and not failed. If you encounter a failed message retry the initialize. 10. Enter all the data recorded in step 1 above. Save the parameters to EEPROM memory. If you do not, the drive parameters will not be saved permanently and the next time power is cycled these new parameters will be lost. 11. Press the F8 function key (YES) to acknowledge the save.
10-10 TROUBLESHOOTING Power Semiconductor Testing If you suspect that a problem may exist with a power semiconductor follow the steps below to help identify a suspicious device. WARNING: Before attempting any work, verify the system has been locked out and tested to have no potential. 1. Using an ohmmeter, measure the anode to cathode, anode to gate, and cathode to gate. The resistance in circuit will differ from out of circuit where other assemblies provide a parallel path.
TROUBLESHOOTING 10-11 SCR Gate Driver Board Calibration and Gate Pulse Verification Procedure The following procedure must be followed when the Silicon Controlled Rectifier Gate Driver (SCRGD) and/or isolated Gate Driver Power Supply (IGDPS) boards are replaced. This procedure must also be followed whenever LINE SIDE CONVERTER devices are to be replaced. Tools Required: Digital Multimeter 100 Meg Hz Oscilloscope Minigrabber meter probes Potentiometer Screwdriver 1.
10-12 1557-UM050F-EN-P – June 2013 TROUBLESHOOTING
TROUBLESHOOTING 10-13 Typical waveforms (13-20V) (2.5V-3.5V) 0V (-0.5V) 16.67ms 5 volts/cm 2.5 µs/cm SCR Gate to Cathode Voltage (13V-18V) Tau = 5us (2.5V - 3.5V) 0V (-0.5V) 5 volts/cm 2.
10-14 TROUBLESHOOTING GTO Gate Driver Board Calibration and Gate Pulse Verification Procedure (800 or 1500 Amp Devices) The following procedure must be followed when the GTOGD and/or IGDPS boards are replaced. This procedure must also be followed whenever MACHINE SIDE CONVERTER devices are replaced. Tools Required: Digital Multimeter 100 Meg Hz Oscilloscope Minigrabber meter probes Potentiometer Screwdriver 1.
TROUBLESHOOTING 10-15 * (-13V to -19V) Voltage levels revised Sept.
10-16 TROUBLESHOOTING Typical waveforms 5 volts/cm 2.5 µs/cm GTO Turn-Off Gate to Cathode Firing Pulse 5 volts/cm 2.
TROUBLESHOOTING 10-17 GTO Gate Driver Board Calibration and Gate Pulse Verification Procedure (3000 Amp Devices) PART NUMBER COMBINATION 80165-958-53 (IGDPS) 80165-978-53 (GTOGD) The following procedure must be followed when the GTOGD and/or IGDPS boards are replaced. This procedure must also be followed whenever MACHINE SIDE CONVERTER devices are replaced. Tools Required: Digital Multimeter 100 Meg Hz Oscilloscope Minigrabber meter probes Potentiometer Screwdriver 1.
10-18 TROUBLESHOOTING The gate-cathode voltage during gating of a 3000A GTO GTO OFF GTO ON All Voltages have a tolerance of +/- 1V. +7V GTO GATE CATHODE (TB9-2,TB9-3) +0.6V 0V -10V -20V -Test point in bold connects positive lead. -22V 200uS 20uS Actual waveforms at different time bases.
TROUBLESHOOTING 10-19 Checking Clamp Force Clamps should be periodically tested to determine that the required forces are being exerted. SNUBBER DIODE There is a tabwasher underneath the nylon insert locknut. The tabwasher should just be able to turn with finger touch (see Figure 10.1). Insulation cups Tab washer to be rotated with finger touch Never Rotate this nut Figure 10.
10-20 TROUBLESHOOTING MACHINE SIDE CONVERTER AND LINE SIDE CONVERTER There are two disc springs located top and center of the clamp pressure bar assembly (not to be confused with the larger diameter disc springs below the pressure bar assembly ). The disc springs should just be able to turn with finger touch (see Figure 10.2). Never rotate this nut Indicating Disk Springs Heatsink (Simplified view) Tension Adjusting Nut Figure 10.
TROUBLESHOOTING 10-21 Power Semiconductor Replacement If a device is found to be faulty, you must replace all devices in that leg. The devices are matched for characteristics at the factory, ensuring proper operation. Mixed characteristics may cause premature failure in the drive. This does not apply to diodes. Replacing Thyristors - Line side converter NOTE: Before disconnecting any leads from the circuit, note all lead connections for reassembly. 1.
10-22 TROUBLESHOOTING Old Style Heatsink stack In old style heatsink stack the steel clamping rods are used, see Figure 10.7. Remove the two nuts at the top of the rod shown in Figure 10.7. Replace the silicon if used in the caps of the nuts. After removal of these two nuts the top pressure bar assembly can be removed. Heatsink segment can now be moved so that SCRs can be replaced. Note the orientation of device leads before re-assembly. 4. Replacement of SCRs Remove the new device from the packing.
TROUBLESHOOTING 10-23 6. Installation of Line side converter Assembly in Drive NOTE: Before putting the heatsink stack back to the drive, check the new device resistance. CAUTION: Be very careful, While taking the heatsink stack out or putting in the drive, do not touch the snubber and sharing/diagnostic resistors. Always check the resistors before taking the stack out and after putting the stack back in the drive. Mount heatsink assembly onto the set of the heatsink stack mounting insulator screws.
10-24 TROUBLESHOOTING Replacing Thyristors - Machine side converter 1. Remove Machine side converter Heatsink Stack Assembly from Drive Disconnect the Gate(G), Cathode (C) and Diagnostic (D) leads from the GTO gate driver boards. Disconnect the fiber optic leads, D.C Power leads to the gate driver and power supply boards. Disconnect leads on the thermistor board (if applicable). Remove the circuit board mounting glastic plate using ¼ in. hardware.
TROUBLESHOOTING 10-25 Exploded View of 2300 Volt Machine Side Converter Top Clamp Pressure Bar Assembly These nuts should not require adjusting. G.T.O. Thyristor Remove M8 Bolts These nuts should not require adjusting. Figure 10.
10-26 TROUBLESHOOTING 4. Replacement of GTOs Remove the new device from the packing. Don‟t handle the device by holding its leads. Ensure the face of the new device is free from dirt. Use a clean, lint free cloth to place a thin film of grease (Alcoa EJC No.2) to both side of the device. Replace GTOs with the appropriate matched set noting the orientation of the GTOs. Ensure that locating pins are in place in the heatsinks and that the pins seat properly in the center of each device.
TROUBLESHOOTING 10-27 DIFFERENCE BETWEEN DIMENSIONS X AND Y TO BE 0.2 mm (.008 in.) MAXIMUM Figure 10.4 – Positioning of Heatsink Bracket 6. Calibration and Gate Pulse Verification Depending on the current rating of the GTO refer to the appropriate GTO Gate Driver Calibration and Gate Pulse Verification Procedure found on pages 10-15 to 10-17.
10-28 TROUBLESHOOTING Replacing Snubber Diodes Snubber diodes can be replaced without having to remove the heatsink assembly from the drive. The circuit board assembly must be removed as described previously in REPLACING THYRISTORSMACHINE SIDE CONVERTER part 1. Remove 1/4 in. nuts of the heatsink to snubber diode link at the front of the heatsink. Remove the M8 bolts of the diode clamp. The clamp and heatsink to diode link can now be removed (see Figure 10.5). Snubber Diode Figure 10.
TROUBLESHOOTING 10-29 NOTE: The following Figure shows the line side converter heatsink stack assembly. Some type of machine side converter heatsink stack assembly does not have the bottom nuts on the fiberglassclamping rod and the device orientation is in downward direction. The procedure to loosen the machine and line side heatsink stacks is the same. ALLEN-BRADLEY GTO & SCR REPLACEMENT INSTRUCTION SHEET For assemblies with FIBERGLASS CLAMPING RODS Dwg. 80098-925(2) Figure 10.
10-30 TROUBLESHOOTING Figure 10.
TROUBLESHOOTING 10-31 Replacing Snubber Capacitors Snubber capacitors in both the machine side converter and line side converter assemblies can be replaced without having to remove the heatsink assemblies from the drive. For 4160 volt drives it may be necessary to remove the small snubber resistor and capacitor assembly so that there is sufficient room to remove the capacitor. In the machine side converter assembly, remove the M8 bolt at the front of the capacitor.
10-32 TROUBLESHOOTING Replacing Cooling Fans There are several models of cooling fans used in 1557 drives. Differing fan types may be used in the various locations of fans throughout the drive. TOP OF MACHINE SIDE CONVERTER SECTION Check the model of cooling fans of the by removing the ventilation cover from the outside of the top plate of the cabinet. To replace Rotron “Caravel” or “Tarzan” fans, remove the barrier located above the machine side converter gate driver board assemblies.
TROUBLESHOOTING 10-33 Meggering Procedure The following procedure is to be used during commissioning or troubleshooting. Meggering the drive allows you to find any ground faults without damaging the drive. 1. Disconnect any incoming power sources, medium voltage sources should be locked off and control power should be turned off at the circuit breaker. 2. Verify with potential indicator that power has been disconnected. 3. Disconnect the following: The J1, J2 Ribbon cables and Gnd.
10-34 TROUBLESHOOTING Drive Faults Fault Code # F0 FAULT MESSAGE Line selftst F Description F The line converter control board has failed its power up self-test. This fault can only be cleared by turning off the control power. The parameters stored in EEPROM on the Line Converter control board have been corrupted. Line side software watchdog has expired. Line side hardware watchdog timer has expired The line current feedback has exceeded the level in P161 for the duration in P162.
TROUBLESHOOTING 10-35 Drive Faults Fault Code # F24 F25 FAULT MESSAGE Mtr stall dc\dc fail F26 Mtr thy open F F27 Mtr thy short F F28 DC cntrl pwr F F29 Mtr unbalance F F30 F31 Output open No Vdc fdbk F F F32 Drv overload F F33 Mtr overload F F34 Mtr over spd F F35 Control temp F F36 Syncxfer fail F F37 Neutral o/v F F38 SCANport flt F F39 Fan Loss F F40 Over temp 1 F A shorted GTO has been detected in the machine converter.
10-36 TROUBLESHOOTING Drive Faults Fault Code # FAULT MESSAGE F Description F44 Over temp 5 F Heatsink over temperature is present, 85 degrees centigrade exceeded. F45 Over temp 6 F Heatsink over temperature is present, 85 degrees centigrade exceeded. F46 Over temp 7 F F47 Firmware rev F Heatsink over temperature is present, 85 degrees centigrade exceeded. Firmware in the two drive control boards or the communication processor board is not compatible.
TROUBLESHOOTING 10-37 Drive Faults Fault Code # F282 FAULT MESSAGE Syncxfer fail W F283 Not used W F284 Com proc brd W F285 Adapter loss W F286 Spd cmd loss W F287 F288 Local loss Tuning abort W W F289 F290 In test mode Reg in limit W W F291 F292 R stator hi Time limit W W F293 F294 Inertia high L comm low W W F295 L comm high W F296 T dc low W F297 T dc high W F298 F299 F300 L leakage lo L leakage hi L magn low W W W F301 L magn hi W F302 T rotor low W F303 T
10-38 TROUBLESHOOTING Drive Faults Fault Code # F304 F305 F306 F307 F308 F309 F310 F311 F312 F313 F314 F315 F316 F317 F318 F319 F320 F321 F322 F323 F324 F325 F326 F327 F328 F329 F330 F331 F332 F333 F334 F335 F336 F337 F338 F339 F340 F341 F342 F343 F344 F345 F346 F347 F348 F349 WARNING MESSAGE L1A open L1C open L1B open L1D open L1E open L1F open L1G open L1H open L1A shorted L1C shorted L1B shorted L1D shorted L1E shorted L1F shorted L1G shorted L1H shorted L2A open L2C open L2B open L2D open L2E open L2
TROUBLESHOOTING 10-39 Drive Faults Fault Code # F350 F351 WARNING MESSAGE L3G shorted L3H shorted Description Thyristor 3G in Line Converter is shorted. Thyristor 3H in Line Converter is shorted.
10-40 F393 F394 TROUBLESHOOTING L6C shorted L6B shorted 1557-UM050F-EN-P – June 2013 Thyristor 6C in Line Converter is shorted. Thyristor 6B in Line Converter is shorted.
TROUBLESHOOTING 10-41 Drive Faults Fault Code # F395 F396 F397 F398 F399 WARNING MESSAGE L6D shorted L6E shorted L6F shorted L6G shorted L6H shorted Description Thyristor 6D in Line Converter is shorted. Thyristor 6E in Line Converter is shorted. Thyristor 6F in Line Converter is shorted. Thyristor 6G in Line Converter is shorted. Thyristor 6H in Line Converter is shorted.
10-42 F439 F440 TROUBLESHOOTING M3H open M3A shorted 1557-UM050F-EN-P – June 2013 Thyristor 3H in Machine Converter is open. Thyristor 3A in Machine Converter is shorted.
TROUBLESHOOTING 10-43 Drive Faults Fault Code # F441 F442 F443 F444 F445 F446 F447 WARNING MESSAGE M3C shorted M3B shorted M3D shorted M3E shorted M3F shorted M3G shorted M3H shorted Description Thyristor 3C in Machine Converter is shorted. Thyristor 3B in Machine Converter is shorted. Thyristor 3D in Machine Converter is shorted. Thyristor 3E in Machine Converter is shorted. Thyristor 3F in Machine Converter is shorted. Thyristor 3G in Machine Converter is shorted.
10-44 F485 F486 TROUBLESHOOTING M6F open M6G open 1557-UM050F-EN-P – June 2013 Thyristor 6F in Machine Converter is open. Thyristor 6G in Machine Converter is open.
TROUBLESHOOTING 10-45 Drive Faults Fault Code # F487 F488 F489 F490 F491 F492 F493 F494 F495 WARNING MESSAGE M6H open M6A shorted M6C shorted M6B shorted M6D shorted M6E shorted M6F shorted M6G shorted M6H shorted Description Thyristor 6H in Machine Converter is open. Thyristor 6A in Machine Converter is shorted. Thyristor 6C in Machine Converter is shorted. Thyristor 6B in Machine Converter is shorted. Thyristor 6D in Machine Converter is shorted. Thyristor 6E in Machine Converter is shorted.
10-46 TROUBLESHOOTING Troubleshooting Guide # FAULT / ALARM 1 LINE CONTACTOR WILL NOT CLOSE IN TEST MODE #3 PROBABLE CAUSE RECOMMENDED ACTION 1. MAINTAINED E. STOP DEPRESSED 1A. RESET DRIVE E. STOP 2. EXTERNAL EMERGENCY STOP PB OR CUSTOMER‟S PERMISSIVE CONTACTS NOT CLOSED (IF PROVIDED) 2A. CHECK THE E-STOP CONTACT FROM CUSTOMERS T-B TO DRIVE T-B 3. RELAYS CR1 & CR2 NOT ENERGIZED 3A. CHECK FOR THE AVAILABILITY OF CONTROL POWER B. CHECK WHETHER START PB IS O.K. C.
TROUBLESHOOTING # 3 FAULT / ALARM DRIVE DOES NOT RESPOND TO START COMMAND (CONT‟D) 10-47 PROBABLE CAUSE RECOMMENDED ACTION 4. LOCAL/REMOTE SWITCH IN WRONG POSITION 4A. POSITION OF THE SWITCH TO PROPER POSITION B. CHECK THE INTEGRITY OF CONTACTS C. CHECK THE REMOTE I/O BOARD FOR PROPER LED TO BE ON 5. NORMAL/OFF/TEST SELECTOR IN OFF POSITION 6. NO DC POWER 5A SWITCH TO NORMAL POSITION 7. GREEN LED OFF ON DRIVE CONTROL BOARD 7A. CHECK FOR THE +5V, +15v, -15V AT DOB‟s B.
10-48 # 4 TROUBLESHOOTING FAULT / ALARM LINE SIDE CONVERTER DEVICE SHORTED PROBABLE CAUSE 1A. CHECK SNUBBER CIRCUIT B. CHECK THE WIRING C. CHECK THE FIBER OPTIC CABLE 2. GATE DRIVER DIAGNOSTIC CIRCUIT FAILURE 2A. CHECK FOR GATE SIGNALS IN TEST MODE 1; IF NO SIGNAL, REPLACE THE BOARDS 3. DEVICE FAILURE HAS OCCURRED 3A. CHECK THE RESISTANCE OF DEVICE. REPLACE THE MATCHED SET OF DEVICES IF THE DEVICE READS ZERO OHMS 4A. CHECK THE VOLTAGE FEED BACK CIRCUITS AND RESISTORS 4.
TROUBLESHOOTING # FAULT / ALARM 10-49 PROBABLE CAUSE RECOMMENDED ACTION 9 ADAPTER LOSS WARNING 1. LOSS OF COMMUNICATION 1A. CHECK THE CABLES BETWEEN SCANport ADAPTER AND COMMUNICATIONS PROCESSOR BOARD B. CHECK THE CONTROL VOLTAGE (+12V DC) C. CHECK THE HEALTHY LED ON COMM PROC BOARD D. CHECK WHETHER THE R/IO ADAPTER IS CONNECTED ON PORT 2 OF THE COMM PROC. E. CHECK THE REMOTE I/O LINK TO PLC 10 BYPASS CLOSED WARNING 1. BYPASS CONTACTOR CLOSED WHEN IT SHOULD BE OPEN 1A.
10-50 # TROUBLESHOOTING FAULT / ALARM PROBABLE CAUSE RECOMMENDED ACTION 12 COMM PROC BOARD WARNING 1. FAILURE OF COMMUNICATION 1A. CHECK THE HEALTHY LED ON DCB B. CHECK THE HEALTHY LED ON COMM PROC BOARD C. CHECK THE RIBBON CABLES D. REPLACE THE COMM PROC BOARD 13 DC CONTROL POWER FAULT 1. NO OUTPUT FROM AC/DC POWER SUPPLY 1A. CHECK THE OUTPUT FROM AC/DC POWER SUPPLY, IT SHOULD BE AT LEAST 50V WHEN THE LOAD IS CONNECTED B. DISCONNECT THE OUTPUT LOAD AND VERIFY THE DC VOLTAGE AT POWER SUPPLY C.
TROUBLESHOOTING # 17 18 FAULT / ALARM INPUT CLOSED WARNING INPUT OPEN FAULT 10-51 PROBABLE CAUSE RECOMMENDED ACTION 1. A WARNING INDICATING THAT THE INPUT IS CLOSED WHEN IT IS REQUESTED TO BE OPEN 1A. CHECK THE CONTROL WIRING AND FUNCTION OF CONTROL RELAYS B. CHECK THE INTEGRITY OF DRIVE I/O BOARD C. CHECK THE AUXILIARY CONTACT OF MAIN CONTACTOR D. IDENTIFY ANY PARALLEL PATHS, WHICH MAY BE CAUSING THE VACUUM CONTACTOR TO STAY ON 2. CONTACTOR CONTROL POWER NOT PRESENT OR INTERMITTENT 2A.
10-52 # TROUBLESHOOTING FAULT / ALARM PROBABLE CAUSE RECOMMENDED ACTION 19 INPUT OPEN WARNING 1. INDICATION THAT THE INPUT CONTACTOR IS OPENED WHEN IT IS REQUESTED TO CLOSE 1A. CHECK THE OPERATION OF VACUUM CONTACTOR. CHECK “HC” & “CC” B. CHECK THE CONTROL CIRCUIT C. CHECK THE DRIVE I/O BOARD FOR MALFUNCTION D. CHECK AUXILIARY CONTACTS OF INPUT CONTACTOR 20 LINE A/C OVERVOLTAGE FAULT 1. THE LINE VOLTAGE HAS EXCEEDED THE SETTING IN PARAMETER P-165 FOR THE DURATION SET IN P-166 1A.
TROUBLESHOOTING # FAULT / ALARM 10-53 PROBABLE CAUSE RECOMMENDED ACTION 26 LINE SYNCH FAULT 1. THE CONVERTER GATING HAS LOST SYNCHRONIZATION WITH THE LINE VOLTAGE 1A. CHECK THE DRIVE GROUNDING FOR PROPER CONNECTIONS B. CHECK THE CONTROL SUPPLY FOR ANY NOISE C. CHECK THE SIGNAL GROUNDS FOR PROPER CONNECTION D. CHECK THE SETTING OF THE COMMUTATION INDUCTANCE PARAMETER 27 LINE UNDER VOLTAGE WARNING 1. THE LINE VOLTAGE IS LOW 1A.
10-54 # TROUBLESHOOTING FAULT / ALARM PROBABLE CAUSE RECOMMENDED ACTION 33 NO VDC FEEDBACK 1. HARDWARE 1A. CHECK THE FUSES ON THE MOV‟S OF DC LINK SURGE SUPPRESSOR NETWORK (IF PRESENT) B. CHECK THE LINE SIDE VOLTAGE FEED BACK BOARDS FOR ANY DAMAGED COMPONENTS AND REPLACE IF NECESSARY C. CHECK THE CABLING ON THE VOLTAGE FEEDBACK BOARDS FROM THE DC LINK D. CHECK THE RIBBON CABLES FROM THE DRIVE CONTROL BOARD LINESIDE TO THE VOLTAGE FEED BACK BOARDS E.
TROUBLESHOOTING # 35 36 37 10-55 FAULT / ALARM MOTOR DOES NOT ROTATE OVER TEMPERATURE 1 THROUGH 7. NO READY LIGHT PROBABLE CAUSE RECOMMENDED ACTION 1. IMPROPER MODE SELECTED 1A. CHECK THE MODE OF OPERATION FROM THE PARAMETER TEST MODE AND SET IT TO ZERO, WHICH IS THE NORMAL MODE OF OPERATION 2. MOTOR FAILURE 2A. MEGGER THE MOTOR AND DETERMINE THE CONDITION 3. MV SENSING NOT AVAILABLE TO THE DRIVE CONTROLS 3A. CHECK THE VARIABLE V LINE AND IT SHOULD READ AROUND 1.0 PU.
10-56 # 38 TROUBLESHOOTING FAULT / ALARM HARDWARE OVER CURRENT PROBABLE CAUSE RECOMMENDED ACTION 1. CT POLARITY / CONNECTIONS TO GROUND 1A. CHECK THE CT‟s FOR PROPER POLARITIES AS PER THE DRAWING B. CHECK THE GROUNDING AT CTS AND ENSURE THEY ARE FIRM 2. BURDEN RESISTOR DEFECTIVE 2A. CHECK THE BURDEN RESISTOR FOR OPEN CIRCUIT. REPLACE IF REQUIRED. B. CHECK THE RIBBON CABLE FROM PHOENIX CONNECTOR TO LINE SIDE DRIVE CONTROL BOARD 3. PARAMETERS ARE NOT PROGRAMMED PROPERLY. 3A.
TROUBLESHOOTING 10-57 # FAULT / ALARM 42 RATED I FEEDBACK WARNING 1. THE CURRENT FEEDBACK SCALING IS OUT OF RANGE 1A. CHECK THE PARAMETER AND ENSURE PROPER VALUES ARE ENTERED FOR C. T. RATIO. (P149) C. T. LINE BURDEN (P151). B. CHECK THE PARAMETERS AND ENSURE PROPER VALUES ARE ENTERED FOR LEM RATIO (P150) AND C. T. MOTOR BURDEN RESISTOR (P152). 43 TACH ROTATION WARNING 1. THE TACH FEEDBACK SIGNALS FROM PHASE „A‟ AND PHASE „B‟ INTERCHANGED 1. 44 MOTOR OVERSPEED 1. LOSS OF LOAD 1A.
10-58 # 48 49 TROUBLESHOOTING FAULT / ALARM DRIVE RUNS AT LESS THAN COMMANDED SPEED PANELVIEW COMMUNICATIONS ERRORS 1557-UM050F-EN-P – June 2013 PROBABLE CAUSE RECOMMENDED ACTION 1. SPEED REGULATOR IN TORQUE LIMIT 1A. DECREASE LOAD 1B. INCREASE TORQUE LIMIT PARAMETER (DRIVE MAY TRIP ON OVERLOAD) 2. CURRENT REGULATOR IN LIMIT 2. IF LINE FIRING ANGLE IS STUCK AT ADVANCE LIMIT (8 DEGREES) DC LINK VOLTAGE IS AT MAXIMUM. INCREASE LINE VOLTAGE OR DECREASE MOTOR FLUX COMMAND. 1.
TROUBLESHOOTING 10-59 External Fault Configuration This is a detailed explanation for setting the Fault Class of the configurable external fault/warnings. There are 16 configurable external fault/warnings. The first eight external fault inputs 1 to 8 are hard wired into the digital I/O circuit boards. Inputs 1 to 3 are located on digital I/O board #1, and inputs 4 to 8 are located on the optional digital I/O board #2.
10-60 TROUBLESHOOTING The factory default for the variable “External Fault Class 1” is 0000 hex and the default value for “External Fault Class 2” is FFFF hex, therefore, the default class for all the config. fault / warning input is class 2 “ramp down trip”. If both, External Fault Class 1 and 2 parameters were set to 0000 hex all of the 16 config. faults / warnings would be class 3 “warnings”.
TROUBLESHOOTING 10-61 Example: Consider an application, which utilizes only the config. fault inputs 1, 2, 3 ,5, and 6. The requirements are: Inputs 1, 3 and 6 are to be ramp down trips “class 2”. Input 5 is desired to be an immediate trip “class 1”. Input 2 is to be only a warning “class 3”. 1. Enable or disable the utilized config. fault / warnings by going into “Setup” then into “FAULTS” and setting the appropriate inputs to either “on” or “off”. 2.
SPARE PARTS NOTE: CHAPTER 11 Spare parts for Drives vary depending on voltage ratings, rectifier configurations and cooling systems. A complete Spare Parts list is provided in the final instruction binder shipped with each order. Contact Cambridge Product Support Parts Division (519-740-4790) for information on spare parts for your particular Drive. Please include your order number.
11-2 1557-UM050F-EN-P – June 2013 SPARE PARTS
Medium Voltage Business, 135 Dundas Street, Cambridge, ON N1R 5X1 Canada, Publication 1557-UM050 F-EN-P – June 2013 Supersedes Publication 1557-UM050E – February 2001 Tel: (1) 519 623-1810, Fax: (1) 519 623-8930 Web Site: www .ab.com/mvb © 2013 Rockwell International Corporation. All rights reserved. Printed in Canada.