
User Manual


Maintenance 4-21
1502-UM051E-EN-P – June 2013
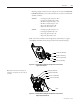
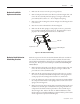
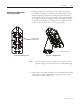
1. Ifreplacingasinglecontactcartridge,removetheappropriateleadsand
turn the plastic retaining screws to allow removal of the cartridge as shown
inFigures4.25and4.26.Insertthenewcartridgeandpositiontheretaining
screwstoholditinplace.Reconnecttheleadstothecartridge.Ensurethat
thecartridgeisintheproperconguration(thetopcartridgesarenormally
closed,thebottomcartridgesarenormallyopen,refertoFigure4.27).e
“normal”stateiswhenthecontactoris“o”(openposition).
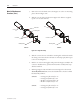
To remove cartridge,
turn retaining screws.
Auxiliary contact removed
Figure 4.25 – Retaining Screws Figure 4.26 – Cartridge Removal
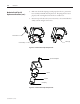
Note: ForSeriesEcontactors,thetopauxiliarycontactpositionmustusea
700-CP1cartridge.Allotherpositionsmustuse700-CPMcartridg-
es.
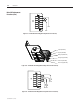
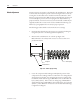
2. Ifreplacingtheentireauxiliaryassembly,removetheleadsfromallcartridges
and remove the assembly complete with mounting plate by removing the
mountingboltsasshowninFigure4.27.
Auxiliary Contact Replacement
and Set-Up Procedure