
Owner manual


Rockwell Automation Publication GMSI10-UM002D-EN-E - August 2012 203
Bump Test Application Chapter 7
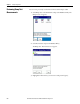
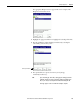
The data is displayed on the screen.
Refer to
Collecting Bump Test Measurements on page 199 for information
on how to move the cursor.
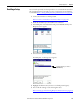
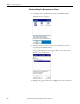
4. To print the screen, press F2 (Print).
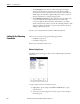
The Print Setup screen appears.
5. Connect the Enpac 2500 to a serial port on a serial printer with a 9-way
plug RS-232 cable.
6. Use the arrow keys to select the desired Printer, Baud rate and image Size,
then press F2 (OK).
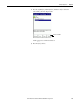
The image prints on the printer.
7. To return to the main Bump Test screen, press F1 (Back).