
Owner's Manual


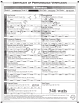
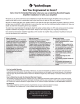
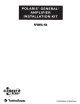
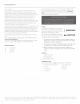

Table Of Contents
- RFX3-PMXDK Installation & Operation
- PMX-2 Installation & Operation
- RM1652B Installation & Operation
- Front Speaker Enclosure Installation & Operation
- Front Subwoofer Enclosure Installation & Operation
- RM110D2B Subwoofer Installation & Operation
- TM400X4ad Amplifier
- Amplifier Installation Kit Installation & Operation

Installation
Considerations
This section focuses on some considerations for installing your Polaris
GENERAL
amplifier installation kit. This kit is designed
to
work
in
conjunction
with
Rockford's other
GENERAL
specific audio kits and
parts.
If
you
f
ee
l
un
s
ur
e
about
installing this
sys
tem
yourself, have
it
installed
by a qualified technician.
When drilling holes, make sure w
hat
is
on
the
other
side.
Be
sure
that
any electrical,
fuel lines
or
any
other
important
components are free
and
clear
from
the
area.
Lh
WARNING
A
CAUTION
A
CAUTION
Before installation, d
is
conn
ec
t
the
battery
n
ega
tive(-) terminal to prevent damage to
the unit, fire
and/or
po
ss
ible injury.
Before beginning any installation,
follow
these simple rules:
Be
sure
to
carefully read and understand the
instructions before attempting
to
install this
wiring kit.
Consu
lt
yo
ur
UT
V's
servi
ce
manual for
model
specific information.
Models may differ from year
to
yea
r
dep
en
ding on fac
tor
y options
and aftermarket accessories added.
o
This amplifier wiring
kit
is
specifically designed
to
work
with
Rockford Fosgate
's
compact chassis amplifiers.
o
With the addition of
an
amplifier
or
source
unit
, be sure t
hat
your
current charging system is in proper working order.
o
Visit
rockfordfosgateocom
for
mor
e comprehensi
ve
produ
ct
information.
o
Visit
ourYouTube
channel for comprehensive installation videos
demonstrating complete installa
tion
guides and insta ll
tip
s.
NEED
HELP
WITH
YOUR
INSTALLATION?
-@
VISIT
OUR
CHANNEL
FOR
A
COMPLETE
.......
YOUTUBE
INSTALLATION
VIDEO
AND
OTHER
TIPS
.......
WWW.YOunJBE.COMIUSERJROCKFORDFOSGATE
Installation
Applicable Models:
Polaris
GENERAL
1000
(2
Be
4 seat models)
This
ampl
ifier wiring kit is designed
to
work
with
Roc
kford Fosgate's
GENE
RAL specific enclosures and dash kits. The kit can be installed in
both
2-seat and 4-seat models.
Step
1.
Remove the hardware hol
ding
the
under seat storage bi
ns,
centerline dri
ves
haft cove
r,
hood and da
sh
t
op
trim
panel
allowing access
to
run the cables forward.
NOTE:
To
make running
th
e power harness easier, we recommend
disconnecting the
blue
remote turn-on wire from the amplifier power
plug.
Step
2.
Starting
at
the batte
ry
locatio
n,
direct the wire
to
the center
of
the vehicle and
pass
it forward along
the
ce
nterline
of
the
vehicle
following the main wire harne
ss.
NOTE:
If
installing into a 4-seat
mod
el, you
will
need
to
pa
ss
the cables
from
the
rea
r seat
to
the front seat through the w
ir
e
tunne
l.
Enough
ca
ble length has been provided for this.
Step
3.
Pass
the harness
thr
o
ug
h
into
the
front
pa
ssenger
wheel
well
area from the inside of the vehic
le,
up
along
the
shock
asse
mbly
through the u nderhood grommet.
Step
4.
Feed the harness
thr
ough
th
e firewall gr
ommet
and
re-
co
nnect the remote wire and
amp
lifier speaker harness
to
the
power
plu
g.
Step 5. Plug
the
input,
output
and power
/g
round harn
esses
into
the
amplifier.
S
tep
6.
Connect
input
connector(
s)
from
the
radi
o.
Step 7.
Co
nn
ec
t
the power and ground
to
the
batt
ery terminals.
Step
8.
Test the system and once verified,
wir
e tie the
ca
bles starting
at the rear pulling any
slack
forward
as
you go.
NOTE:
When secu ring
the
wire in
the
wheel well area, keep cables
as
far
from
th
e shock
asse
mbly
as
possible to avoid possible dam
age
.
S
tep
9. Reassemble the
vehicle
3