
Owner's Manual
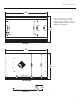
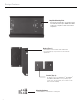
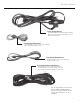
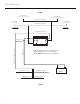
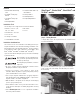

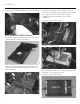
Table Of Contents

9
Installation
Example below: 4-Channel Power Amplifer
Note: Refer to your amplifier’s owner manual for additional wiring
and setup information. Be careful when plugging in the harnesses
to the appropriate socket. The 4-pin Molex plugs for the Input /
Output Harnesses fit in both sides of the amplifier.
Step 4 - Fairing Speaker Wiring
Unplug the the factory speaker wires from the speaker and plug
them directly in to the Front Speaker Input Harness. These are
labeled clutch and brake side.
Now you can plug the new Front Speaker Output Harness onto
your new speaker terminals.
NOTE: The terminals utilize the 1/8” for negative (-) and the 1/4”
for positive (+) sizes for easy connections.
Route power / ground through fairing. (If installing a 4-Channel
amplifer and rear speakers, feed the Rear Speaker Input
/ Output Harness through fairing towards the rear of the
bike.)
Proceed to Step 5 on page 11 for continued installation
instructions.
Road Glide
®
and Road Glide Ultra
®
models.
Step 1 - Removal
Leaving the windshield in place, remove the six inner fairing
screws.
After the screws are removed, use your socket or ratcheting wrench
to unbolt the turn signal brackets.
NOTE: Some turn signal brackets stay attached and some can be
completely removed. This varies depending on aftermarket and
factory accessory styles.