cobas® pulse User Assistance Publication version 1.0 Software version 01.
Publication information Publication version 1.0 Software version 01.03 Revision date July 2021 Change description First edition y Revision history Material number Edition notice 09515909018 This publication is intended for users of cobas® pulse. Every effort has been made to ensure that all the information contained in this publication is correct at the time of publishing.
Warranty Any customer modification to the instrument renders the warranty or service agreement null and void. For conditions of warranty, contact your local sales representative or refer to your warranty contract partner. Limited warranty Copyright PLACEHOLDER © 2020–2021, Roche Diagnostics. All rights reserved. License information The cobas® pulse instrument software is protected by contract law, copyright law, and international treaties.
Feedback Every effort has been made to ensure that this publication fulfills the intended use. All feedback on any aspect of this publication is welcome and is considered during updates. Contact your Roche representative, should you have any such feedback. Approvals cobas® pulse meets the requirements laid down in: Directive 98/79/EC of the European Parliament and of the Council of 27 October 1998 on in vitro diagnostic medical devices.
Contact addresses Roche Diagnostics GmbH Sandhofer Strasse 116 68305 Mannheim Germany Distributed in the U.S.A. by: Roche Diagnostics 9115 Hague Road Indianapolis, IN 46256 Roche affiliates A list of all Roche affiliates can be found at: www.roche.com/about/business/roche_worldwide.htm eLabDoc Electronic user documentation can be downloaded using the eLabDoc e-service on Roche Dialog: dialogportal.roche.com For more information, contact your local affiliate or Roche Service representative.
Page intentionally left blank. Roche Diagnostics cobas® pulse · Software version 01.03 · User Assistance · Publication version 1.
Table of contents Table of contents Publication information 2 Contact addresses 5 Intended use 9 Symbols and abbreviations 9 Reviewing QC test results Adding comments to a test result 6 Safety 1 General safety information Safety classifications Safety precautions Warning messages Caution messages Notices Safety information for disposal Recommendations for cybersecurity and data security 17 18 20 22 24 25 26 System description Non-routine operation Entering insulin information Performing a line
Table of contents 11 Configuring by barcode Formats and language configuration QC configuration Data deletion Barcode camera configuration Connectivity 370 371 376 385 388 390 General configuration List of power management options Patient ID handling User ID handling Result range handling Measurement workflow Generic instrument functionality 425 427 437 448 458 467 Glossary Index Roche Diagnostics cobas® pulse · Software version 01.03 · User Assistance · Publication version 1.
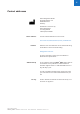
Intended use cobas® pulse is intended for multiple-patient use within professional healthcare settings, including intensive critical care and non-critical care settings. This system is not for screening or diagnosis of diabetes, but is indicated for use in determining dysglycemia. Symbols and abbreviations Product names Except where the context clearly indicated otherwise, the following product names and descriptors are used.
Symbol Explanation Materials that are required for a task Prerequisites of a task y Symbols used in the publication Symbols used on product and packaging Symbol Explanation Manufacturer. Date of manufacture. Catalog number. In vitro diagnostic medical device. Global Trade Item Number. Serial number. Unique device identifier TÜV SÜD U7-2D Biohazardous RFID reader. Device contains a transmitter.
Symbol Explanation Device not for self-testing Temperature limitation Humidity limitation Refer to safety information included in this publication. Consult the instructions for use.
Page intentionally left blank. Roche Diagnostics cobas® pulse · Software version 01.03 · User Assistance · Publication version 1.
Safety 1 General safety information ........................................................................ 15 Roche Diagnostics cobas® pulse · Software version 01.03 · User Assistance · Publication version 1.
Page intentionally left blank. Roche Diagnostics cobas® pulse · Software version 01.03 · User Assistance · Publication version 1.
Table of contents 15 General safety information In this chapter 1 17 Safety precautions ................................................................. 18 Warning messages ................................................................ 20 Caution messages ................................................................. 22 Notices ....................................................................................... 24 Safety information for disposal ........................................
Table of contents 1 General safety information Page intentionally left blank. Roche Diagnostics cobas® pulse · Software version 01.03 · User Assistance · Publication version 1.
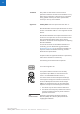
General safety information 17 Safety classifications The safety precautions and important user notes are classified according to the applicable standards. Familiarize yourself with the following meanings and icons: Safety alert r The safety alert symbol is used to alert you to potential physical injury hazards. Obey all safety messages that follow this symbol to avoid possible damage to the system, injury, or death.
Safety precautions Safety precautions To avoid serious or fatal injury, read and comply with the following safety precautions. User qualification Insufficient knowledge and skills To ensure correct operation of cobas® pulse: r Only trained healthcare professionals may operate the instrument. r Users must have received comprehensive instruction in the operation, QC, and care of cobas® pulse.
General safety information • 19 Consult the dealer or an experienced radio/TV technician for help. cobas® pulse complies with both the electromagnetic immunity requirements and radio interference immunity requirements at the frequency and test levels according to ISO 15197. Electrostatic discharge (ESD) The cobas® pulse system complies with the electrostatic discharge (ESD) immunity requirements as specified in IEC 61326-2-6.
Warning messages Warning messages List of warning messages Failure to observe warning messages may result in death or serious injury. r Before using the system, read the warning messages carefully. Incorrect test measurement To avoid harmful outcomes resulting from incorrect test measurements, ensure the following: r Only use a blood sample when performing a test measuring blood glucose. r Only use an appropriate QC material when performing QC tests.
General safety information Protection against infection and blood-borne pathogens 21 Healthcare professionals using cobas® pulse to perform tests must be aware that any object coming into contact with human blood is a potential source of infection. Users must adhere to standard precautions when handling or using cobas® pulse.
Caution messages Caution messages List of caution messages r Before operating, read the caution messages carefully. Failure to observe them may result in minor or moderate injury. Allergy or injury caused by reagents and other working solutions Direct contact with reagents, detergents, cleaning solutions, disinfectants or other working solutions may cause skin irritation or inflammation. r Always wear disposable gloves.
General safety information • English lowercase alphabetic characters (a through z) • Numeric characters (0 through 9) • Non-alphabetic characters (for example, !, $, #, %) 23 Examples of weak passwords: uhxwze11 contains no upper case letter. • UHXW13SF contains no lower case letter. • uxxxxx7F contains the same character more than four times. • x12useridF contains a substring of the user ID longer than four characters.
Notices Notices List of notices Failure to observe the notices may result in damage to the system. r Before using the system, read the notices carefully. General care Using cleaning solutions and disinfectants not specified in this publication may result in incorrect operation and possible failure of the instrument. r Only clean the instrument with the recommended cleaning solutions and disinfectants.
General safety information 25 Safety information for disposal Disposal of the instrument Infection by a potentially biohazardous instrument. r The instrument or its components must be treated as potentially biohazardous waste. Decontamination (i.e., a combination of processes including cleaning, disinfection and/or sterilization) is required before reuse, recycling, or disposal. r Dispose of the instrument or its components according to the appropriate local regulations or you may return it to Roche.
Recommendations for cybersecurity and data security Recommendations for cybersecurity and data security Potentially sensitive personal information may be stored on the instruments locally and transferred over the network. After results are sent to the DMS, they remain on the instrument. This is a patient safety measure enabling the user (such as a nurse) to look up previous patient measurement results when the network or DMS is unavailable.
General safety information 27 Delete users who are no longer needed on the instruments and use the "standby timeout" function for automatic logout on inactivity (see the Standby timeout and Logon session timeout configuration items). Ensure that users log off the instrument when they have finished using it (see “User log off”).
Recommendations for cybersecurity and data security Ensure that the instrument date and time are synchronized with the date and time of IT systems to which it is connected (DMS, cobas infinity edge). Instruments with an incorrect date and time will experience connectivity issues. u Access restrictions (467) Secure network connections You should use WPA2 encryption to protect your data and wireless connection. Alternative connection methods (e.g.
General safety information Asset tracking controls Data retention time 29 Ensure that your facility implements controls to track instruments. Adjust the instrument result retention time and the result deletion algorithm according to your facility’s current regulations.
Recommendations for cybersecurity and data security 1 General safety information Page intentionally left blank. Roche Diagnostics cobas® pulse · Software version 01.03 · User Assistance · Publication version 1.
System description 2 Overview of the system ............................................................................... 33 3 Specifications.................................................................................................. 83 Roche Diagnostics cobas® pulse · Software version 01.03 · User Assistance · Publication version 1.
Page intentionally left blank. Roche Diagnostics cobas® pulse · Software version 01.03 · User Assistance · Publication version 1.
Table of contents 33 Overview of the system 2 About the system ................................................................... 35 About the instrument ........................................................... 37 Overview of the charging station ..................................... 39 Overview of the carry case ................................................. 40 Overview of the user interface .......................................... 41 Overview of the software ........................
Table of contents Accessing the User Assistance offline ............... 79 Searching in the User Assistance......................... 80 2 Overview of the system 34 Roche Diagnostics cobas® pulse · Software version 01.03 · User Assistance · Publication version 1.
Overview of the system 35 About the system The cobas® pulse system is a blood glucose monitoring system that allows healthcare professionals to measure blood glucose levels near the patient. The system can do the following: • Perform patient blood glucose tests and glucose QC tests with QC material. • Record automatically information related to the performed tests. • Record tests results and reagent information. • Record data related to quality assurance.
About the system System extension Through the app library, the system provides the option to extend its functionality by installing additional (Rochecontrolled) apps with other functionalities. u About the app library (46) Configuration options The system is highly-configurable. For that reason, some screens and procedures in your healthcare facility might differ slightly from the ones in this publication.
Overview of the system 37 About the instrument A E F G B H C I D A Charge indicator F Built-in flashlight B Touch screen G Barcode camera C On/off button H Instrument information D Test strip port and light I RFID reader E Battery compartment cover w Main instrument components front (left) and rear (right) Charge indicator Status indicator that shows the status of the charging process.
About the instrument Cover by which the battery is Battery compartment cover accessed. Barcode camera You use the integrated barcode camera to do the following: • Read user and patient IDs • Read test strip container barcodes • Read QC material bottle barcodes • Read Linearity material bottle barcodes • Configure the instrument Built-in flashlight Illuminates the barcode for scanning.
Overview of the system 39 Overview of the charging station The charging station enables you to charge the instrument when it is not being used. A B A Rear panel B Access to power inlet w Charging station The panel contains 2 holes which can be used to mount the charging station, on a wall for example. The power supply is attached at the rear of the charging station. u Setting up the charging station (154) Roche Diagnostics cobas® pulse · Software version 01.
Overview of the carry case Overview of the carry case The carry case provides an area for storing and transporting consumables needed for performing blood glucose tests. The carry case may not be available in all countries. 2 Overview of the system w Carry case Roche Diagnostics cobas® pulse · Software version 01.03 · User Assistance · Publication version 1.
Overview of the system 41 Overview of the user interface In this section Overview of the software (41) About the user interface (43) About the charging screen (45) About the Tests screen (46) About the app library (46) About the Glucose app start screen (47) Overview of the software 2 Overview of the system The figure contains the software items. Instrument configuration and user rights determine what you can access on your instrument. Roche Diagnostics cobas® pulse · Software version 01.
Overview of the user interface Glucose app Tests Local results Notifications Settings Glucose Patient results QC status Brightness and volume Emergency QC results Instrument cleaning status Change password QC Instrument synchronization status Language Linearity Instrument memory status Date and time Proficiency User recertification status Insulin Message of the day Lot management OTS Personal message Configuration by barcode Set date Set time Audit trail Instrument informa
Overview of the system 43 About the user interface The user interface enables you to perform tasks on the instrument. The user interface layout reflects the workflows of the tasks that you perform on the instrument.
Overview of the user interface The synchronization warning icon displayed in the status bar indicates that the instrument has not synchronized data with the DMS. In particular, recently measured test results and new patients, and additionally events, updated user lists and changes to the instrument configuration. App bar The app bar contains a screen title, indicating the user interface submenu in which you are working, or the activity that you are performing.
Overview of the system 45 The button provides access to the results that are currently stored on the instrument • Patient results • QC results The button provides access to the Notifications screen which is used for the following: • Reminders (for example, QC test is due) • Messages (for example, message of the day, personal messages) • Logging cleaning A blue notification badge on the button ( ) indicates that notifications require a response from you.
Overview of the user interface About the Tests screen The Tests screen contains the tests that are available for use, and indicates who is logged on to the Glucose app. You access the Tests screen in 2 ways: Tests Jenny Doe (1234567890) Glucose Emergency Linearity QC Insulin Proficiency • When you log on to the Glucose app. • On the navigation bar, by tapping the button. Each test is represented by a button.
Overview of the system 47 Depending on your instrument’s configuration, the app library is accessible as follows: • From the Glucose screen by tapping the app library button. • Directly when you log on. There are 2 categories of apps: • Apps of the cobas pulse system • Other apps Apps of the cobas pulse system are those which are provided with cobas pulse, including the Glucose app. Other apps are provided by Roche or by third parties.
Overview of the user interface The Glucose screen can be configured to display the following: Instrument name and/or ID (top of screen). • Site and location where the instrument is used (bottom of screen). 2 Overview of the system • Roche Diagnostics cobas® pulse · Software version 01.03 · User Assistance · Publication version 1.
Overview of the system 49 About tests In this section About patient entry (49) About collecting a blood sample (51) About performing a glucose test (52) About glucose test results (54) About performing QC tests (58) About proficiency testing (60) About linearity testing (60) About the observed test sequence (OTS) (62) About adding comments to a test result (62) About the test strip port light (64) About patient entry The way in which your instrument manages patient IDs depends on how it has been configur
About tests Patient ID entry by keyboard can be configured to be any combination of up to 20 alphanumeric characters, with specified minimum and maximum lengths. Patient entry by barcode scanning only works using supported barcode types. u Barcode specifications (90) Autocomplete Enter patient name or patient ID When configured, autocomplete provides a quick way to enter a patient when using keyboard entry.
Overview of the system 51 "Pattern only" validation checks that the patient ID entered matches the configured patient ID pattern. For example, that the patient ID always starts with “PA”. If it does not, an error message is displayed. "List based" validation checks that the patient ID entered matches an entry in the patient list on your instrument. If it does not, an error message is displayed. "List based.
About tests If no healthcare facility policy exists for collecting capillary blood, the patient's hands (or heel in the case of small children) should be thoroughly cleaned and dried. WARNING! Incorrect results due to residues on skin Traces of food on the fingers or fatty residues from hand cremes or soap products may contaminate the sample and lead to incorrect results. Residues of water or disinfectant on the skin can dilute the drop of blood and lead to incorrect results.
Overview of the system 53 When configured, this occurs after you have entered the patient. The Confirm patient dialog box is displayed containing the following information: Confirm patient Patient ID Gender • Name • Patient ID • Gender • Age • Date of birth Age Date of birth Cancel Confirm Sample type selection When you confirm that you have entered the correct patient you move to the next stage of the test. If it is not the correct patient you can cancel and then re-enter the patient.
About tests • Required when a test result is above or below the configured result range limits. u About adding comments to a test result (62) Glucose test series Your instrument can be configured to perform consecutive tests for the same patient. When configured, the Options dialog box is displayed at the end of the first test and you can choose to repeat the glucose test. Since the patient is already selected, you start the second test by inserting a test strip.
Overview of the system 55 Glucose test A John Doe 03-Feb-1970 Result 22-Mar-2020, 16:31 Glucose D 60 B mg/dL E Below normal range C New test strip lot F Sample type Arterial blood Test strip lot number Confirm A Patient details D Patient local results history B Glucose test result E Test range details C Comment F Edit comments w Glucose test result Patient details Displays the patient information that has been provided by the DMS: • Patient ID • Patient name • Gender • Dat
About tests 1 Critically high Reportable range 2 Above normal range 3 Within normal range 4 Below normal range 5 6 Reportable range Critically low 7 w Test result ranges color coding The following types of measuring ranges can be distinguished: • System measuring range • Institution-set measuring range The ranges define details of the glucose result screen (such as the color coding and showing quantitative or qualitative result values) and can be used to trigger specific messages.
Overview of the system 30 6 mg/dL 57 The test result value is critically low. Critically low The test result value is critically low (LO). LO 7 Critically low Critically low Critically low result message. The message text can be configured via the DMS.
About tests Tapping the button displays the Comments dialog box in which you can enter up to 3 comments for the glucose test result as required. For glucose tests, the instrument can be configured so that a comment must be entered when a result is within one of the following categories: • Outside the normal range. • Below the critical range lower limit, or above the critical range upper limit. • Below the reportable range lower limit or above reportable range upper limit.
Overview of the system 59 starting to test with a new test strip lot), a warning is displayed when the instrument is powered on and when the Glucose Test function is selected. QC tests should be run in the following circumstances: • Before using the instrument for patient testing the first time. • At the QC intervals established by your healthcare facility. • When using a new test strip container for the first time.
About tests • Custom deviation Level 2 (L2): High (high values in test results) It is possible to change the pre-defined default deviations for each QC level in accordance with applicable regulations. The custom deviations (to be configured for level 1 and level 2 in mg/dL or mmol/L) define, in combination with the given target level of each QC level, the permitted result range to have a QC PASS result.
Overview of the system 61 The term “linearity” describes the ability of the system to maintain a constant accuracy over the full range of specified values. If test results were plotted against expected values as a curve over the full range of these values, the ideal (high linearity) would be a straight line. Linearity is the range of values from the lowest to the highest for which the instrument is proven capable of giving accurate results.
About tests About the observed test sequence (OTS) The observed test sequence (OTS) enables an observer (supervisor) to assess and record a user’s ability to perform a glucose patient test (for recertification purposes, for example). The observer monitors a user performing a test to check that the test is being performed according to recommended procedures. The supervisor then evaluates the performance and passes or fails the user.
Overview of the system 63 Comment entry mandatory To enter a comment you tap the button in the test result screen and the Comments dialog box is displayed. You can enter a maximum of 3 comments for a test result. The number of comments entered is indicated on the title bar of the Comments dialog box. A B Comments (1/3) Enter a comment 0/20 New test strip lot Physician notified C Will repeat test RN notified No action Invalid result D Result will be excluded from local results history.
About tests • Outside the normal range. • Below the critical range lower limit, or above the critical range upper limit. • Below the reportable range lower limit or above reportable range upper limit. Quality-related comments For QC tests and linearity tests, the instrument can be configured so that a comment must be entered when a test fails.
Overview of the system 65 Blue • Test strip inserted and recognized • Test strip checked and passed White • Ready for sample application Blue • Sufficient sample has been applied and processing is underway Magenta Eject test strip 2 Overview of the system • Roche Diagnostics cobas® pulse · Software version 01.03 · User Assistance · Publication version 1.
About lockouts About lockouts In this section About the QC lockout (66) Lockout types (68) About the QC lockout A QC lockout on an instrument occurs when a QC test is due. It is probably the most common type of lockout. You remove a QC lockout by performing QC tests. QC lockout is indicated on the charging screen and on the Glucose screen. On the Tests screen QC lockout is indicated on a test button by a symbol on its top right corner.
Overview of the system • Until failed QC • Time interval • Shift • Test strip count • Time of day 67 With the exception of the QC disabled and Until failed QC configurations, a configured QC lockout can be alternating or non-alternating. i You can view your instrument’s QC configuration by going to QC interval. Disabled Until failed QC > Instrument information > QC lockout is disabled. Glucose tests can be performed at any time, regardless of the result of a possible QC test.
About lockouts Only successful measurements are included in the test strip count. To remove the QC lockout, you must run and pass a QC test passed both QC test levels. New test strip lot Alternating / non-alternating QC lockout You can configure the instrument to handle new test strip lots in one of the following ways: • Using a new test strip lots is possible without having a QC test passed for it. • Using a new test strip lot is only possible after having a QC test passed for both QC levels.
Overview of the system 69 The lockout type determines the corrective action you should take. By tapping a button with a lockout badge a dialog box is displayed providing guidance.
About lockouts Synchronization lockout is resolved by synchronizing the instrument with the DMS. Additionally a user with administration rights can reset synchronization lockout by choosing > Administrator > Reset synchronization lockout Temperature lockout A temperature lockout occurs when the instrument temperature is too high or too low for the test strips to operate correctly.
Overview of the system • Glucose test • Emergency test • OTS • Proficiency test • QC test • Linearity test • Insulin entry 71 Memory lockout is resolved by synchronizing the instrument with the DMS to ensure it has sufficient free memory. User lockout User lockout occurs when a user’s certificate expires and they require recertification. The instrument can be configured to display a user certification expiration warning in advance of the individual user certification expiration.
List of notifications List of notifications Notifications provide you with reminders and messages. You access the Notifications screen by tapping the button on the navigation bar. A new notification is indicated by a blue badge on the button .
Overview of the system 73 When instrument cleaning is overdue, a red warning icon and the date and time of the instrument cleaning is displayed.
List of notifications Instrument memory lockout is resolved by synchronizing the instrument with the DMS to ensure it has sufficient memory. User certification status This notification only shows when a there is a certification warning for the user currently logged on or their recertification is due. It indicates either: • The date when the recertification is required.
Overview of the system 75 Overview of the User Assistance In this section About the User Assistance (75) Overview of User Assistance functions (76) Accessing the User Assistance online (78) Accessing the User Assistance offline (79) Searching in the User Assistance (80) About the User Assistance The User Assistance supports you in your daily work. It is available in different formats (e.g., online, offline,...). The functionalities provided by the user interface are similar across all formats.
Overview of the User Assistance Home To view the description of the available tabs. From here, you can access each tab directly. Search in this publication To search for information in the whole User Assistance. Table of contents To get an overview of the User Assistance publication. Recently viewed To get a list of the most recent topics that you have viewed. Favorites To store your frequently used topics for direct access at any time.
Overview of the system 77 Related topics At the end of some topics, there is a list of links to other topics that contain related information. You can go back to the original topic using the button. Related topics Viewing descriptions of terms The button in text indicates that you can view information about the term to the button’s left. When you Downloading a PDF You can download the publication to your computer in PDF format using the Download PDF button.
Overview of the User Assistance Giving feedback In the User Assistance online, at the bottom of each topic, you can give feedback on that topic. We use your feedback to improve the next update of our publications. Send feedback Yes No Was not the topic that I was looking for Topic was not clear/understandable Enter an email address Enter your feedback here Cancel Send Accessing the User Assistance online When accessing the User Assistance online, the latest content is always available.
Overview of the system 79 3 In the list of e-services, find the User Assistance card, and then choose the Launch button in the card. User Assistance f The User Assistance publication selector is displayed. Launch 4 Use the filter settings to find the publication you want. Add publications 5 Select the publication that you want, and then choose the Add publication button, and then the Add to list button.
Overview of the User Assistance Searching in the User Assistance Use the search function in the User Assistance to find information directly. Search options There are 2 search options in the User Assistance: • Text search: Searches the text entered in the search field. • Faceted search: Limits the number of search results using filters. You can combine both search options.
Overview of the system 81 r To perform a search in the User Assistance 1 In the User Assistance, choose the tab. 2 To perform a simple search, enter full or partial text entries, and then choose the button. Search in this publication Search results Type Topic 3 To perform a faceted search, choose the button. f The filter drop-down lists are displayed. Search in this publication 4 From the drop-down lists, choose one or more search filters.
Overview of the User Assistance 2 Overview of the system Page intentionally left blank. Roche Diagnostics cobas® pulse · Software version 01.03 · User Assistance · Publication version 1.
Table of contents 83 Specifications In this chapter 3 85 Technical specifications ...................................................... 86 Environmental conditions ................................................... 87 Dimensions and weights..................................................... 88 List of accessories and consumables............................. 89 Barcode specifications......................................................... 90 Radio equipment specifications ................
Table of contents 3 Specifications Page intentionally left blank. Roche Diagnostics cobas® pulse · Software version 01.03 · User Assistance · Publication version 1.
Specifications 85 General specifications The instrument has the following basic characteristics: System Data storage • up to 100 proficiency test results • up to 2000 patient result records • up to 3 comments for each test record • up to 500 glucose QC result records • up to 50 linearity test results • up to 300 test strip lot code containers • up to 15000 user ID records • up to 15000 patient records • up to 200 OTE reagents records • up to 50 QC lot records • up to 10 linearity l
Technical specifications Technical specifications The power supply must fulfill the following requirements. Never operate the system if one of the environmental conditions is not fulfilled. Input voltage Instrument Wireless charging Charging station + 12 V DC Power supply Input current 100-240 V AC, 50-60 Hz Instrument Wireless charging Charging station 2.5 A (max) Power supply 0.6-0.3 A Battery voltage type Instrument 3.
Specifications 87 Environmental conditions The location must comply with the following conditions: International (Europe) Ambient temperature during operation Ambient temperature during long-term storage Instrument 12-40 °C 54-104 °F Charging station 12-40 °C 54-104 °F Power supply 0-45 °C 32-113 °F Carry case 12-40 °C 54-104 °F Instrument 5-40 °C 41-104 °F Charging station 5-40 °C 41-104 °F -40-70 °C -40-158 °F 5-40 °C 41-104 °F -25-70 °C -13-158 °F -25-70 °C -13-158 °F Powe
Dimensions and weights Dimensions and weights The system components have the following dimensions and weights: Instrument International (Europe) US Depth 30 mm 1.18 in Width 77 mm 3.03 in Height 210 mm 8.27 in Weight 390 g (inc. battery) 0.86 lb y Dimensions and weight of the instrument Charging station International (Europe) US Height 140 mm 5.51 in Width 100 mm 3.94 in Depth 95 mm 3.74 in Weight 250 g 0.
Specifications 89 List of accessories and consumables You should ensure that you use the correct accessories and consumables when performing tests and measurements.
Barcode specifications Barcode specifications Barcodes provide a means of entering data in the cobas pulse system (user ID/patient ID entry, instrument configuration). WARNING! Risk of barcode read errors If a barcode is read incorrectly, it may lead to patient misidentification and inappropriate therapy decisions. r When creating patient or user barcodes, always adhere to the applicable international IEC/ISO standards for the respective barcode type.
Specifications 91 The barcode samples shown here are for illustration purposes only. If printed out, they can be used to check the barcode camera. However, they are not meant to be used as a reference for size or resolution of real patient or user ID barcodes. When creating patient or user barcodes, always refer to the relevant standard ISO/IEC 15416 and 15415 for size and resolution requirements and to the specifications listed in the table.
Barcode specifications Interleaved 2 of 5 with checksum PDF417 Aztec DataMatrix 3 Specifications QR code Roche Diagnostics cobas® pulse · Software version 01.03 · User Assistance · Publication version 1.
Specifications 93 Radio equipment specifications This equipment complies with FCC radiation exposure limits set forth for an uncontrolled environment and meets the FCC radio frequency (RF) Exposure Guidelines. This equipment is tested for specific absorption ratio (SAR) and complies with FCC/IC radiation exposure limits set forth for an uncontrolled environment. This device complies with FCC/IC SAR limit of 1.6 W/kg.
Radio equipment specifications 3 Specifications Page intentionally left blank. Roche Diagnostics cobas® pulse · Software version 01.03 · User Assistance · Publication version 1.
Operation 4 Frequently performed tasks....................................................................... 97 5 Routine operation........................................................................................ 111 6 Non-routine operation............................................................................... 129 Roche Diagnostics cobas® pulse · Software version 01.03 · User Assistance · Publication version 1.
Page intentionally left blank. Roche Diagnostics cobas® pulse · Software version 01.03 · User Assistance · Publication version 1.
Table of contents 97 Frequently performed tasks In this chapter 4 99 Charging the instrument ..................................................... 104 Checking notifications ......................................................... 105 Putting the instrument into standby mode................... 107 Waking the instrument from standby mode ................ 108 Logging off the Glucose app .............................................
Table of contents 4 Frequently performed tasks Page intentionally left blank. Roche Diagnostics cobas® pulse · Software version 01.03 · User Assistance · Publication version 1.
Frequently performed tasks 99 Logging on to the Glucose app If your instrument is switched off you must turn it on and log on in order to use it. After turning on your instrument, depending on your instrument’s configuration, there are 3 options: 1. You must always log on. 2. You need only log on to perform a QC test. 3. You do not need to log on.
Logging on to the Glucose app 2 Swipe your RFID tag over the RFID icon on the rear of your instrument, as shown by the animation. f If a password is required the Enter password screen is displayed. f If a password is not required the Tests screen is displayed. Log on is complete. 3 In the Enter password screen, enter your password in the Password field and then tap the Log on button. User logon Enter password f The Tests screen is displayed. Logon is complete.
Frequently performed tasks 101 3 CAUTION! Ensure that the barcode is flat and not damaged. Position the instrument so that the barcode is visible on the screen and inside the white frame. I If there is insufficient light, tap the turn on the built-in flashlight. button to f If a barcode is detected the frame turns green and the Enter password screen is displayed. Password entry is required. Go to the next step. f The frame turns green the Tests screen is displayed (if configured).
Logging on to the Glucose app r To log on to the Glucose app using the keyboard 1 Remove the instrument from the charging station and do one of the following: • In the Glucose screen, tap the Log on button. • If the app library is displayed, tap the Glucose app and then in the Glucose screen, tap the Log on button. Glucose f The User logon screen is displayed. 2 In the User logon screen, tap the tab. Log on 3 In the Enter user ID screen enter your user ID and then tap the Next button.
Frequently performed tasks 103 4 In the Enter password screen, enter your password in the Password field and then tap the Log on button. User logon Enter password f The Tests screen is displayed. Logon is complete. Log on r No logon required 1 Remove the instrument from the charging station. 2 In the Glucose screen, tap the Proceed button f The Tests screen is displayed. Glucose 3 When you have finished using the instrument, dock it in the charging station.
Charging the instrument Charging the instrument When not being used, the instrument should be placed in the charging station. This ensures that the instrument has sufficient charge to operate. When the instrument is in the charging station the charging screen is displayed. If the instrument is turned off when placed in the charging station, it will start up, after which the charging screen is displayed.
Frequently performed tasks 105 Checking notifications Notifications provide you with reminders and messages. Notifications are accessed by tapping the button on the navigation bar. A blue badge on the button indicates a new notification. After you have taken the appropriate action, the notification is removed from the Notifications screen. The action you take depends upon the type of notification.
Checking notifications 5 If a notification warns of, or indicates that there is a lockout due to insufficient memory, synchronize your instrument the DMS to remove the lockout 4 Frequently performed tasks 6 For a notification of a message, do the following: • Tap the message to display the corresponding message screen. • After reading the message, tap the button to return to the Notifications screen. Roche Diagnostics cobas® pulse · Software version 01.03 · User Assistance · Publication version 1.
Frequently performed tasks 107 Putting the instrument into standby mode When the instrument is not in the charging station and not in use, standby mode can be activated. In standby mode the instrument is inactive, and saving power as it is not processing or making measurements. Automatic activation of standby mode is set by the Standby timeout configuration item. If enabled it determines the length of time (seconds) an instrument must be inactive before standby mode is activated.
Waking the instrument from standby mode Waking the instrument from standby mode When the instrument is not in the charging station and not in use, standby mode can be activated. In standby mode the instrument is inactive, and saving power as it is not processing or making measurements. The instrument can be configured to wake from standby mode using the Lift to wake configuration item. When enabled the instrument in standby mode is ’woken’ by movement detection. For example, by lifting the instrument.
Frequently performed tasks 109 Logging off the Glucose app When you have finished working in the Glucose app, you should log off. Depending on how your instrument is configured, after logging off from the Glucose app you are returned to the Glucose screen or to the app library. i An instrument can be configured to automatically activate standby mode after a pre-determined time period using the Standby timeout configuration item.
Logging off the Glucose app 4 Frequently performed tasks Page intentionally left blank. Roche Diagnostics cobas® pulse · Software version 01.03 · User Assistance · Publication version 1.
Table of contents 111 Routine operation 5 Entering a patient................................................................... 113 Performing a glucose test................................................... 116 Reviewing patient test results ........................................... 120 Performing a QC test ............................................................ 122 Reviewing QC test results................................................... 126 Adding comments to a test result ......
Table of contents 5 Routine operation Page intentionally left blank. Roche Diagnostics cobas® pulse · Software version 01.03 · User Assistance · Publication version 1.
Routine operation 113 Entering a patient The way in which you enter a patient depends on your instrument’s configuration. You enter a patient in the following tests: • Glucose test • Insulin entry • OTS The following configurations can be made to your instrument, and determine how you manage patient entry.
Entering a patient 2 CAUTION! Ensure that the barcode is flat and not damaged. Position the instrument so that the barcode is visible on the screen and inside the white frame. I If there is insufficient light, tap the turn on the built-in flashlight. button to f If a barcode is detected the frame turns green and the Confirm patient dialog box is displayed. Go to the next step. f The frame turns red and a message is displayed at the bottom of the screen.
Routine operation 115 2 In the Enter patient ID screen, enter the patient ID. I Patient ID entry is case sensitive. 3 Tap the Continue button. Enter patient ID Continue 4 If the Confirm patient dialog box is displayed, check that the patient details are correct, and then tap the Confirm button. f The next test screen is displayed. Continue with the test.
Performing a glucose test Performing a glucose test One of the main functions of the instrument is to perform glucose tests. The procedure outlined in this task contains the main steps that you perform when performing a glucose test. However, depending on your instrument’s configuration, there may be additional steps in the glucose test: • Patient ID confirmation (after entering the patient). • Sample type selection (after entering the patient / after Patient ID validation).
Routine operation 117 WARNING! Incorrect interpretation of test result when using anticoagulant tubes To avoid harmful outcomes resulting from the incorrect interpretation of a test result. r When using anticoagulant tubes, do not store the tube after drawing, but apply the blood immediately.
Performing a glucose test 3 CAUTION! Close the test strip container immediately after removing the test strip. When prompted, insert a test strip by doing the following: • Remove the test strip from the test strip container and then close it. • Insert the test strip into the test strip port as far as it will go. I The test strip port light color briefly turns blue (test strip is recognized and checked), and then turns white (instrument is ready for sample application). An audible signal is emitted.
Routine operation Eject test strip Touch and hold 119 7 CAUTION! When you eject the test strip, ensure that you dispose of it in accordance with the applicable regulations. Never pull out the test strip. Hold the instrument vertically over the waste container. In the Eject test strip dialog box, touch and hold the button until the blue progress indicator has encircled the button. I The test strip port light color turns magenta. f The test strip is loosened and falls into the waste container.
Reviewing patient test results Reviewing patient test results You can review the patient test results that are stored on your instrument. The period of time for which a test remains on the instrument is configurable. You view the patient results on the Local results screen.
Routine operation 121 2 In Local results > Patient results tap the button. Local results Patient results QC results 22-Mar-2020, 16:31 Glucose Unknown patient 300 mg/dL 999999999 22-Mar-2020, 16:31 Regular insulin Jenny Doe 2U 3 To search for a patient whose result you require, do one of the following: • In the tab, search for the patient by using the keyboard and entering the patient ID or name. • Tap the tab, and then scan the barcode of the patient that you require.
Performing a QC test Performing a QC test Accurately testing known levels of glucose ensures that the system and your technique used in testing give accurate results on patient samples. A QC test using QC material comprises the following: • Select the desired QC level for the test. • Enter the QC material lot number. • Perform the QC test with the QC material.
Routine operation c d 123 Intervals between running QC tests are determined by your healthcare facility. m Glucose QC material m Glucose test strips m Waste container m New pair of disposable gloves j m The instrument is turned on. m You are logged on to the instrument. u Logging on to the Glucose app (99) r To perform a QC test 1 On the Tests screen, tap the QC button.
Performing a QC test 4 CAUTION! Close the test strip container immediately after removing the test strip. When prompted, insert a test strip by doing the following: • Remove the test strip from the test strip container and then close it. • Insert the test strip into the test strip port as far as it will go. I The test strip port light color briefly turns blue (test strip is recognized and checked), and then turns white (instrument is ready for sample application). An audible signal is emitted.
Routine operation QC test Result - Level 1 Glucose 55 mg/dL Passed 125 7 In the test result screen (Result - Level 1 / Result Level 2), you can do the following: • Tap the button to view the Range details dialog box. • Tap the button to add comments for the result as required. 8 Tap the Confirm button. u Related topics No comments • Adding comments to a test result (128) • About the test strip port light (64) 5 Routine operation Confirm Roche Diagnostics cobas® pulse · Software version 01.
Reviewing QC test results Reviewing QC test results You can review the QC test results that were performed on your instrument. The period of time for which a test result remains on an instrument is configurable. You view the QC results on the Local results screen.
Routine operation 127 3 In the QC results tab, tap the result that you want to view.
Adding comments to a test result Adding comments to a test result Comments enable you to add supplemental information to a test result. A button or a button in a test result screen indicates that you can enter comments for that result. All test types can be configured for comments to be entered for a test result. The color of the comment button indicates that comment entry is optional or mandatory.
Table of contents 129 In this chapter 6 Entering insulin information............................................... 131 Performing a linearity test................................................... 135 Performing an emergency glucose test......................... 139 Performing a proficiency test ............................................ 142 Performing an observed test sequence (OTS)............ 145 Adjusting the screen brightness and the volume level ......................................
Table of contents 6 Non-routine operation Page intentionally left blank. Roche Diagnostics cobas® pulse · Software version 01.03 · User Assistance · Publication version 1.
Non-routine operation 131 Entering insulin information You can record information about insulin administered to a patient. Your instrument can be configured to enter insulin information in 2 ways: • On the Tests screen by tapping the Insulin button. • After performing a Glucose test. You enter insulin information on 5 pages, between which you can move using Next and Previous buttons.
Entering insulin information 3 In the Confirm patient dialog box, tap the Confirm button if the patient details are correct. Confirm patient Patient ID Gender Age Date of birth Cancel Confirm 4 In the Date/time screen, the date and time default to the current date and time. To enter different values, do the following: • To change the date, tap the Date field and use the date picker to set a date, and then tap the Confirm button.
Non-routine operation 133 6 In the Insulin name screen, tap the appropriate name, and then tap the Next button. Insulin name Humulin R Novolin R Next 7 In the Insulin units screen do the following: • Using the number pad, tap the appropriate number. • Tap the button. • Tap the Next button. Insulin units Enter units Previous Next 8 In the Comments screen, select up to 3 comments and then tap the Next button. Comments I You can add a free-text comment of up to 20 characters.
Entering insulin information Insulin entries 9 In the Insulin entries screen, tap the Confirm button to complete the insulin information entry. I To change an entry, tap the corresponding button, make the amendment, and then tap the Confirm button. Changing certain entries (e.g. insulin type) may require associated entries to be changed.
Non-routine operation 135 Performing a linearity test Linearity tests help you check the function and accuracy of the entire system over the full range of specified values. A linearity test comprises the following main steps: • Checking the lot number of the linearity material. • Checking the lot number of the test strips. • Perform the test with a minimum of 3 linearity levels. i When performing a linearity test, the instrument does not perform a linear regression.
Performing a linearity test 3 In the Linearity test screen tap the Level 1 button. Linearity test Level 1 Required Level 2 Required Level 3 Required Level 4 Required Level 5 Required Level 6 Required 4 CAUTION! Close the test strip container immediately after removing the test strip. When prompted, insert a test strip by doing the following: • Remove the test strip from the test strip container and then close it. • Insert the test strip into the test strip port as far as it will go.
Non-routine operation Eject test strip Touch and hold 137 6 CAUTION! When you eject the test strip, ensure that you dispose of it in accordance with the applicable regulations. Never pull out the test strip. Hold the instrument vertically over the waste container. In the Eject test strip dialog box, touch and hold the button until the blue progress indicator has encircled the button. I The test strip port light color turns magenta. f The test strip is loosened and falls into the waste container.
Performing a linearity test 9 Tap the Proceed button. f The Linearity test screen is displayed, indicating if level 1 has passed or failed.
Non-routine operation 139 Performing an emergency glucose test You perform an emergency glucose test when you need to perform a glucose test but a patient ID is not available. Consequently, you skip patient identification and start testing directly to get the result as fast as possible. When your instrument is configured to perform an emergency glucose test, the Emergency button is available on the Tests screen.
Performing an emergency glucose test r To perform an emergency glucose test 1 In the Tests screen, tap the Emergency button. Tests Emergency 2 CAUTION! Close the test strip container immediately after removing the test strip. When prompted, insert a test strip by doing the following: • Remove the test strip from the test strip container and then close it. • Insert the test strip into the test strip port as far as it will go.
Non-routine operation Emergency glucose test Unknown patient Result Glucose 141 4 Before confirming the result, you can do any of the following: • Tap the button to view the result range details. • Tap the button to add comments for the result if required. 5 Tap the Confirm button. 95 mg/dL f The Eject test strip dialog box is displayed.
Performing a proficiency test Performing a proficiency test You perform blood glucose proficiency tests on samples provided by an independent organization and whose values are unknown to you. The results should be forwarded to the appropriate source after completing the test. The supplied samples are treated in the same manner as regular patient samples. The procedure outlined in this task contains the main steps that you perform in a proficiency test.
Non-routine operation 143 r To perform a proficiency test 1 In the Tests screen, tap the Proficiency button. Tests 2 In the Proficiency test screen, do one of the following • Scan the sample ID barcode. • Tap the tab, enter the sample ID, and then tap the Continue button. Proficiency 3 CAUTION! Close the test strip container immediately after removing the test strip. When prompted, insert a test strip by doing the following: • Remove the test strip from the test strip container and then close it.
Performing a proficiency test • • Proficiency test Result Glucose 34 mg/dL No comments If the Result screen is displayed, continue with step 6. If the Eject test strip button dialog box is displayed, perform step 8, and then steps 6 and 7. 6 In the Result screen you can do the following: • Tap the button to view the Range details dialog box. • Tap the button to add comments for the result if required. 7 Tap the Confirm button.
Non-routine operation 145 Performing an observed test sequence (OTS) The observed test sequence (OTS) enables an observer (supervisor) to assess and record a user’s performance (for certification purposes, for example). The observer watches the user performs a glucose test, after which they assess the user in terms of the: • Glucose test result • Observed test sequence Since the test involves the user and the observer, an indication of who performs each step is provided.
Performing an observed test sequence (OTS) Assessment Glucose test result 5 OBSERVER: In the Assessment screen, tap the Glucose test result option. Observed test sequence Add a comment (required) Confirm Glucose test result Valid 6 Non-routine operation Invalid Observed test sequence Passed Failed 6 OBSERVER: In the Glucose test result screen tap the appropriate option (Valid or Invalid.). 7 OBSERVER: In the Assessment screen, tap the Observed test sequence option.
Non-routine operation 147 Adjusting the screen brightness and the volume level You adjust the instrument brightness and volume to suit your working environment. r To adjust the screen brightness and the volume level 1 Tap Brightness and volume Brightness Volume > Brightness and volume. 2 To adjust the screen brightness do one of the following: • To increase the screen brightness, move the Brightness slider to the right. • To decrease the screen brightness, move the Brightness slider to the left.
Reviewing the audit trail Reviewing the audit trail You use the audit trail to review the events that have taken place on an instrument. Each audit trail event has an entry on the Audit trail screen in terms of a title (for example, Material expired) and the date and time at which the event took place. Behind each event is an Audit trail details screen which provides more information about the event (for example, ’Use material from a valid lot to continue’).
Non-routine operation Audit trail details User logon 149 4 In the Audit trail details screen, view the details of the event or error. 5 To return to the Audit trail screen. tap the button, Date and time 22-Mar-2020, 15:27 Event 6 Non-routine operation User logged on. Roche Diagnostics cobas® pulse · Software version 01.03 · User Assistance · Publication version 1.
Changing your user password Changing your user password User passwords guard against unauthorized access to the Glucose app on instruments. Periodically you may be required to change your password. When choosing a new password, follow your healthcare facility’s guidelines on password management. The new password will be required the next time you log on to the Glucose app. It might not be available on all instruments immediately after you have made the change.
Non-routine operation 151 Turning on the instrument You can turn on the instrument in one of two ways: j • Using the on/off button. • Placing the instrument in the charging station. m Instrument battery has sufficient charge r To turn on the instrument 1 Do one of the following: • Press and hold the on/off button for approximately 3 seconds. • Place the instrument in the charging station. I In each case an audible beep is made.
Turning off the instrument Turning off the instrument You should only turn off the instrument when it will not be used for a considerable period of time. i An instrument will not communicate with the DMS when it is turned off. Normally the instrument should be placed in the charging station when it is not being used. Ensure that you store the instrument correctly until it is next used.
Non-routine operation 153 Restarting the instrument You should only restart the instrument when instructed to. For example, by an error message. r To restart the instrument 1 Press and hold the on/off button until the Power off / Restart menu is displayed. I The instrument emits regular beeps while you do this. 2 Tap the Restart option. f The splash screen displays and the instrument restarts. 6 Non-routine operation f The splash screen displays again.
Setting up the charging station Setting up the charging station The charging station must be connected to a power source. When setting up the charging station, ensure that it is placed where it is easily accessible and within sufficient distance of a power outlet. i the charging station should not be located in direct sunlight, or where it might be easily knocked over, causing the instrument to fall out.
Non-routine operation 155 Lot management In this section About test strip lot distribution (155) Adding a test strip lot to the instrument (156) Reviewing test strip lot details on the instrument (158) Deleting a test strip lot from the instrument (159) Adding a QC or linearity lot to the instrument (160) Reviewing QC lots on the instrument (161) Deleting a QC lot from the instrument (162) About test strip lot distribution Test strip lot distribution enables test strips from new test strip lots to be use
Lot management 8 A nurse uses a test strip from the new lot. If configured, the nurse is first prompted to perform a QC test. 9 The test strips from the new lot can be used. y Digital lot data reception with manual release workflow 1 A new test strip lot is released and sent to the healthcare facility. 2 A corresponding lot data file is created and sent to cobas® infinity edge. 3 The lot data file appears as a QR code in the cobas® infinity edge portal.
Non-routine operation 157 The instrument can be configured to perform a QC test the first time a test strip from a new lot is inserted into the instrument. CAUTION! Instrument is not connected to cobas® infinity edge If the instrument is not connected to cobas® infinity edge you cannot add a test strip lot as described in this task. r You must scan the QR code generated in the cobas® infinity edge portal using the > Configuration by barcode option.
Lot management Reviewing test strip lot details on the instrument You can review the test strip lots on the instrument, as well as the details of an individual lot. The following information is available when reviewing an individual test strip lot: c • Lot No. • Expiry date • Content version • Type As required r To review test strip lot details on the instrument 1 In the Glucose app, tap Lot management Test strip lots Lot No. Type QC lots Expiry date > Lot management.
Non-routine operation 159 3 In the Test strip lot details screen view the information about the lot. Test strip lot details Lot No. Expiry date Content version Type Glucose Delete Deleting a test strip lot from the instrument You can delete a test strip lot from the instrument when it is no longer needed. Test strip lots are normally deleted from the instruments using the DMS.
Lot management 2 In the Lot management screen in the Test strip lots tab, tap the lot you want to delete. Lot management Test strip lots Lot No. QC lots Type Expiry date GLU GLU GLU GLU GLU Add test strip lot 3 In the Test strip lot details screen, tap the Delete button. Test strip lot details 4 In the Lot deletion dialog box, tap the Confirm button. Lot No. Expiry date f The lot is deleted from the instrument.
Non-routine operation 161 r To add a QC lot to the instrument 1 In the Glucose app, tap > Lot management. 2 In the Lot management screen, tap the QC lots tab. 3 On the QC lots tab, tap the Add QC lot button. Lot management Test strip lots Lot No. Type 4 Using the Scan bottle barcode screen, scan the barcode on a bottle from the new lot. QC lots f If you are adding a new linearity lot, the new lot is added to the QC lots tab and a confirmation message is displayed.
Lot management r To review QC lots on the instrument 1 In the Glucose app, tap > Lot management. 2 In the Lot management screen, tap the QC lots tab. 3 In the QC lots tab you can do the following; • Review the QC and linearity lots on the instrument. • Tap a lot to view its details. Lot management Test strip lots Lot No. QC lots Type Expiry date GLU QC level 1 GLU QC level 2 GLU Linearity GLU QC level 1 Add QC lot 4 In the QC lot details screen view the information about the lot.
Non-routine operation c 163 As required r To delete a QC lot from the instrument 1 In the Glucose app, tap > Lot management. 2 In the Lot management screen, tap the QC lots tab. 3 In the QC lots tab, tap the lot that you want to delete. Lot management Test strip lots Lot No. QC lots Type Expiry date GLU QC level 1 GLU QC level 2 GLU Linearity GLU QC level 1 Add QC lot 4 In the QC lot details screen, tap the Delete button.
Lot management 6 Non-routine operation Page intentionally left blank. Roche Diagnostics cobas® pulse · Software version 01.03 · User Assistance · Publication version 1.
Maintenance 7 Maintenance ................................................................................................. 167 Roche Diagnostics cobas® pulse · Software version 01.03 · User Assistance · Publication version 1.
Page intentionally left blank. Roche Diagnostics cobas® pulse · Software version 01.03 · User Assistance · Publication version 1.
Table of contents 167 Maintenance 7 About cleaning and disinfecting the instrument ....... 169 Acceptable cleaning solutions and disinfectants ...... 171 Cleaning and disinfecting the instrument .................... 172 Cleaning and disinfecting the charging station ......... 175 Cleaning and disinfecting the carry case ..................... 176 Replacing the battery ...........................................................
Table of contents 7 Maintenance Page intentionally left blank. Roche Diagnostics cobas® pulse · Software version 01.03 · User Assistance · Publication version 1.
Maintenance 169 About cleaning and disinfecting the instrument Ensure that you are fully familiar with the requirements for cleaning and disinfecting the instrument. Healthcare professionals should wear gloves and follow their facility’s infection control procedures when handling blood glucose testing equipment. The gloves worn during cleaning and disinfecting should be removed and hands washed thoroughly with soap and water before performing the next test.
About cleaning and disinfecting the instrument u Related topics • Cleaning and disinfecting the instrument (172) 7 Maintenance • Acceptable cleaning solutions and disinfectants (171) Roche Diagnostics cobas® pulse · Software version 01.03 · User Assistance · Publication version 1.
Maintenance 171 Acceptable cleaning solutions and disinfectants Only use recommended cleaning solutions and disinfectants to clean and disinfect the instrument. Before using a cleaning solutions and disinfectants on instrument components, refer to the product labelling for required contact time for cleaning solutions and disinfectants, and to ensure that the active ingredients are acceptable for use. Prepare all solutions per the manufacturer’s product labelling. Cleaning solutions Disinfectants • 0.
Cleaning and disinfecting the instrument Cleaning and disinfecting the instrument Cleaning and disinfecting the instrument ensures that it will function correctly and efficiently. Your instrument can be configured to notify you to clean it as follows: • After each test. • After a specified number of hours since the last time the instrument was cleaned. Clean the instrument to remove visible soil and organic material for safe handling and/or prior to disinfection.
Maintenance 173 u Acceptable cleaning solutions and disinfectants (171) r To clean and disinfect the instrument 1 Remove the instrument from the charging station. 2 Turn off the instrument and then place it on a level surface. 3 Gently wipe the surfaces (touch screen, instrument housing) with the cloth slightly dampened (not wet). For each surface, apply 3 horizontal and 3 vertical passes. Use an unused part of the towelette for each pass.
Cleaning and disinfecting the instrument 4 CAUTION! Wear gloves if spraying the instrument. It may get slippery when wet so take care not to drop it. Do not spray the instrument if it is docked in the charging station! Carefully wipe over the test strip port area, making sure that no liquid enters the test strip port. 5 Dry the instrument thoroughly with a the lint free cloth or gauze after cleaning. Visually verify that no solution is seen anywhere on the instrument after cleaning.
Maintenance 175 Cleaning and disinfecting the charging station Cleaning and disinfecting the charging station ensures that it will function correctly and efficiently. Clean the charging station to remove visible soil, and disinfect it as per your healthcare facility’s guidelines. c As specified by your healthcare facility.
Cleaning and disinfecting the carry case Cleaning and disinfecting the carry case Cleaning and disinfecting the carry case thoroughly ensures that nothing can be transmitted to its contents. After cleaning and disinfecting the carry case, ensure that it has dried thoroughly before using it again. c As specified by your healthcare facility.
Maintenance 177 Replacing the battery When the battery no longer functions correctly it should be replaced. When shipped, the battery is installed in the instrument. Unused batteries lose their charge over time and must be recharged before they can be used. After installing a new battery, the instrument should be charged for at least 8 hours (e.g., overnight) in the charging station before testing. Replace the battery within approximately 10 minutes to retain the date and time settings.
Replacing the battery r To replace the battery 1 Place the instrument face down on a level surface, and using a Torx screwdriver (T5), remove the two screws holding the battery compartment cover in place. 2 Remove the battery compartment cover from the instrument. The battery is now visible and connected to the instrument by a plug. 7 Maintenance 3 Using the plastic handle on the battery, carefully lift the battery out of the compartment. Roche Diagnostics cobas® pulse · Software version 01.
Maintenance 179 4 Take the new battery and place it in the compartment. Ensure that the battery connector plug sits securely in its socket. Using a thumb or forefinger, gently apply downward pressure on the connector plug to ensure it is completely in the socket. 5 Close the battery compartment with the cover and tighten the 2 screws. 7 Maintenance 6 Place the instrument in the charging station to ensure that the battery is charging. Roche Diagnostics cobas® pulse · Software version 01.
Replacing the battery 7 Maintenance Page intentionally left blank. Roche Diagnostics cobas® pulse · Software version 01.03 · User Assistance · Publication version 1.
Troubleshooting 8 Troubleshooting ........................................................................................... 183 9 Error messages............................................................................................. 195 Roche Diagnostics cobas® pulse · Software version 01.03 · User Assistance · Publication version 1.
Page intentionally left blank. Roche Diagnostics cobas® pulse · Software version 01.03 · User Assistance · Publication version 1.
Table of contents 183 Troubleshooting 8 Resetting the instrument..................................................... 185 Running a network status test .......................................... 186 Network status test steps ................................................... 188 Resetting a synchronization lockout............................... 190 Deleting instrument data .................................................... 191 List of audit trail events .....................................
Table of contents 8 Troubleshooting Page intentionally left blank. Roche Diagnostics cobas® pulse · Software version 01.03 · User Assistance · Publication version 1.
Troubleshooting 185 Resetting the instrument An instrument reset should only be performed when all other remedial actions have failed. For example, you might reset an instrument if it ’hangs’. r To reset the instrument 1 Place the instrument on a level surface. 2 Press the on/off button for at least 10 seconds and then release the button. f The instrument turns off and on again. f The splash screen is displayed.
Running a network status test Running a network status test You can use the Network status test option to help diagnose connectivity issues. The network status is given in terms of the following information: • Wi-Fi activated • Associated • Authenticated • Received IP: • Gateway: • DNS: • Contacted DMS • Connected to DMS • Contacted cobas infinity edge • Connected to cobas infinity edge Each network status item is tested.
Troubleshooting Network status test 187 2 In the Network status test screen, tap the Test button. f The test result is displayed. Test Wi-Fi activated Associated Authenticated Received IP: 10.0.0.100 Gateway: 10.0.0.1 DNS: 10.0.0.1 Contacted DMS Connected to DMS 8 Troubleshooting Contacted cobas infinity edge Roche Diagnostics cobas® pulse · Software version 01.03 · User Assistance · Publication version 1.
Network status test steps Network status test steps You use the Network status test option to help diagnose connectivity issues. Network status test Test You run the test by tapping > Instrument information > Network status test. The test result screen contains each of the test steps and indicates if the step passes or fails. Wi-Fi activated Associated The table contains each of the test steps, and indicates the following: Authenticated Received IP: 10.0.0.100 • Expected outcome (pass) 10.0.0.
Troubleshooting Test step Expected outcome Potential cause of failure 189 Solution Wrong Gateway configured (in Enter correct gateway address case of static IP address) Wrong DNS server configured Enter correct DNS server (in case of static IP address) address Gateway: IP address of a gateway Wrong gateway IP address (in Enter correct gateway address case of static IP address) DNS: IP address of a Domain Name Wrong DNS server IP address Enter correct DNS server Service for IP/ host name (in case o
Resetting a synchronization lockout Resetting a synchronization lockout You can use the reset synchronization lockout when a synchronization lockout has occurred on the instrument, and a synchronization lockout override is unavailable. This situation might occur due to a network failure, or other situations. The reset lasts for the period of time defined by the Synchronization lockout (in hours) configuration item, after which the synchronization lockout applies again.
Troubleshooting 191 Deleting instrument data This option deletes all data on the instrument, and effectively returns it to a default configuration status. This includes uninstalling all third party apps. This might be necessary when there was a problem with the instrument configuration. It may be necessary to remove the instrument data to comply with data protection and privacy policies when returning the instrument to the manufacturer, or passing it on to another healthcare facility.
List of audit trail events List of audit trail events Audit trail events enables you to view the activity that has taken place on the instrument. The table contains all of the events that can be recorded in the audit trail. ID Severity Audit trail details (GUI) UPM W User password was changed. SEP N Item name: - , previous value: , new value: . ERR Depends on individual level 1 message (C, W, N) e.g.