
User's Guide

WR-3700 Series User’s Guide
27
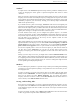
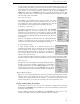
Initially, you have to add a trace (or more) to be recorded by clicking on the Add button.
Enter the appropriate data. You can also specify a colour to show the trace on the display.
A list of traces is shown in the drop-down list to the left of the ‘Add’ button. If you wish to
edit, disable/enable or delete any traces, select a trace and click on Edit, Disable/Enable or
Delete buttons respectively. When a trace is deleted, it cannot be recovered (except by re-
opening the same file if it was previously saved). If you wish to stop a trace, but not delete it,
click on the Disable button. You can re-enable it by clicking on the Enable button. The only
property of a trace that can be edited is the colour (select ‘invisible’ to hide the trace).
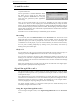
Enter an interval in the ‘Interval’ edit box (up to 99 hours, 59 minutes and 59 seconds). An
interval of 00:00:00 will sample the signal strength as quickly as possible (this depends upon
the number of enabled traces and the mode for each trace).
Click on Start to start recording.
When you have finished recording the signal strength, click on Stop and you can now save it
to a file.
If you close the recorder and the recording hasn’t been saved since it was last modified, you
will be asked if you want to save the changes before the recorder closes. If it is a new
(unnamed) file, you will be asked to enter a file name.
Saving and Loading Files
To save a file, select Save or Save as from the File menu. Enter a file name in the dialog box
that appears, and click on OK. If you select Save for a previously saved file, you will not be
prompted for a file name.
To load a previously recorded file, select Open from the File menu. Choose a file from the
dialog box and click on OK. You may continue recording to the end of the file, including
adding, editing and removing channels (the new data is appended to the existing file).
To create a new recording, select New from the File menu. If the current recording hasn’t
been saved since it was last modified, you will be asked if you want to save the changes.
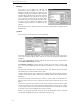
Options
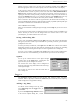
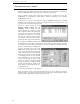
To set up the various features of the signal strength
recorder, click on the Setup button. A dialog box will
appear to allow you to configure the recorder.
The vertical scale of the display can be configured to
show only part of the range instead of the full 0-120 range
of the signal strength.
The recorder can also be set to mute the audio when it
does a sample run.
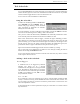
Logger
The WiNRADiO Logging facility can store the date, time, frequency, mode, level and a
comment. When a log entry is added from WiNRADiO, the current date, time, frequency,
mode and signal level is appended to the log.
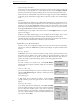
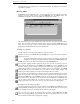
Adding a Log Entry
To add the current settings to the log, either
select Add to log from the Logger menu, or
press Ctrl+L.
If you have Prompt for log comment checked
in the General Options dialog box, a small