
Data Sheet

4/27/2018 OpenCR1.0
http://emanual.robotis.com/docs/en/parts/controller/opencr10/ 5/50
The defined xml file should be converted to the command code of the language you want
to use through the MavLink utility. Download the MavLink utility source code from github
below.
https://github.com/mavlink/mavlink/
It is written in Python and requires Python 2.7 or later. If it is not installed, add it.
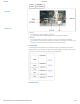
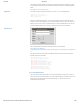
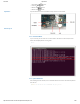
When you run MAVLink Generator, a GUI screen will appear, select the XML file already
created in XML, set the language to C, and set the protocol version to 1.0. If you select the
folder name for output in Out, and select Generate, a function header file that can use the
command added based on the xml file is created and can be used in the firmware
The final generated communication code can be seen in the link below.
https://github.com/ROBOTIS-
GIT/OpenCR/tree/master/arduino/opencr_develop/opencr_bootloader/common/msg/mavli
nk
The commands for the boot loader to download and execute the firmware through the
MavLink protocol are as follows.
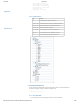
4. 3. 3. Download Sequence
The main function of the boot loader is to receive the firmware file from the PC, store it in
flash, and execute the stored firmware. The order of downloading is as follows, and you can
check how to proceed and how to proceed by looking at it. You can do the actual
implementation based on this.
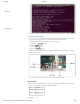
$ sudo apt-get install python-tk
$ sudo apt-get install python-future
$ python mavgenerate.py
void cmd_read_version( msg_t *p_msg );
void cmd_read_board_name( msg_t *p_msg );
void cmd_jump_to_fw( msg_t *p_msg );
void cmd_flash_fw_write_packet( msg_t *p_msg );
void cmd_flash_fw_write_begin( msg_t *p_msg );
void cmd_flash_fw_write_end( msg_t *p_msg );
void cmd_flash_fw_write_block( msg_t *p_msg );
void cmd_flash_fw_erase( msg_t *p_msg );
void cmd_flash_fw_verify( msg_t *p_msg );
void cmd_flash_fw_read_block( msg_t *p_msg );
OpenCR1.0
Back to Top ▲