
Data Sheet


4/27/2018 OpenCR1.0
http://emanual.robotis.com/docs/en/parts/controller/opencr10/ 30/50
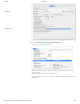
7. Examples
7. 1. LED
It is a built-in LED test on the OpenCR board.
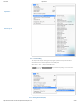
7. 1. 1. Code
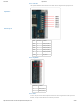
There are 5 LEDs available in OpenCR, USER1 ~ 4, and the LED connected to base 13 of
Arduino.
USER1 ~ 4 arduino pin numbers are defined as follows. When the corresponding pin is
output as High / Low, the LED turns on / off.
It is a code that sequentially turns on and off all the LEDs.
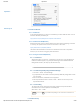
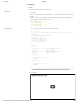
7. 1. 2. Result
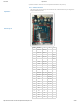
OpenCR Arduino Test - LED
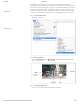
#define BDPIN_LED_USER_1 22
#define BDPIN_LED_USER_2 23
#define BDPIN_LED_USER_3 24
#define BDPIN_LED_USER_4 25
int led_pin = 13;
int led_pin_user[4] = { BDPIN_LED_USER_1, BDPIN_LED_USER_2, BDPIN_LED_USER_3, BDPIN_LED_USER_4
void setup() {
// Set up the built-in LED pin as an output:
pinMode(led_pin, OUTPUT);
pinMode(led_pin_user[0], OUTPUT);
pinMode(led_pin_user[1], OUTPUT);
pinMode(led_pin_user[2], OUTPUT);
pinMode(led_pin_user[3], OUTPUT);
}
void loop() {
int i;
digitalWrite(led_pin, HIGH); // set to as HIGH LED is turn-off
delay(100); // Wait for 0.1 second
digitalWrite(led_pin, LOW); // set to as LOW LED is turn-on
delay(100); // Wait for 0.1 second
for( i=0; i<4; i++ )
{
digitalWrite(led_pin_user[i], HIGH);
delay(100);
}
for( i=0; i<4; i++ )
{
digitalWrite(led_pin_user[i], LOW);
delay(100);
}
}
OpenCR1.0
Back to Top ▲