
Manual


Robotiq 3-Finger Adaptive Robot Gripper Instruction Manual
Robotiq inc. © 2008 - 2014 113
1.
2.
3.
a.
b.
4.
a.
b.
5.
6.
7.
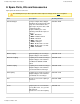
7.7 Gear replacement
Maintenance interval Tools you need Parts you need
2 M cycles or 1 year 2.0mm precision flat head
screwdriver
Dry tissue or towel
Retaining ring (snap ring) pliers
Philips screwdriver
Replacement gear kit provided by
Robotiq (one kit for each Finger
Gear to be replaced)
Heavy strength thread-locker (Lo
)ctite 263
See section to order Robotiq 3-Finger Adaptive Robot Gripper replacement parts.Spare Parts, Kits and Accessories
Note
Always turn off robot and Gripper power supply before performing maintenance operations on
the Gripper.
Warning
Always wear protective glasses when doing maintenance work on the 3-Finger Adaptive Robot
Gripper, especially when manipulating snap rings.
Procedure
Remove the Gripper from the robot following schematics in section .3.3 Mechanical connections
Clean the Gripper following instructions in .7.1 Gripper cleaning
Remove the Fingers B and C by :
Removing the snap rings at the base of the fingers using the snap ring pliers.
Gently pull the finger base axis, beware the finger will come off.
Remove Finger A by :
Removing the two (2) Palm Pad screws on each side of Finger A.
Then remove the proximal axis by holding Finger A and inserting a screwdriver or Allen key in the hole
on either side of the Finger A, beware the finger will come off.
On each Finger requiring replacement, remove the gear by unscrewing the three (3) 4-40 screws (note the
gear orientation), discard the 4-40 screws and gear.
Place the new gear in the previous position with exact orientation.
Screw in the new gear using the new 4-40 screws, applying heavy strength .Loctite 263