
Service manual


SECTION 10: COMMISSIONING
17
10.4.2 Commissioning the Gas Valves (all gases)
10.4.2.1 Check Burner Gas Pressure
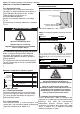
1. Loosen the screw cover of the outlet (burner)
pressure test point and connect a manometer.
2. With the burner firing, measure the pressure on
the manometer. To adjust the burner pressure,
remove the regulator cover from the valve and
turn the regulator adjustment screw to set the
required burner pressure as stated in the Tech-
nical Data Tables for the correct gas and model
on Page 6, Section 4.3.
NOTE: If the correct burner pressure cannot be
reached, then check the inlet pressure to the valve,
with the burner firing. See Technical Data Tables on
Page 6, Section 4.3 for inlet pressure requirement.
Do not continue to adjust the regulator if the
pressure is not changing.
If the inlet pressure is too low to allow correct burner
pressure setting, then the gas inlet pressure must be
corrected before completing the commission.
Check Gas Rate
1. After burner pressure adjustment, allow the
heater to operate for at least 15 minutes and
then re-check settings.
2. Remove the manometer and refit all covers to
the valve and tighten the screw of the outlet
pressure tap.
3. Check gas flow rate at gas meter.
10.5 Combustion Testing (all models)
The only adjustment to alter combustion
performance is burner pressure. Combustion quality
must be tested to prove correct heater operation.
Incorrect results will indicate faults with the
installation or appliance.
Combustion testing must be carried out with all
covers in place. The flue gas is sampled in the flue,
within 1 meter of the heater. The values of CO
2
should be between 6.5% to 8.0% for natural gas and
7.0% to 9.1% for LPG dependant upon model.
The CO will be up to 80 ppm (0.008%) dry, air free
dependant upon model. Temperature rise of the flue
gases above ambient should be approximately 160°
C to 180° C. Seal test hole in flue after testing.
Pressure Switch
The pressure switch is factory pre-set for each
model and is not adjustable.
10.6 Turning Off the Heater (all models)
Set the external controls to the off position and the
main burner will stop.
The fans will run until they are stopped automatically
by the fan thermostat.
Do not use Electrical Isolator for control of
heater. Electrical Isolator will switch off the fan.
Heat exchanger could be damaged. Warranty will
not cover damage to the heat exchanger if
operated improperly.
10.7 External Controls
External Controls may include time switch, room
thermostat and frost thermostat. Operate each
control to ensure that they function correctly. Set the
time switch (if fitted) and room thermostat to the
users’ requirements.
10.8 Complete the Commissioning
Ensure that all covers are fitted correctly and all test
points are properly sealed.
10.9 Instruction to the User
Explain the controls of the heater to the user
including how to turn it on and off, using the controls
fitted on site.
Give this manual to the user.
Ensure that the user is shown and understands the
importance of maintaining clearances to
combustibles and the user instructions on Page 18,
Section 11 through Page 19, Section 11.5 and all
warnings defined in this manual.
ODELJAK 10: UPOTREBA/PUŠTANJE U RAD
10.2.2 Postupak sa glavnim regulatorom
pritiska gasa na gorioniku (svi gasovi)
10.2.2.1 Provera pritiska gasa na gorioniku
1. Olabavite vrh zavrtnja izlaznog pritiska (gorionik) i
povežite manomatar
2. Izmerite pritisak u upaljenom gorioniku. Da biste
podesili pritisak gorionika uklonite poklopac sa
regulatora i okrenite podešavajući zavrtanj
regulatora kako je precizirano u Tabeli tehničkih
detalja za odgovarajući gas i model na strani 6,
odeljak 4.3
Napomena: Ukoliko se ne može dostići
odgovarajući pritisak onda proverite ulazni pritisak
(prema ventilu), sa upaljenim gorionikom. Vidite
Tabelu tehničkih podataka na strani 6,odeljak 4.3 u
vezi uslova ulaznog pritiska.
Ukoliko se pritisak ne menja nemojte dalje
podešavati regulator.
Ukoliko je ulazni pritisak suviše nizak za
podešavanje odgovarajućeg pritiska gorionika, mora
biti podešen pre puštanja potrošača u rad.
Provera protoka gasa
1. Nakon prilagođavanja pritiska gorionika, ostavite
potrošač da radi najmanje 15 minuta a onda opet
proverite.
2. Uklonite manometar, vratite poklopce na ventil i
stegnite zavrtanj na izlazu (outlet)
3. Proverite protok gasa na meraču
10.2.3 Testiranje sagorevanja (svi modeli)
Jedino podešavanje koje doprinosi promeni
karakteristika sagorevanja je podešavanje pritiska
gorionika. Kvalitet sagorevanja mora biti testiran u
cilju potvrde ispravnog rada potrošača.
Neodgovarajući rezultati ukazuju na grešeke tokom
instaliranja ili primene.
Testiranje sagorevanja mora se vršiti sa svim
poklopcima na predviđenim mestima. Gas u cevi za
sprovođenje gasova/dimnjaku isprobava se u samoj
cevi/dimnjaku na razdaljini do 1m od potrošača.
Vrednosti CO2 trebalo bi da budu između 65.7% i
8.0% za prisodni gas i od 76.8% do 9.2% za LPG u
zavisnosti od smeše.
Vrednosti CO će biti do 80pmm (0.008%) suv, u
zavisnosti od smeše. Porast temperature gasova u
dimnjaku trebalo bi približno da bude između 130 i
160 stepeni celzijusa. Nakon testiranja treba
plombirati otvor na cevi.
10.2.4 Prekidač za pritisak (presostat)
Prekidač za pritisak je fabrički podešen i nije ga
moguće naknadno prilagođavati.
10.2.5 Gašenje zagrejača (svi modeli)
Spoljne kontrole podesite na off i glavni gorionik će
biti stopiran.
Ventilatori će da funkcionišu dok ih automatski ne
zaustavi termostat.
Ne koristite električni izolator za kontrolu
potrošača. Električni izolator će zaustaviti
ventilatore. Razmenjivač toplote (heat
exchanger) bi mogao biti oštećen. Garancija ne
važi za oštećenje razmenjivača toplote
izazvanog neprikladnim rukovanjem.
10.2.6 Spoljne kontrole/upravljači
U spoljne kontrole/upravljače mogu da se uračunaju
vremenski prekidač, sobni termostat i termostat
hlađenja. Probajte svaku kontrolu da bste se uverili
da ispravno funkcioniše. Podesite vremenski
prekidač (ukoliko postoji) i sobni termostat u skladu
sa zahtevom korisnika.
10.2 Poslednje provere pre puštanja u rad
Proverite da li su svi poklopci podešeni na
odgovarajući način i da li su mesta na kojima je
vršeno testiranje plombirana.
10.3.1 Uputstvo korisniku
Objasnite koriniku način na koji se upravlja grejnim
telom i kako ga paliti i gasiti. Dajte mu ovaj
priručnik. Proverite da li je korisnik video i razumeo
informacije o značaju udaljenosti grejnog tela od
zapaljivih materijala i uputstvo korisniku na strani
18, odeljak 11 do strane 19, odeljak 11.5, kao i
upozorenja prezentovana u ovom priručniku.