
Installation & Assembly
LEDGER TABLE LAMP
ASSEMBLY INSTRUCTIONS FOR YOUR
ASSEMBLY INSTRUCTIONS
NOTE: Do not connect electricity until lamp is fully assembled.
1. Unpack all parts and remove packing materials. Place lamp base on a level surface.
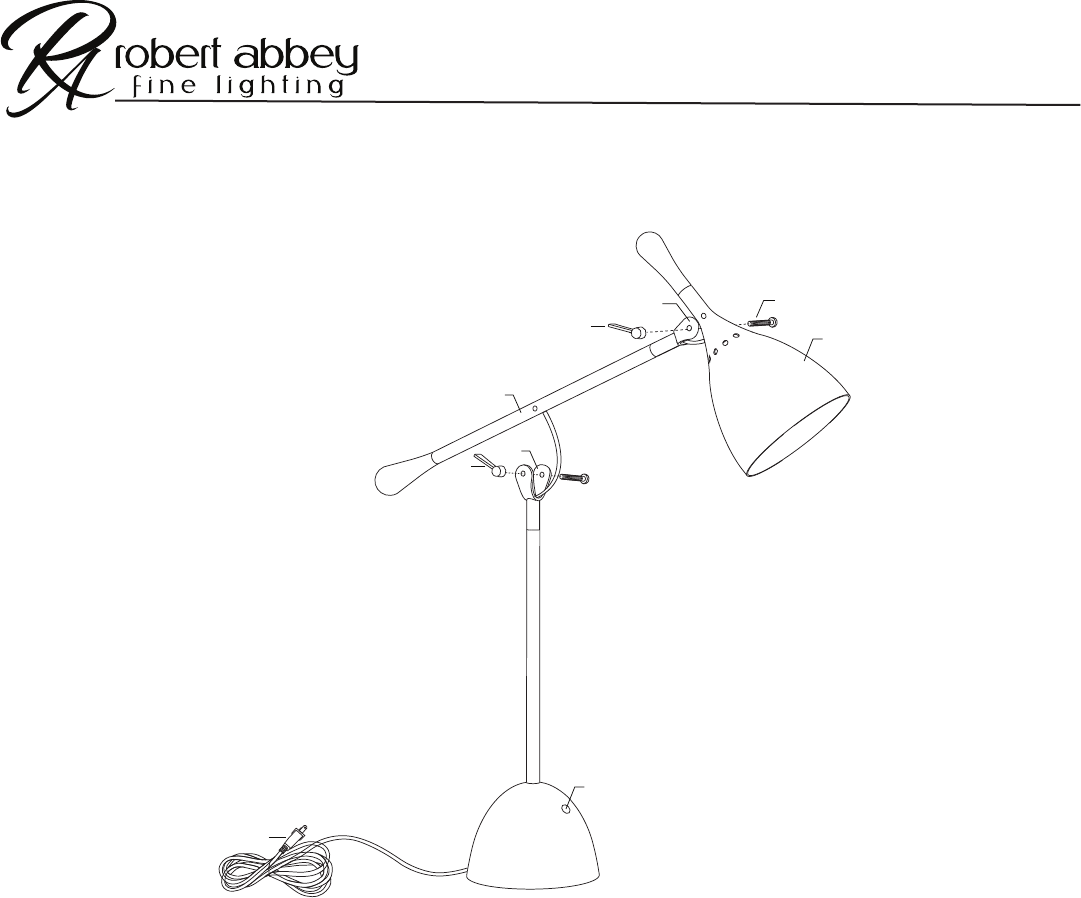
2. Place shade (A) into bracket (C), and align holes. Slide bolt (B) through holes and secure shade in place by threading knob (D)
onto bolt until hand tight.
3. Place arm (E) into bracket (F) and align holes. Slide remaining bolt (B) through holes and secure arm by threading remaining
knob (G) onto bolt until hand tight.
4. To adjust position of arm (E) loosen knob (G). Move arm (E) into desired position. Turn knob (G) until hand tight to secure arm
position.
5. To adust position of shade (A) loosen knob (D). Move shade (A) into desired position. Turn knob (D) until hand tight to secure
shade position.
6. Insert one 60W MAX. Type B, medium base bulb into the socket located inside of shade (A).
7. Insert polarized plug (I) into wall outlet.
8. Control power to the xture by operating switch (H).
IMPORTANT SAFETY INSTRUCTIONS:
* This lamp has a polarized plug (one blade is wider than the other) as a feature to reduce the risk of electric shock. This plug will t in
a polarized outlet only one way. If it does not t fully in the outlet, reverse the plug. If it still does not t, contact a qualied
electrician. Do NOT alter the plug.
* Do not use with an extension cord unless the plug from the lamp can be fully inserted itno the extesion cord receptacle.
* Switch power o and remove plug from the wall outlet before replacing the bulb.
*This lamp is UL rated for dry locations.
(A)
(B)
(C)
(D)
(E)
(F)
(G)
(H)
(I)
1341
*To clean, use a so dry cloth. Do not use any chemical or abrasive cleaners.*