
Operating instructions


Table Of Contents
- Operation
- Dimensions and assembly
- Dimensions DC 12
- Dimensions of the basic housing DC 12
- Assembly DC 12
- 1. Loosen the screw of the front cover.
- 2. Take off the front cover.
- 3. With a screwdriver lift the base from the controller-print, see illustration right.
- 1. Hold the controller base to the assembly place and mark with an indication pin the mounting holes.
- 2. Drill the mounting holes and provide them with pegs.
- 3. Place the controller base, fit the screws (do not tighten), align the base, then drive the mounting screws fully home.
- Start up
- Troubleshooting
- Technical data
- Index
5
1 Operation
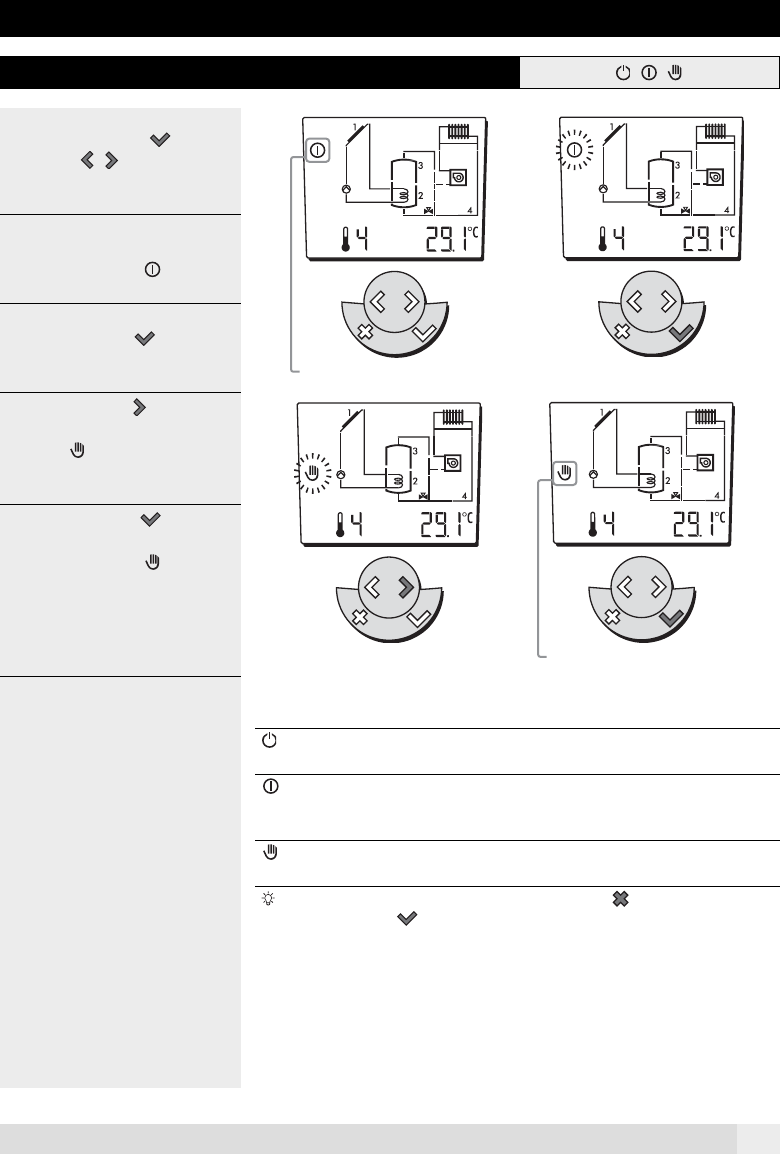
1.1 How to change operating modes
You can select automatic or manuel ope-
rating by using the enter key and
the settings keys.
1 2
Example:
1. when the controller is in automatic
mode the symbol is
.
2. To change the operating mode to
manual, press the
. enter key.
The operating mode now flashes.
3. Press the settings key to select
the operating mode manual until the
symbol
flashes.
3 4
4. Press the enter key .
The controller is now in manual ope-
rating mode and the symbol is
lit.
Operating modes:
Standby • System off, only the protective functions
are activ
Automatic mode • The controller functions are active do to
the selected hydraulic variant and set
-
tings
Manual • The functions can be tested and adju-
sted manually
When changing operating modes you may press the cancel key before you
have pressed the enter key and the controller will then revert to the pre-
vious operating mode.
Automatic mode
Manual
A0805