
Owner's Manual
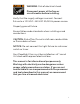
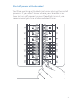


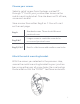
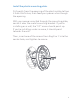
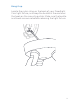
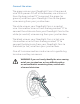
Table Of Contents
- User Guide
- Quick Start
- Shut off power at the breaker!
- Prep your Floodlight Cam for installation
- Remove your existing floodlight
- Choose your screws
- Attach the metal mounting bracket
- Install the plastic mounting plate
- Hang it up
- Connect the wires
- Mount the light fixture
- Restore power at the breaker
- Complete setup in the Ring App
- Review, share and download
- What is Ring Protect
- Quick Start
- Important Product Information

10
Connect the wires.
The green wire on your Floodlight Cam is the ground
wire. With power still o at the breaker, use a wire nut
from the bag marked “G” to connect the green (or
ground) wire from your Floodlight Cam to the green
wire coming from your junction box.
The white wire on your Floodlight Cam is a neutral
wire. Use another wire nut from the bag marked “G” to
connect the white wire from your Floodlight Cam to the
white (or neutral) wire coming from your junction box.
The black wire on your Floodlight Cam is a hot wire.
Use another wire nut from the bag marked “G” to
connect the black wire from your Floodlight Cam to
the black (or hot) wire from your junction box.
Give all 3 wire connections and wire nuts a gentle tug
to make sure they are secure.
WARNING: If you can’t easily identify the wires coming
out of your junction box, or have diculty with or
are uncomfortable connecting them, consult with
a licensed electrician.