
User manual


RIGOL
DP700 Quick Guide 9
English
5
.
Power on the instrument
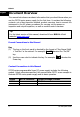
Press the Power key , and then the instrument is launched and
begins to perform the self-inspection. If the instrument passes the
self-inspection, the welcome interface is displayed; otherwise,
self-inspection failure information about corresponding items (including
the analog board, OVP, OCP, fan, and temperature) will be displayed.
Tip
After powering off the instrument, please wait for at least 2 s to power
it on again.
6
.
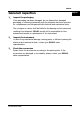
Perform the output check
Perform the output check to ensure that the power supply can output the
rated values and properly respond to the operations on the front panel.
Note: Before checking the current output, you should complete the
voltage output check first.
Check the voltage output: verify the basic voltage functions without a
load.
(1) Press
to power off the instrument.
(2) Ensure that no load is connected to the channel output terminals on
the front panel. Then, press
to power on the instrument, and
check whether the voltage between the positive terminal (+) and
negative terminal (-) of the channel output is 0 V.
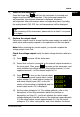
(3) Press On/Off to turn on the channel output.
At this time, the actual output status (actual
output voltage (V), actual output current (A),
and actual output power (W)) on the left
section of the interface is highlighted, and the
actual output mode (CV) is displayed.
(4) Set the output voltage to 0 V (For setting methods, refer to the
descriptions of the help information below the interface or
descriptions on Page 11.), and check whether the actual output
voltage displayed on the left section of the interface is approximately
0 V, the actual output current approximately 0 A. Set the output
voltage to 30 V (max. rating value), and check whether the actual