
User manual
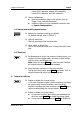
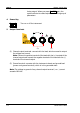
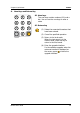

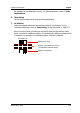
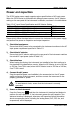
Table Of Contents
- Guaranty and Declaration
- Safety Requirement
- DP700 Series Overview
- Document Overview
- Chapter 1 Quick Start
- Chapter 2 Front Panel Operations
- Chapter 3 Remote Control
- Chapter 4 Troubleshooting
- Chapter 5 Specifications
- Chapter 6 Appendix
- Index
RIGOL Chapter 1 Quick Start
1-14 DP700 User’s Guide
Power-on Inspection
The DP700 series power supply supports various specifications of AC input power.
When the DP700 series is connected with different power sources, the AC selector
setting on the rear panel of the instrument is different, as shown in the table below.
Table 1-2 AC Input Power Specification and AC Selector Setting
AC Input Power
AC Selector
100 Vac x (100% ± 10%), 50 Hz to 60 Hz
100 Vac
120 Vac x (100% ± 10%), 50 Hz to 60 Hz
120 Vac
220 Vac x (100% ± 10%), 50 Hz to 60 Hz 220 Vac
240 Vac x (100% ± 10%) (max: 253 Vac), 50 Hz to 60 Hz 240 Vac
Please strictly follow the steps below to connect the instrument to the power supply,
and perform the power-on inspection and output inspection.
1. Check the input power
Ensure that the AC power to be connected to the instrument conforms to the AC
input power requirement specified in Table 1-2.
2. Check the AC selector
Ensure that the AC selector setting on the rear panel of the instrument matches
the actual AC input power (refer to Table 1-2).
3. Check the fuse
When leaving the factory, the instrument has installed a fuse that conforms to
the standard of the destination country. When the AC Selector is set to 100 Vac
or 120 Vac, Fuse T5A is used; when the AC Selector is set to 220 Vac or 240 Vac,
Fuse T2.5A is used.
4. Connect the AC power
Plug the specified power cord available in the accessories into the AC power
supply connector of the instrument, and then connect the instrument to the
properly grounded AC power.
WARNING
To avoid electric shock, ensure that the instrument is correctly
grounded.
5. Power on the instrument
Press the Power key , and then the instrument is launched and begins to
perform the self-inspection. If the instrument passes the self-inspection, the
welcome interface is displayed; otherwise, self-inspection failure information
about corresponding items (including the analog board, OVP, OCP, fan, and
temperature) will be displayed.