
Operation Manual


Making your very rst 3D print – Quick Print Guide
4
1. Making your very rst 3D print
– Quick Print Guide
We know you cannot wait to start 3D printing! In this guide we will take you on the easiest journey
from box to print.
This section contains the following information:
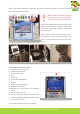
1.1. Unpacking your Creatr HS and nding the right place for it
1.2. Getting to know your printer
1.3. Plugging in your Creatr HS
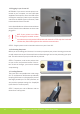
1.4. Preheating the printer
1.5. Loading lament
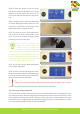
1.6. Checking and adjusting the bed
1.7. Printing
1.1. Unpacking your Creatr HS and nding the right place for it
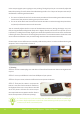
Unpacking your Creatr HS carefully, according to the following steps, ensures that the machine
stays calibrated (although in some cases decalibration might occur during transport). These steps
you only have to follow when your brand new Creatr HS arrives at your doorstep for the rst time.
Before you start, make sure that you have cleared a spot where you want to place the printer. We
advise you to nd a place at room temperature, where there is no draft (for example next to a win-
dow) and where the printer cannot get wet. Choose a surface which is sturdy (so the printer cannot
move) and supports the weight of the machine. It is useful to have another set of hands to help out,
the machine is quite heavy.
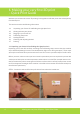
STEP 1: Cut the tie cords and lift the top of the box from where the handles are.
STEP 1: Cut the tie cords and lift the top box.