
Operation Manual


Creating your own printable le: from STL to gcode
13
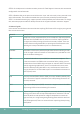
TIP: The standard print settings for each material are divided in categories: there is
a trade-off between quality and speed of getting a part. Before printing you need to
ask yourself what is of more importance to you: would you like to receive your part as
fast as possible with a rougher nish? Choose fast printing. If you want to have a very
detailed print with a nice nish, you can choose high quality printing. If you want the best of both
worlds, use medium printing.
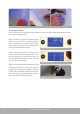
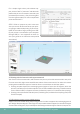
STEP 2: Make sure the 3D model that you are
using is saved as le format .stl. Import your stl
le by clicking on “Import” in the models sec-
tion.
STEP 3: Double click on the model name to
scale and position your model according to your
requirements.
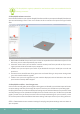
TIP: for successful printing, be sure to position the print on a point where the sticker is
not damaged. To move a print, hold the control and left mouse button down.
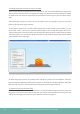
TIP: If your stl model has overhang angles of more than 45 degrees, the printer will not
be able to print it without a support structure (simply because the printer cannot lay down layers of
plastic in mid-air). If you want to learn how to add support structures, revert to section 3.5.
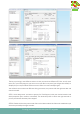
STEP 4: From the downloaded standard settings you now need to determine which proper prole
you want to use. To do this the following choices must be made:
• Which lament material is used in your right and in your left extruder
• Which (part of the) model should be printed with the right or left material
• Which extruder should print support if this is needed
• Should the print be fast, medium, or should it be detailed
STEP 2: Import STL
STEP 3: adjust the model setting to your requirements