
User Manual - Version 2.3 User Manual


58 Counterpart User Manual
5.6 WeighVault
WeighVault is a PC program which allows Counterpart users to add, edit, and access IDs over a network
connection. WeighVault surpasses the
Counterpart's 150 ID limitation and eliminates front-panel entry of ID
parameters.
In and Out softkeys can be used to update the ID quantity with inventory changes. Setting up softkeys
is explained in Section 1.7 on page 5. If WeighVault is enabled the inventory changes are also sent to the
WeighVault PC.
It also collects data as transactions occur, and provides detailed transaction and
productivity reports which can be
exported to Excel, Word, or PDF. For WeighVault to function, the following criteria must be met:
• Use on-board Ethernet or wireless option (PN72117 Et
hernet TCP/IP Interface Installation and
Configuration Manual)
• IP address assigned to the
Counterpart (Refer to PN72117 Ethernet TCP/IP Interface Installation and
Configuration Manual) (If using option)
• WeighVault enabled in the
Counterpart menu (ETHERNET menu; see Section 3.6.5 on page 36).
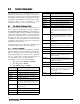
Table 5-1 lists parameters that must be entered
in order for WeighVault to work.
Table 5-1. WeighVault Default Settings
Parameter Default
DHCP Consult with network administrator
IP ADDRESS Consult with network administrator
NET MASK Consult with network administrator
PORT Port 10001
REMOTE IP IP address of computer running W
eighVault - Must be Static
REMOTE PT 5466
VAULT Onboard
or external if using a wireless option
Note
The above mentioned default settings only apply if the VAULT parameter is set to ONBOARD. See Figure
3-10 on page 34.
5.6.1 Demo Setup of Counterpart and WeighVault
Install WeighVault from the DVD. There are two setup programs that need to be installed.
PC Setup for WeighVault
This setup was completed in Windows 7, however the basic information about setup is applicable to other
computer operating systems.
1. Use an Ethernet crossover cable to connect the Cou
nterpart and PC. Normal straight-through or patch
cables will not function correctly.
2. Open the Control Panel and click
Network and Internet.
3. Open the Local Area Connection and go to
Properties » Internet Protocol.
Ensure Version 4 - TCP/IPv4 is checked.
4. Choose
Assign IP Address.
5. Check with the network administrator for an available
IP address. In these instructions, we will use the
following IP address:
192.168.0.2.
6. Click on Subnet Mask field - and this will fill
screen in automatically.
7. Click OK and close each window.