
Quadra User's Guide

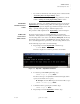
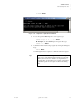
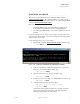
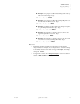


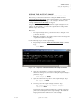
Table Of Contents
- Table of Contents
- Introduction
- Installation and Setup
- Operations
- In This Chapter
- Introduction to Operations
- Setting Output Format
- Testing Outputs
- Selecting an Input Source
- Enabling and Disabling Outputs
- Understanding Auto Sync
- Cropping an Image
- Zooming an Image
- Panning an Image
- Sizing the Output Image
- Using Position
- Adjusting Brightness and Contrast
- Adjusting Hue and Saturation
- Adjusting Sharpness
- Creating a Background
- Creating a 2x2 Monitor Wall
- Command Line Interface
- Image Concepts
- Communications Setup
- Connector Types
- Firmware Upgrades and Troubleshooting
- Technical Specifications

OPERATIONS
Cropping an Image
350-7951 Quadra User’s Guide 39
. . . . .
S Example: Crop input 1 to 800 x 600, starting at the exact top
left corner of the image. Type:
wsr 1 0 0 800 600 Enter
S Example: Crop input 2 to 300 x 300, starting 500 pixels over
from the left, and 10 lines down. Type:
wsr 2 500 10 300 300 Enter
S Example: Assuming a 1280 x 1024 source image for input 4,
crop off 100 pixels around the edge. Type:
wsr 4 100 100 1080 824 Enter
S Example: From input 1’s current position, zoom in to the
upper left quadrant in 5 seconds. Type:
wsr 1 0 0 400 300 5 Enter
S Example: From input 1’s current position, zoom out to full
screen in 8.2 seconds (assuming 800 x 600). Type:
wsr 1 0 0 800 600 8.2 Enter
Please note:
• Remember that the horizontal and vertical sizes can be adjusted
independently. For example, if you simply want to “stretch” an image
horizontally, enter the same values for x, y and height, and simply
change the width.
• In Appendix A, refer to the “Image Rectangles” section for addition
details on WSR and WDR commands.