
Quadra User's Guide
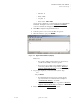

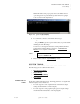
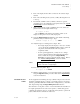
Table Of Contents
- Table of Contents
- Introduction
- Installation and Setup
- Operations
- In This Chapter
- Introduction to Operations
- Setting Output Format
- Testing Outputs
- Selecting an Input Source
- Enabling and Disabling Outputs
- Understanding Auto Sync
- Cropping an Image
- Zooming an Image
- Panning an Image
- Sizing the Output Image
- Using Position
- Adjusting Brightness and Contrast
- Adjusting Hue and Saturation
- Adjusting Sharpness
- Creating a Background
- Creating a 2x2 Monitor Wall
- Command Line Interface
- Image Concepts
- Communications Setup
- Connector Types
- Firmware Upgrades and Troubleshooting
- Technical Specifications

INSTALLATION AND SETUP
System Timing
350-7951 Quadra User’s Guide 19
. . . . .
With the IP address and port properly entered, the Telnet window
opens and Quadra responds with the product name and copyright
notice as shown in the sample below.
Figure 2-5. Quadra
Login (Sample)
4. To confirm the connection, in the Telnet window type:
ID
… and press Enter. Quadra responds with a variety of product details
including the unit’s IP settings.
You can now control Quadra directly by issuing ASCII commands
from the Telnet terminal. Refer to Chapter 4, “Command Line
Interface” for a complete command list.
5. Please continue with the “System Timing
” section.
. . . . . . . . . . . . . . . . . . . . . . . . . . . . .
SYSTEM TIMING
The following topics are outlined in this section:
• Introduction to Timing
• Output Timing
• Advanced Output Timing
• Input Timing
INTRODUCTION TO
. . . . . . . . .
TIMING
For the best visual results with Quadra, the timing parameters of a signal must
match the display device. Please note:
• For each of Quadra’s four output channels, each channel’s output
settings should match the connected display.
• For each of Quadra’s four graphics inputs, Quadra’s input settings
should match the characteristics of the input signals.
Note To close a Telnet session, type EXIT or use the keystroke
sequence “Control + D.”