Quadra User’s Guide
.....
..... DOCUMENT ............................. • Quadra User’s Guide • • • P/N 350-7951 Revision Draft 1.05A, June 29th 2004 Printed in U.S.A. COPYRIGHT ............................. © 2004 RGB Spectrum, Inc. All rights reserved. This document, in whole or in part, may not be reproduced, translated or reduced to any machine-readable form without prior written approval from RGB Spectrum, Inc. NOTICE .............................
..... LIMITED W ARRAN TY ............................. RGB Spectrum (RGB) warrants that this product will be free from defects in material and workmanship, under normal use and service when correctly installed and maintained, for a period of one (1) year from date of shipment. RGB’s liability under this warranty is limited solely to replacing, repairing or issuing credit for any product which is shown to be defective during the warranty period.
..... T ABLE OF C ONTENTS .................................. Chapter 1 Introduction . . . . . . . . . . . . . . . . . . . . . . . . . 1 Product Overview . . . . . . . . . . . . . . . . . . . . . . . . . . . . . . . . . . . . In This Guide . . . . . . . . . . . . . . . . . . . . . . . . . . . . . . . . . . . . . . . System Features . . . . . . . . . . . . . . . . . . . . . . . . . . . . . . . . . . . . . A Word about Inputs . . . . . . . . . . . . . . . . . . . . . . . . . . . . . . . . . .
..... Automatically Loading Output Parameters . . . . . . . . . . Manually Loading Output Parameters . . . . . . . . . . . . . . Testing Outputs . . . . . . . . . . . . . . . . . . . . . . . . . . . . . . . . . . . . . Selecting an Input Source . . . . . . . . . . . . . . . . . . . . . . . . . . . . . Enabling and Disabling Outputs . . . . . . . . . . . . . . . . . . . . . . . . Understanding Auto Sync. . . . . . . . . . . . . . . . . . . . . . . . . . . . . Auto Sync Overview . . . . . . . . . . . . . . .
..... Miscellaneous Commands . . . . . . . . . . . . . . . . . . . . . . . Miscellaneous Commands Descriptions . . . . . . . Timing Parameters . . . . . . . . . . . . . . . . . . . . . . . . . . . . . . . . . . Factory Timing List . . . . . . . . . . . . . . . . . . . . . . . . . . . . . . . . . Appendix A Image Concepts . . . . . . . . . . . . . . . . . . . . . 82 In This Appendix . . . . . . . . . . . . . . . . . . . . . . . . . . . . . . . . . . . Image Rectangles . . . . . . . . . . . . . . . . . . .
..... Appendix D Firmware Upgrades and Troubleshooting 106 In This Appendix . . . . . . . . . . . . . . . . . . . . . . . . . . . . . . . . . . 106 Firmware Upgrades. . . . . . . . . . . . . . . . . . . . . . . . . . . . . . . . . 107 Firmware Upgrade Prerequisites. . . . . . . . . . . . . . . . . 107 Downloading Firmware . . . . . . . . . . . . . . . . . . . . . . . . 107 Transferring Firmware . . . . . . . . . . . . . . . . . . . . . . . . .
I NTRODUCTION .................................. 1 PR OD U C T O VE R V IE W ............................. The Quadra is a high performance, four channel multi-format up/down converter with a full range of digital and analog input and outputs. The unit provides four independent processing channels, each with the ability to select between three standard inputs and one optional input.
..... INTRODUCTION In This Guide A command line interface provides easy access to all Quadra functions. This interface is supported remotely by either RS-232 serial communications or by network control (Ethernet 10/100 BaseT). IN THIS GUIDE ............................. The following chapters are included in the Quadra User’s Guide: • Chapter 1, “Introduction” outlines the guide, describes Quadra’s system features, and discusses inputs, outputs and scan rates.
..... INTRODUCTION A Word about Inputs • Image Manipulation — Any portion of an input image can be extracted and expanded to fill the output raster. Image characteristics such as brightness, saturation and gamma can be adjusted. The system also enables you to zoom, pan and freeze an input source, and if the size of the output image is reduced, the background can be black, a solid color, or a shaded color.
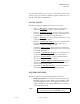
..... INTRODUCTION A Word about Outputs identical input and output channels. Figure 1-2. Quadra block diagram A WORD ABOUT OUTPUTS ............................. As standard, Quadra provides four identical DVI-I output connectors — one per output channel. Each output connector is dedicated to a specific input channel, and each output connector supports one analog or one digital output.
..... INTRODUCTION Quadra Control • Maximum number of lines that can be processed These factors are all interrelated with the system’s refresh rate (also known as “frame rate”). When configuring a channel’s output, please keep the following rules of thumb in mind: • Sample rate is directly proportional to the product of: (# of pixels per line) x (# lines) x (refresh rate) Therefore, if a higher refresh rate is desired, the sample rate must be increased.
..... INTRODUCTION Feature Summary • The RS-232 serial port connects to an ASCII terminal, any computer with a serial port or an external device such as a touchpad. Commands are sent from the terminal or computer to the Quadra. • The Ethernet port (10/100BaseT) allows a Quadra system to be connected to a local area network (LAN) or directly to a PC that is properly equipped with a network card. Note that direct connection requires the use of an Ethernet hub or Ethernet cross-over cable. Figure 1-3.
..... INTRODUCTION Feature Summary ~ Analog RGB output up to 1600 x 1200 @ 75Hz. ~ DVI output up to 1600 x 1200 @ 60Hz. ~ Adjustable output gamma to optimize performance with a variety of display technologies. • Special features: ~ High quality filtering. ~ Pan, zoom and freeze each input. ~ Colored and shaded backgrounds. ~ Export / import system settings. ~ Support for EDID. ~ Wall mode.
I NSTALLATION AND S ETUP .................................. 2 I N T H I S C H A PTE R ............................. This chapter provides instructions for installing and setting up your Quadra system. The following topics are discussed: • • • • • • • • Standard Supplied Components Optional Items Rack Mounting Front Panel Rear Panel Installation System Control Setup System Timing ST ANDARD SUPPL IED COMPONEN TS .............................
..... INSTALLATION AND SETUP Optional Items O PT I O N A L I T E M S ............................. RGB Spectrum can optionally provide additional equipment that may be useful in installing and operating your Quadra system. The items listed below may be purchased separately from RGB Spectrum. Table 2-2. Optional Items Item Part Number Description VGA Cable 520-0298-1 15-pin HD Male to 15-pin HD Male, 6 ft. Use to connect your analog output/inputs to sources with a female VGA connector.
..... INSTALLATION AND SETUP Front Panel FRONT PA NEL ............................. 2 3 Alarm Activity Link 4 Quadra R G B SPECTRUM 5 I 1 O The figure below illustrates a front panel view of the Quadra. 6 Figure 2-1.
..... INSTALLATION AND SETUP Rear Panel REA R PAN EL ............................. The figure below shows a view of the Quadra rear panel. 1 2 3 4 5 DVI-1 DVI-2 DVI-3 DVI-4 Holes Holes RGB-1 Composite-1 S-Video-1 RGB-2 Holes Composite-2 S-Video-2 RGB-3 6 7 10 Output - 3 Output - 4 RS-232 Output - 1 Output - 2 10/100 BaseT 8 9 11 Holes Composite-3 S-Video-3 RGB-4 Composite-4 S-Video-4 Figure 2-2.
..... INSTALLATION AND SETUP Rear Panel ~ Composite Video — One BNC female connector is provided for NTSC or PAL composite video, a signal that typically originates from a VCR or camera. An adapter may be required when connecting this input to consumer equipment, which typically uses a phono connector for composite video (professional equipment typically uses BNC connectors).
..... INSTALLATION AND SETUP Rear Panel can connect this output to a DVI-capable monitor or an analog RGB monitor. 7) Graphic Output 2 One DVI-I multi-pin connector is provided for Graphic Output 2, which is identical to Graphic Output 1. 8) Graphic Output 3 One DVI-I multi-pin connector is provided for Graphic Output 3, which is identical to Graphic Output 1. 9) Graphic Output 4 One DVI-I multi-pin connector is provided for Graphic Output 4, which is identical to Graphic Output 1.
..... INSTALLATION AND SETUP Installation INST ALLATION ............................. This section provides Quadra installation instructions. All connections are made to the rear of the Quadra chassis. Refer to Figure 2-2 for the location of each connector. Note Ensure that Quadra is rack mounted before continuing. Refer to the “Rack Mounting” section for instructions. Use the following steps to install the Quadra: 1. Connect Power — Connect a power cord to the AC Power Connector.
..... INSTALLATION AND SETUP Installation ~ To connect to a monitor with an analog RGB input, use an adapter that converts from the DVI connector directly to a 15pin D-sub connector. This adapter is provided as a standard item with your Quadra. As an alternative, standard cables are readily available to convert from the DVI connector to either 15-pin D or BNC connectors. Remember that each output connector supports both analog and DVI signals.
..... INSTALLATION AND SETUP System Control Setup SYSTEM CONTROL SETUP ............................. The following topics are discussed in this section: • • • Note METHODS OF ......... COMMUNICATIONS Methods of Communications RS-232 Serial Control Setup Ethernet Control Setup Before applying power, ensure that all cables are connected correctly and that Quadra’s power switch is OFF. With all cables properly connected, turn the Quadra ON.
..... INSTALLATION AND SETUP System Control Setup ~ ~ ~ ~ Data bits: 8 Parity: None Stop bits: 1 Flow control: XOn / XOff Quadra can be configured to operate at baud rates from 9600 baud to 115 kbaud. In Chapter 4, refer to the “Serial Port Commands” section for details about changing baud rates. 4. Click OK to display the Hyperterminal window. 5. Select the “phone” icon to connect the PC to the Quadra. 6. When the window is open, press ENTER. Figure 2-4.
..... INSTALLATION AND SETUP System Control Setup ETHERNET . .CONTROL . . . . SETUP ... Ethernet control enables you to use a Telnet session to control Quadra using a command line interface. Quadra includes an internal Telnet server which works with standard Telnet clients. A Telnet client is included as a standard item with Windows® operating systems. Note If your system cannot locate the Telnet client during the following procedure, there is a most likely a “path” problem.
..... INSTALLATION AND SETUP System Timing With the IP address and port properly entered, the Telnet window opens and Quadra responds with the product name and copyright notice as shown in the sample below. Figure 2-5. Quadra Login (Sample) 4. To confirm the connection, in the Telnet window type: ID … and press Enter. Quadra responds with a variety of product details including the unit’s IP settings. You can now control Quadra directly by issuing ASCII commands from the Telnet terminal.
..... INSTALLATION AND SETUP System Timing Quadra can be used with both standard and non-standard display devices. You can allow Quadra to automatically “learn” the display’s timing parameters, or you can enter your own. Internally, Quadra keeps an “Factory Timing List” that contains both factory-defined and user-defined timing values. • The first 99 entries in the Factory Timing List are reserved for factory defined entries. • • Entries from 100 to 160 are reserved for user-defined values.
..... INSTALLATION AND SETUP System Timing “Factory Timing List” in Chapter 4. Use the following steps to set up the Quadra’s output timing. Note This setup procedure applies to both analog and digital displays. 1. Select the output channel and display device for which you want to set up timing. 2.
..... INSTALLATION AND SETUP System Timing 6. Turn on the display monitor that is connected to the selected output channel. 7. Turn on the controlling device (such as your PC), allowing time for it to boot up. 8. From the PC, establish a serial (or Telnet) connection to Quadra (depending upon your configuration). If required, refer to the “System Control Setup” section for instructions. 9. With communications properly established, turn on the “Grid” test pattern for the selected output channel.
..... INSTALLATION AND SETUP System Timing Additionally, users must “exit” the interactive timing mode before normal command line interface functions can be issued. Use the following steps to adjust output timing interactively: 1. For the selected output channel and display, ensure that you’ve followed steps 1 through 9 in the preceding “Output Timing” section. 2. Turn on the “Grid” test pattern: TP
..... INSTALLATION AND SETUP System Timing Type: OPTMNAME [name] Enter S Example: To name output 1 “Studio_LCD_1,” type: OPTMNAME 1 Studio_LCD_1 9. Once the display is adjusted, use the Output Timing Save function to save parameters in memory. Quadra allows you to save up to 61 userdefined settings. These settings may then be recalled at any time to quickly change the system’s output settings. To save settings in one of 61 available timing slots, type: OPTMSAVE
..... INSTALLATION AND SETUP System Timing • The Input Interactive function enables you to adjust each input’s timing interactively. Interactive timing applies only to graphics inputs (not composite or S-Video sources). This method is described below. Use the following steps to adjust input timing interactively. The procedure takes you through the complete adjustment for one input (including naming and saving settings), and then asks you to repeat steps for each remaining input. 1.
..... INSTALLATION AND SETUP System Timing 7. With the upper-left corner properly adjusted, adjust the lower-right corner next by using the following keyboard controls. The goal is to position this corner for maximum image visibility. I = move up M = move down Note J = move left L = move right These commands are all upper case. 8. To exit the function, type q. This returns the system to the “normal” command mode of operation. 9. Repeat steps 5 through 7 for the selected input.
O PERATIONS .................................. 3 I N T H I S C H A PTE R ............................. This chapter provides operating instructions for a variety of frequently-used Quadra features.
..... OPERATIONS Introduction to Operations I N T R O D U C T I O N T O O P E R A T I ON S ............................. The Quadra is a high performance, four channel multi-format up/down converter with numerous applications in graphics, displays and multi-monitor environments. Using an easy command line interface, users can convert each input to a different user-defined output format, or take a single distributed input source and “scale” it across multiple displays.
..... OPERATIONS Setting Output Format In this configuration, using an external splitter or DA (Distribution Amplifier), Quadra automatically crops each identical input into its proper “quadrant” using the WALL command. Refer to the “Creating a 2x2 Monitor Wall” section for instructions. PROCEDURES AND ......... PREREQUISITES This chapter provides detailed operating procedures for many of Quadra’s most frequently used functions.
..... OPERATIONS Setting Output Format 2. To enable automatic detection and loading of a display timing set type the following command (using upper or lower case characters). H OPREF EDID Enter • This will cause Quadra to read the preferred timing parameters from your display device, and then search for a match in the Factory Timing List. If it finds a match (for example, one that you have previously stored), it selects and loads those parameters.
..... OPERATIONS Testing Outputs 6. Review the list in detail, and note the timing parameters that most closely match the specifications of your monitor. 7. Load the timing parameters for the selected output. Type: OPTMLOAD
..... OPERATIONS Selecting an Input Source TP ALL GRID Enter 5. To turn off the test pattern on a single output, type: TP
..... OPERATIONS Enabling and Disabling Outputs 3. Query the command for the selected channel, to determine what the current input source is. Type: INSRC Enter 4. To switch sources for a selected input, type: INSRC [desired source] Enter S Example: To switch input 1 to DVI, type: INSRC 1 DVI Enter 5. Repeat from step 3 to switch additional inputs. EN ABLING AND DISA BLING OUTPUTS .............................
..... OPERATIONS Understanding Auto Sync OPEN ALL OFF Enter 4. To enable a selected output, type: OPEN
..... OPERATIONS Understanding Auto Sync Once a close match is found for each RGB input, Quadra tries to lock to it — or continues down the list until a “lock” is achieved. LOADING INPUT ......... TIMING VALUES To load a different set of parameters or “create” your own, Auto Sync can be disabled — and you can force Quadra to load a custom set of parameters. Use the following steps to load timing values: 1.
..... OPERATIONS Understanding Auto Sync PERFORMING INTERACTIVE INPUT . . . . . . TIMING ... • If you want to “interactively” time an input, please continue with the “Performing Interactive Input Timing” section. • To name and save a custom set of input timing parameters, continue with the “Naming and Saving Input Timing Values” section. If you want to “fine tune” a set of timing parameters visually, you can use the INputINTeractive command.
..... OPERATIONS Understanding Auto Sync H INSAVE Enter Figure 3-10. Help Text — Input Save Command 5. To save the specified RGB input in a “user” register, type: INSAVE <100...160> Enter S Example: To name RGB input 3 in register 101, type: INSAVE 3 101 Enter 6. Confirm the name and the storage register by viewing the timing list. Type: TMLIST Enter Scroll through the list as required to confirm the name and register.
..... OPERATIONS Cropping an Image CROPPING AN IMAGE ............................. This section provides basic instructions for using the WSR command (WindowSourceRectangle). The command enables you to define a precise portion of an input source, which is then mapped to the output using the WDR command (WindowDestinationRectangle). Please note: • By default, WSR shows the entire source image as defined by the horizontal and vertical dimensions of the selected RGB input.
..... OPERATIONS Cropping an Image S Example: Crop input 1 to 800 x 600, starting at the exact top left corner of the image. Type: wsr 1 0 0 800 600 Enter S Example: Crop input 2 to 300 x 300, starting 500 pixels over from the left, and 10 lines down. Type: wsr 2 500 10 300 300 Enter S Example: Assuming a 1280 x 1024 source image for input 4, crop off 100 pixels around the edge.
..... OPERATIONS Zooming an Image ZO OM IN G AN I MAG E ............................. The zoom function enables you to interactively zoom an image’s WSR coordinates. Use the following steps to zoom an image: 1. Request help text for the ZooM command. Type: H ZM Enter Figure 3-12. Help Text — Zoom Command 2. Activate the “interactive” zoom function. Type: ZM Enter Use the following controls to zoom. Type ~ i to zoom in ~ o to zoom out 3.
..... OPERATIONS Panning an Image PA NNING A N IM AGE ............................. The pan function enables you to interactively pan an image’s WSR coordinates, effectively moving only the x and y coordinates while maintaining the height and width parameters. Use the following steps to pan an image: 1. Request help text for the PAN command. Type: H PAN Enter Figure 3-13. Help Text — Pan Command 2. Ensure that the image has been zoomed or cropped before proceeding.
..... OPERATIONS Sizing the Output Image SIZING THE OUT PUT IMAGE ............................. This section provides basic instructions for using the WDR command (WindowDestinationRectangle). The command enables you to define the size and position of the “output” rectangle — the rectangle to which the source rectangle (WindowSourceRectangle) is mapped.
..... OPERATIONS Sizing the Output Image S Example: Assuming an output resolution of 1024 x 768, set output 1 to full screen. Type: wdr 1 0 0 1024 768 Enter S Example: Place a 100 pixel by 100 line video window at column 300, line 400 on the monitor for output 2. Type: wdr 2 300 400 100 100 Enter S Example: From a full screen output 1 rectangle, transition the rectangle (in 5 seconds) to approximately center screen in an 800 x 600 window.
..... OPERATIONS Using Position US IN G P O SI TI O N ............................. With a defined WDR rectangle, you can interactively move the rectangle around the selected output screen using the SETRATE and POSition commands. Please note: • The SETRATE command determines the number of pixels that the selected output rectangle moves — each time a Position command is issued.
..... OPERATIONS Using Position 4. Request help text for the POSition command. Type: H POS Enter Figure 3-16. Help Text — Position Command 5. Change the Position interactively as desired. Type: POS
..... OPERATIONS Adjusting Brightness and Contrast ADJ USTIN G BRIGHTNESS AND C ON TRAST ............................. Quadra enables you to easily adjust a source image’s brightness and contrast using the BRIghtness and CONTrast commands. 1. Request help text for the BRIghtness command. Type: H BRI Enter Figure 3-17. Help Text — Brightness Command 2. Query the source’s current brightness. Type: BRI Enter 3. Adjust the brightness as desired, from -500 to +500.
..... OPERATIONS Adjusting Hue and Saturation ADJ USTIN G HUE AND SATURA TION ............................. Quadra enables you to easily adjust a source image’s hue and saturation using the HUE and SATuration commands. 1. Request help text for the HUE command. Type: H HUE Enter Figure 3-19. Help Text — Hue Command 2. Query the source’s current hue. Type: HUE Enter 3. Adjust the hue as desired, from -180 to +180 (degrees). Type: HUE [hue value] Enter 4.
..... OPERATIONS Adjusting Sharpness ADJ USTIN G SHARPNESS ............................. Quadra enables you to easily adjust a source image’s sharpness using the SHARPness command. 1. Request help text for the SHARPness command. Type: H SHARP Enter Figure 3-21. Help Text — Sharpness Command 2. Query the source’s current sharpness. Type: SHARP Enter 3. Adjust the sharpness as desired, from -5 (soft) to +5 (sharp).
..... OPERATIONS Creating a Background CREATING A B ACKGROUND ............................. Quadra enables you to set an output channel’s background color, from a solid color to a shaded “ramp” using the BackGroundSouRCe command. 1. Request help text for the BackGroundSouRCe command. Type: H BGSRC Enter Figure 3-22. Help Text — Background Source Command 2. Query the source’s current background color. Type: BGSRC Enter 3. Change the source’s background as desired.
..... OPERATIONS Creating a 2x2 Monitor Wall CREATING A 2 X 2 MONITOR WALL ............................. Using the WALL command, you can quickly crop all four inputs, configuring each input’s WSR to exactly 1/4 of the screen. With your output channels properly connected to a 2x2 monitor wall display, you’re ready to go with one easy command. Use the following steps to create a 2x2 monitor wall. 1.
..... OPERATIONS Creating a 2x2 Monitor Wall ~ Input #3 is cropped to the exact lower left quadrant of the source image. ~ Input #4 is cropped to the exact lower right quadrant of the source image. The net result on your 2x2 monitor wall is a perfectly expanded source image. 8. To switch back to full size inputs on each output channel, use the UDC command.
C OMMAND L INE I NTERFACE .................................. 4 This chapter discusses Quadra control commands that provide access to all of the unit’s functions. The following topics are discussed: • • • • • • Control Overview Command Format Command Set List Command Summary Timing Parameters Factory Timing List C O N T R O L O V E R V IE W ............................. Quadra may be controlled externally via RS-232, or via the unit’s Ethernet 10/100BASE-T port, as shown below. Figure 4-1.
..... COMMAND LINE INTERFACE Command Format CO MMAN D FOR MAT ............................. All Quadra control functions are issued via ASCII commands that are used to set one or more system parameters (or values). Typically, Quadra is controlled by a third party machine such as a PC or laptop.
..... COMMAND LINE INTERFACE Command Format .................................................... To execute commands, each command line must be followed by a carriage return (pressing Enter). .................................................... . . COMMAND . . . . .HELP .. S Commands: “Help” There are two primary ways to use the Quadra’s help feature: • • Type HELP to list all Quadra commands. Type HELP followed by the command to get command-specific help.
..... COMMAND LINE INTERFACE Command Format An individual destination is indicated by the parameter such as , and is typically the first parameter following the command name. S Example: Set input #1’s brightness value to 50: BRIght 1 50 Many commands allow the use of the optional modifier ALL which enables you to set all applicable destinations with one command.
..... COMMAND LINE INTERFACE Command Set List COMMAN D SE T LIST ............................. The following sections list the commands used for controlling the Quadra.
..... COMMAND LINE INTERFACE Command Summary COMMAN D SUM MARY ............................. This section provides a table of all Quadra commands in alphabetical order. Click the desired command to access detailed instructions. You may also want to print this list and keep it near your PC for reference. Table 4-1.
..... COMMAND LINE INTERFACE Command Summary . INPUT . . . COMMANDS ..... Input commands allow you to make input adjustments, and then save these settings into the unit’s internal memory. A summary of input commands is listed below. Click the desired command to access detailed instructions. Table 4-2. Input Commands Summary Command Description INputAutoSync Sets the input mode for the specified input. INputFormat Checks the video format of the current video input selection.
..... COMMAND LINE INTERFACE Command Summary INPUT COMMANDS DESCRIPTIONS The table below lists all input commands, their arguments and detailed descriptions. Table 4-3. Input Commands Descriptions Command Arguments Description INputAutoSync [ON | OFF | DEBUG] Sets the input mode for the specified input. ON enables the autosync circuitry. OFF disables the autosync circuitry.
..... COMMAND LINE INTERFACE Command Summary Table 4-3. Input Commands Descriptions(Continued) Command Arguments Description INputLOAD <1…160> Loads the indicated entry from the Timing List to the specified input channel. Timing list entries from 1 to 99 are reserved for factory defined timing parameters. Entries from 100 to 160 are available for user defined timing entries.
..... COMMAND LINE INTERFACE Command Summary Table 4-3. Input Commands Descriptions(Continued) Command Arguments Description TiMingLIST <1 … 160> [<1 … 160>]] | [ACTIVE] Displays the entire Timing List. If arguments are supplied, displays only the portion of the list requested. The Active argument displays all saved list entries. TiMingLISTCLEAR none Deletes all user defined input timing sets.
..... COMMAND LINE INTERFACE Command Summary OUTPUT . . . . COMMANDS ..... Output commands control Quadra’s output channels. They define the output timing and sync format, and save, load, and delete timings to the Output List. A summary of output commands is listed below. Click the desired command to access detailed instructions. Table 4-4. Output Commands Summary Command Description OutPutENable Switch or fade the output to or from black. OutPutREFerence Selects the output’s timing reference.
..... COMMAND LINE INTERFACE Command Summary OUTPUT COMMANDS DESCRIPTIONS The table below lists all output commands, their arguments and detailed descriptions. Table 4-5. Output Commands Descriptions Command Arguments Description OutPutENable
..... COMMAND LINE INTERFACE Command Summary Table 4-5. Output Commands Descriptions(Continued) Command Arguments Description OutPutTiMingLOAD
..... COMMAND LINE INTERFACE Command Summary DISPLAY . . . . COMMANDS ..... Display commands apply to positioning and visibility, and enable you to control the display configuration, zoom and pan operations, freezing inputs and more. A summary of commands is listed below. Click the desired command to access detailed instructions. Table 4-6. Display Commands Summary Command Description OVerScan Performs an automatic 2% enlargement on video inputs only.
..... COMMAND LINE INTERFACE Command Summary DISPLAY COMMANDS DESCRIPTIONS The table below lists all positioning, visibility and display commands, including their arguments and detailed descriptions. Table 4-7. Display Commands Descriptions Command Arguments Description OVerScan [ON | OFF] Performs an automatic 2% enlargement on video inputs only. It has no effect on WSR values, and it applies to all video inputs for the specified channel.
..... COMMAND LINE INTERFACE Command Summary Table 4-7. Display Commands Descriptions(Continued) Command Arguments Description SIZE [ ] Activates the size utility, allowing you to resize the specified input. Controls are: s = smaller l = larger q = quit Size affects the WDR value for the input. UDC (none) Configures Quadra so that each input is set to full size.
..... COMMAND LINE INTERFACE Command Summary Table 4-7. Display Commands Descriptions(Continued) Command Arguments Description WindowDestinationRecta ngle
..... COMMAND LINE INTERFACE Command Summary Table 4-7. Display Commands Descriptions(Continued) Command Arguments Description WindowSourceRectangle [ ] [duration: 0.1…128] Sets the source rectangle for the selected input. The source rectangle is the portion of the original input that is displayed on screen. • By default, WSR is set to show the entire image.
..... COMMAND LINE INTERFACE Command Summary IMAGE CONTROL . . . . COMMANDS ..... After you have made adjustments with the Input commands, you can use the image control commands to adjust parameters such as brightness, contrast and color. A summary of commands is listed below. Click the desired command to access detailed instructions. Table 4-8. Image Control Commands Summary Command Description BRIghtness Sets the brightness value of the selected input.
..... COMMAND LINE INTERFACE Command Summary IMAGE CONTROL COMMANDS DESCRIPTIONS The table below lists all image control commands, their arguments and detailed descriptions. Table 4-9. Image Control Commands Descriptions Command Arguments Description BRIghtness [-500 … 500] Sets the brightness value of the selected input. The ALL argument sets brightness for all four inputs. Default: 0 CONTrast [0 ... 200] Sets the contrast value of the selected input.
..... COMMAND LINE INTERFACE Command Summary SERIAL PORT . . . . COMMANDS ..... Serial Port Commands are used to control the baud and echo settings. A summary is listed below. Click the desired command to access detailed instructions. Table 4-10. Serial Port Commands Summary Command Description BAUDrate Sets the serial port baud rate. ECHO Turns the serial echo On/Off. HANDShaking Sets the flow control mode.
..... COMMAND LINE INTERFACE Command Summary NETWORK . . . . COMMANDS ..... Network Commands control the settings for Quadra’s Ethernet port. The values used in this section are typically provided by your facility’s IT specialist. A summary is listed below. Click the desired command to access detailed instructions. Table 4-12. Network Commands Summary Command Description IPADDRess Sets the IP address for the Quadra. IPSubNET Sets the IP subnet mask for the Quadra.
..... COMMAND LINE INTERFACE Command Summary MISCELLANEOUS . . . . COMMANDS ..... The Miscellaneous commands category control includes a variety of general Quadra functions. A summary of commands is listed below. Click the desired command to access detailed instructions. Table 4-14. Miscellaneous Commands Summary Command Description BackGroundSouRCe Selects a colored or shaded background that appears behind an output channel.
..... COMMAND LINE INTERFACE Command Summary MISCELLANEOUS COMMANDS DESCRIPTIONS The table below lists all miscellaneous commands, their arguments and detailed descriptions. Table 4-15.
..... COMMAND LINE INTERFACE Command Summary Table 4-15. MIscellaneous Commands Descriptions(Continued) Command Arguments Description SETTINGSEXPORT [TIMING | WINDOW | SYSTEM | ALL] [filename] This command enables you to store Quadra settings on an external computer. This is useful in backing up settings, or providing the ability to “clone” the settings on multiple Quadra devices. Storing this data is a two step process: • Create a text file named “export.txt” that is stored in Quadra memory.
..... COMMAND LINE INTERFACE Command Summary Table 4-15. MIscellaneous Commands Descriptions(Continued) Command Arguments Description SETTINGSIMPORT [filename] This command enables you to restore or set system settings (or clone a new system) to match the configuration of a different Quadra unit. The command accepts the text file created using the SETTINGSEXPORT command. If the filename is not specified, the default filename“export.txt” is assumed.
..... COMMAND LINE INTERFACE Timing Parameters TIMING PARA METERS ............................. The table below lists timing parameters, values and ranges used for both the input and output timing functions. Advanced users can also use the table to assist with values listed in the “Factory Timing List.
..... COMMAND LINE INTERFACE Timing Parameters Table 4-16. Definitions and Ranges for Timing Parameters(Continued) Parameter Definitions Ranges Comments SYNC Sync format 3, 4, or 5 wires This command applies to analog RGB inputs only. In 3 wire sync systems the H & V sync signals are combined with the Green signal. In 4 wire sync systems the H&V sync signals are combined and transmitted on a dedicated wire. 5 wire systems the H & V signals are transmitted on separate dedicated wires.
..... COMMAND LINE INTERFACE Factory Timing List FACTORY TIMING LIST ............................. The table below lists all of Quadra’s preset timings that can be used for Output or Input timing settings. User-defined settings can also be added to this list. These settings are used to match the system’s output to that of your display device, or can be used to manually define input timing. In Chapter 2, refer to the “System Timing” section for instructions on using the list.
..... COMMAND LINE INTERFACE Factory Timing List ID TYPE HFP HS HBP HACT HFRQ VFP VS VBP VACT SYNC HPOL VPOL IL 19 VESA 1280 x 960 @ 60Hz 96 112 312 1280 60.000 1 3 36 960 5 1 1 0 20 VESA 1280 x 960 @ 85Hz 64 160 224 1280 85.938 1 3 47 960 5 1 1 0 21 VESA 1280 x 1024 @ 60Hz 48 112 248 1280 63.981 1 3 38 1024 5 1 1 0 22 VESA 1280 x 1024 @ 75Hz 16 144 248 1280 79.
I MAGE C ONCEPTS .................................. A I N T H I S A P P EN D IX ............................. This appendix discusses the basics of image size and position, beginning with the concepts of source and destination rectangles. In addition to the ability to size and position an input, users can assign different input sources and manipulate them in various creative ways.
..... IMAGE CONCEPTS Image Rectangles IMAGE RECTAN GLES ............................. The resolution of raster scanned images is defined by the number of pixels per line and the total number of lines per frame. For example, the XGA format is defined as having a resolution 1024 x 768 (1024 pixels per line and 768 active lines). This convention is applied to both the input and output of Quadra. Within the Quadra architecture, the input signal is the source image.
..... IMAGE CONCEPTS Image Rectangles SOURCE . . . .RECTANGLE ..... The source rectangle for each input is defined in terms of the input image’s pixel position in coordinate space. The image’s top left corner is positioned using these coordinates, and the image’s width and height are defined in the same way. In the first example below, the full size source image is 640 pixels wide by 480 lines high. Figure A-1.
..... IMAGE CONCEPTS Image Rectangles In the second example below, a portion of the full size source image has been defined. Figure A-2. Portion of Full Size Image The “cropped” image is 450 pixels wide by 300 lines high. The upper left corner starts at pixel coordinate (100,50). The bottom right corner ends at coordinate (549,349).
..... IMAGE CONCEPTS Image Rectangles DESTINATION . . . .RECTANGLE ..... Each input’s destination rectangle is defined in terms of the display device’s screen space coordinates, rather than the input picture’s coordinates. Each destination rectangle represents the source rectangle mapped to a specific size and position on the display. In the example below, the display monitor is 1280 x 1024.
..... IMAGE CONCEPTS Aspect Ratio In the next example, the “cropped” image from Figure A-2 is mapped to a new destination space on the display device. Figure A-4. Cropped Source mapped to Destination In this case, the WDR value would be defined as: 300 500 450 300 Using WDR, you can take a portion of the source image and (without resizing it) can place it anywhere on the display device.
..... IMAGE CONCEPTS Positioning and Clipping • The size and shape of the source rectangle are independent of the destination rectangle’s size and shape. Suppose that you have defined an input’s source and destination rectangles so that a 320 x 240 portion of a video source image is mapped into a 640 x 480 rectangle. Here, the destination rectangle is larger than the source rectangle, but it has the same shape and the same width-to-height aspect ratio (4:3).
..... IMAGE CONCEPTS Positioning and Clipping In the second example, the same source rectangle is mapped to a destination rectangle starting at (-200,200). By specifying screen coordinates with negative values, the left and top edges of the source image can be clipped. Figure A-6.
C OMMUNICATIONS S ETUP .................................. B I N T H I S A P P EN D IX ............................. This appendix provides detailed information about specific communications setup procedures that are referenced in Chapter 2, “Installation and Setup.” The following topics are discussed: • • Launching a Hyperterminal Window IP Address Setup LAUNC HIN G A HYPERT ERM IN AL WINDOW ............................. Use the following steps to launch a Hyperterminal window on your PC: 1.
..... COMMUNICATIONS SETUP Launching a Hyperterminal Window This action displays the Connection Description Dialog, a sample of which is shown below. Figure B-2. Connection Description Dialog (Sample) 2. In the dialog: ~ Enter a name ~ Choose an icon ~ Click OK to display the Connect To Dialog. Figure B-3. Connect To Dialog (Sample) 3. 350-7951 In the Connect To Dialog, ignore the Country, Area Code and Phone Number fields.
..... COMMUNICATIONS SETUP Launching a Hyperterminal Window 4. Click OK to display the COM Properties Dialog. Figure B-4. COM Properties Dialog (Sample) 5. Configure your PC to match Quadra’s pre-configured factory settings, as follows: ~ ~ ~ ~ ~ Bits per second (baud): 9600 Data bits: 8 Parity: None Stop bits: 1 Flow control: XOn / XOff Quadra can be configured to operate at baud rates from 9600 baud to 115 kbaud.
..... COMMUNICATIONS SETUP IP Address Setup IP ADD RESS SETUP ............................. The following topics are discussed in this section: • • • INTRODUCTION TO . . .IP.ADDRESSES ..... Introduction to IP Addresses IP Address Setup via Serial Port IP Address Setup via Ethernet When connecting systems via Ethernet, the setup of communications parameters is automatic. However, because this is a network connection, a unique address (known as the IP address) is required.
..... COMMUNICATIONS SETUP IP Address Setup 4. Quadra responds with the following message: The system must be restarted for your changes to take effect. Do you want to restart the system (y/n)? ~ Press “y” to restart Quadra and use the newly assigned IP address. ~ Press “n” to retain the current IP address, and discard the new address. 5. Confirm the new setting by typing the command IPADDR. If Quadra has accepted the command, it responds with the new IP address that you just entered.
..... COMMUNICATIONS SETUP IP Address Setup At this point, the Telnet window starts and Quadra responds with the product name and copyright notice as shown in the sample below. Figure B-5. 5. Quadra Login (Sample) To obtain a complete list of IP address settings, and to confirm the connection, in the Telnet window type: ID ... and press Enter. Quadra responds with a variety of product details including the IP settings. 6.
..... COMMUNICATIONS SETUP IP Address Setup Window. Refer to Chapter 4, “Command Line Interface” for a complete command list. Note 350-7951 To close a Telnet session, type EXIT or use the keystroke sequence “Control + D.
C ONNECTOR T YPES .................................. C I N T H I S A P P EN D IX ............................. This appendix provides detailed information about Quadra’s signal and control connectors. • • • • • • • Connector Summary Composite Video Connector S-Video Connector High Resolution Analog Connector DVI-I Connector Ethernet Connector RS-232 Connector CONNECTOR SU MMARY ............................. The table below summarizes the types of connectors used in the Quadra chassis: Table C-1.
..... C O N N E C T O R TY P E S Composite Video Connector C O M P OS I T E V I D E O C O N N E C T O R ............................. Quadra’s composite video inputs use the industry standard 75 Ω BNC connector. Signal conductor Ground/Shield Figure C-1. BNC connector (viewed from rear of chassis) The BNC connector is designed for use with coaxial cables. Coaxial cables are well suited for the transmission of high frequency signals over moderate distances.
..... C O N N E C T O R TY P E S S-Video Connector S- VIDEO CONNECTOR ............................. S-Video signals are generally of higher quality than analog composite video signals. Composite video signals combine the black and white (monochrome) signals together with color information on a single coaxial cable. S-Video signals, however, use two signal wires to keep the luminance (black and white) and chrominance (color information) signals separated. CONNECTOR TYPE .........
..... C O N N E C T O R TY P E S High Resolution Analog Connector HIGH R ESOLUTION ANALOG C ONN ECT OR ............................. Analog graphics signals are connected to Quadra using a standard 15-pin Dtype connector. In graphics applications, the signals are typically transmitted as separate Red (R), Green (G) and Blue (B) signals.
..... C O N N E C T O R TY P E S High Resolution Analog Connector Table C-3. RGB Analog Video Connector Pinouts(Continued) HIGH RESOLUTION ANALOG CABLE . . . . . .LENGTH ... 350-7951 Pin Signal Description 13 CS/HS Composite Sync or Horizontal Sync 14 VS Vertical Sync 15 NC ID3 (not used) High quality RGB or YUV signals have very high signal bandwidths. Cable lengths should be kept as short as possible, as longer cable lengths attenuate the signal more severely at higher bandwidths.
..... C O N N E C T O R TY P E S DVI-I Connector DVI- I CONN ECTOR ............................. The DVI connector is used to interconnect graphics devices. This is a standard connector based on the work of the Digital Display Working Group (DDWG). CONNECTOR TYPE ......... AND PINOUTS The connector used in Quadra is a 29-pin DVI-I connector, supporting both analog and digital signals.
..... C O N N E C T O R TY P E S DVI-I Connector Table C-4.
..... C O N N E C T O R TY P E S Ethernet Connector ET HER NET CONNECTOR ............................. CONNECTOR TYPE The Ethernet connector is a standard RJ-45 type connector. . . . AND . . PINOUTS .... 1 8 Figure C-5. Ethernet connector (viewed from rear of chassis) The 8-pin RJ-45 Ethernet connector has the following signals:. Table C-5.
..... C O N N E C T O R TY P E S RS-232 Connector RS -2 32 C ON NEC TOR ............................. The RS-232 port is configured according to the Electronic Industries Association Standard RS-232-C published in August 1969. The Quadra can be explicitly controlled with ASCII Command Set instructions sent via the RS-232 serial port from either a computer or an ASCII terminal. In Chapter 4, refer to the “Command Set List” section for details on all commands. CONNECTOR TYPE .........
F IRMWARE U PGRADES T ROUBLESHOOTING AND D .................................. I N T H I S A P P EN D IX .............................
..... F I R M W A R E U P G R A D E S A N D TR O U B L E S H O O T I N G Firmware Upgrades FIRMWA RE UPGRADES ............................. From time to time, new features or improvements are made to Quadra’s firmware. Your system’s firmware can be updated at your facility, as soon as you have a copy of the new firmware. The following topics are discussed in this section: • • • • FIRMWARE UPGRADE .........
..... F I R M W A R E U P G R A D E S A N D TR O U B L E S H O O T I N G Firmware Upgrades TRANSFERRING ......... FIRMWARE 6. If an upgrade is required for your product, click the “Firmware” link and download the firmware to a folder on your PC. 7. Make a note of this folder’s location, for use in a subsequent step. 8. Continue with the “Transferring Firmware” procedure.
..... F I R M W A R E U P G R A D E S A N D TR O U B L E S H O O T I N G Firmware Upgrades TRANSFERRING NEW FIRMWARE (FTP METHOD) Using FTP in a standard command window, this procedure is an alternate way of transferring the firmware file from your PC to Quadra. 1. Connect Quadra to the PC using the Ethernet port — either directly or via a network. Remember that a crossover cable is required for direct connections. 2. On your PC, open up the folder into which you downloaded the firmware.
..... F I R M W A R E U P G R A D E S A N D TR O U B L E S H O O T I N G Firmware Upgrades 8. Type the command “put fwop_x.xx.tar” (where x.xx represents the version number) and press Enter. This action copies the firmware to Quadra. 9. Type the command “quit” and press Enter to close the FTP session. 10. Please continue with the “Installing New Firmware” procedure. INSTALLING NEW .........
..... F I R M W A R E U P G R A D E S A N D TR O U B L E S H O O T I N G System Troubleshooting SY S T E M T R O U B L E SH O O T I N G ............................. Problems with Quadra operation may result from incorrect system connections and settings.
..... F I R M W A R E U P G R A D E S A N D TR O U B L E S H O O T I N G System Troubleshooting Table D-1. Troubleshooting Guide(Continued) Symptom Images have the wrong aspect ratio (e.g., are stretched) or are not positioned correctly Recommendations • • • Blank image (the output is black) • • Frozen image Missing imagery • • • • • • • • • No color on the S-Video input • • • Aspect Ratio on a video input is incorrect.
..... F I R M W A R E U P G R A D E S A N D TR O U B L E S H O O T I N G System Troubleshooting Table D-1. Troubleshooting Guide(Continued) Symptom No text on a terminal Recommendations • • • • • Unreliable control of the Quadra from the RS232 port. • Unable to connect to the Quadra over the network. • • • • • Unable to connect to Quadra directly from a PC (peer to peer connection).
..... F I R M W A R E U P G R A D E S A N D TR O U B L E S H O O T I N G How to Contact RGB Spectrum HOW TO C ON TACT RGB SPECTRUM ............................. RGB Spectrum can be reached via phone, fax, mail and e-mail as listed below: 350-7951 • RGB Spectrum 950 Marina Village Parkway Alameda, CA 94501 • • • • • Phone: (510) 814-7000 Fax: (510) 814-7026 E-Mail (technical support): support@rgb.com E-Mail (sales and product information): sales@rgb.com Website: http://www.rgb.
T ECHNICAL S PECIFICATIONS .................................. E I N T H I S A P P EN D IX ............................. This appendix is divided into two sections: • The “General Specifications” section provides Quadra’s technical, functional and performance specifications. • The “Parameter Storage” section provides details of the types of data that are used in Quadra, and how they may be stored and retrieved.
..... TE C H N I C A L S P E C I F I C A T I O N S General Specifications SYSTEM The table below lists Quadra system characteristics: .CHARACTERISTICS ........ Table E-1. System Characteristics Parameter Specification Number of channels Four channels, each with up to four user-selectable types of inputs.
..... TE C H N I C A L S P E C I F I C A T I O N S General Specifications ANALOG INPUT The table below lists high resolution graphics analog input specifications: . .SPECIFICATIONS ....... Table E-3. Analog Input Specifications Parameter Specification Type Analog RGB/YPbPr Analog video RGB/YPbPr, interlaced or non-interlaced Video level Input impedance Sample rate Nominal 0.7V p-p (1.
..... TE C H N I C A L S P E C I F I C A T I O N S General Specifications S-VIDEO INPUT The table below lists S-Video input specifications: . .SPECIFICATIONS ....... Table E-5. S-Video Input Specifications Parameter Specification Format S-Video (NTSC RS-170A or PAL CCIR 624) Number Up to four S-Video channels, or the user may use the S-Video channel for four additional composite video inputs (Composite2). Input sampling All inputs sampled as 3:2 pixels (CCIR 601 sampling) Video levels 0.
..... TE C H N I C A L S P E C I F I C A T I O N S General Specifications IMAGE CONTROL The table below lists image control specifications: . .SPECIFICATIONS ....... Table E-7. Image Control Specifications Parameter Specification Size The size of each image can be scaled from thumbnail up to full screen. Position Images may be positioned to an accuracy of one pixel horizontally and one line vertically.
..... TE C H N I C A L S P E C I F I C A T I O N S General Specifications POWER AND The table below lists Quadra power and physical specifications: PHYSICAL ......... SPECIFICATIONS Table E-9. Power and Physical Specifications 350-7951 Parameter Specification Input Voltage 90-264 VAC Frequency 47Hz - 400 Hz Power Consumption 65VA Size 19" W x 15.3" x D x 1.75"H Weight 14 pounds (6.
..... TE C H N I C A L S P E C I F I C A T I O N S Parameter Storage PA RAMETER STORAGE ............................. This section describes the categories of settings that are stored in Quadra, and how these settings are stored and retrieved. The following topics are discussed: • • • • • • FACTORY . . . . .DEFAULTS ....
..... TE C H N I C A L S P E C I F I C A T I O N S Parameter Storage of the settings as outlined below: Tip Recalling previously stored parameters will change the operation of your unit. Because there is no undo feature, we recommend that you have a backup copy of your preferred settings. The copy could be stored internally in Quadra using the SAVECONFIGguration command, or externally using the SETTINGSEXPORT feature.
.....
..... TE C H N I C A L S P E C I F I C A T I O N S Parameter Storage • Configuration values — The following configuration values are stored: ~ X and Y repeat rates used in interactive image position and pan ~ Scale step used in interactive image size and zoom • Serial port settings — The following settings are stored for RS-232 control port: ~ Baud rate ~ Echo ~ Handshaking . .TIMING . . . PRESETS ....