
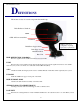
Installation guide
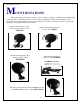
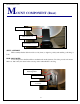

Mount Installation Guide
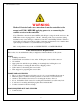
3
WARNI NG
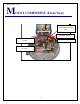
Make all electrical and coax connections from the controller to the
mount and LNB's BEFORE applying power to, or connecting the
satellite receiver to the controller.
Note: When the controller is turned OFF it will still pass voltage from the receiver to the
LNB if the receiver is plugged in to 110 AC. Shorting of the coax at any time during
installation may cause damage to either the Controller or the DiSEqC Switch. Failure to
follow this procedure can result in voiding of warranty replacement, not to mention time
spent trying to troubleshoot a system that does not perform.
90% of all problems are a result of CONNECTIVITY or CONFIGURATION.
Tools and Hardware Requirements
This is a list of tools and hardware that you might use in the installation of the system.
TOOLS
#2 Philip screwdriver
3/32 Flat blade screwdriver for use on the 12 Pin green control cable connector
1/2" drill bit
Appropriate size drill bit for pre-drilling of mounting holes in fiberglass roofs
Cordless battery for raising the dish from its shipped position
Cable cutters for shortening the control cable
Wire strippers for preparing the control cable
HARDWARE and SUPPLIES
Dicor or a lap sealant approved for the type of roof you are installing the mount on
Dielectric grease or jell for moisture protection of all outdoor coax connections
16-20 ea. #12 Stainless Steel screws for securing the mount to the roof
6-8 ea. #8 Stainless Steel screws for securing the Clam Shell over cable entry hole
4" wire ties for securing and tidying up the cables inside the RV
Cordless vacuum for interior cleanup
TOOLS REQUIRED BUT NOT SUPPLIED
Common Sense