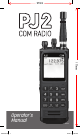
97mm 171mm Operator’s Manual Manual.
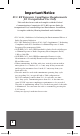
Important Notice FCC RF Exposure Compliance Requirements for Occupational Use Only This radio has been tested and complies with the Federal Communications Commission (FCC) RF exposure limits for Occupational Use/Controlled Exposure Environment. In addition, it complies with the following Standards and Guidelines: • FCC 96-926, Guidelines for Evaluating the Environmental Effects of Radio-Frequency Radiation.
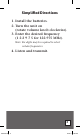
Simplified Directions 1. Install the batteries. 2. Turn the unit on (rotate volume knob clockwise). 3. Enter the desired frequency (1 2 2 9 7 5 for 122.975 MHz). Note: Six digits may be required to select certain frequencies. 4. Listen and transmit. 3 Manual.
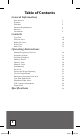
Table of Contents General Information Introduction Features Warranty Antenna Requirements Batteries Precautions 5 5 6 6 7 8 Top View Left Side View Right Side View Front View Back View 10 10 10 12 12 Manual Frequency Selection Frequency Search Frequency Memory Memory Recall Memory Scan Memory Clear Transmitting Key Lock Screen and Keypad Lighting NOAA Weather Band Emergency Frequency Selection Low Back Light Mode High Back Light Mode LCD Contrast Adjustment Night Mode 14 15 16 18 19 20
General Information Introduction This manual contains only operational information relative to the PJ2 COM radio. This manual is not intended as a service or maintenance manual and does not contain any theory or schematic diagrams. Features Rexon PJ2 COM is a hand-held, aircraft communication transceiver with the following features: • Standard Twin Plug Aviation Headset Jacks • Accepts USB Type C Power (2.4 amps) • 760 COMM frequencies (118.000 MHz to 136.
Warranty If, during the first year, your PJ2-COM transceiver fails due to defective workmanship or parts under normal use, we will replace it or repair it at our option. The warranty does not apply to units subject to misuse, battery leakage, neglect or accidents.
Batteries An Alkaline Battery Pack is standard equipment with the PJ2 COM. Alkaline batteries are a good power source for a backup radio because they have excellent storage life and no maintenance is required. The Alkaline Battery Pack is NOT rechargeable. The batteries must be replaced. To replace the batteries, turn the power OFF and then remove the battery pack from the unit by holding the belt clip in the out position, and then lift the latch mechanism found at the bottom of the battery pack.
Precautions: • Changes or modifications not expressly approved by the manufacturer for compliance could void the user’s authority to operate the equipment. • Never attempt to service this unit yourself. It should be referred to qualified service personnel. Please read the Warranty section in this manual. • If liquid spills or some solid object falls into the unit, remove the battery pack or external power adapter and have the unit checked by a qualified person before further operation.
Page intentionally left blank 9 Manual.
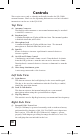
Controls This section serves only to identify and briefly describe the PJ2 COM’s external features. Please see the Operating Instructions section for detailed instructions on the use of the PJ2 COM. Top View (A) Antenna Connector The flexible rubber antenna or an external antenna may be attached to this BNC connector. (B) Earphone Jack A standard headphone PJ plug will fit into here. The internal speaker is disabled when this jack is used.
Left Right M’s detailed Top (A) (D) (E) ached peaker (F) (C) (B) wise me. n the (I) ad. ble/ (H) (G) equency. (J) attery r into te d. Use 11 Manual.
Front View (K) Screen This LCD displays the current frequency, last frequency, and other information to the operator. (L) Internal Microphone (M) Numeric Keypad These keys are used whenever the PJ2 COM requires a numeric input such as setting the frequency. (N) Down Key/Key Lock This key is used to select the next lower frequency or to initiate search and scan functions. This key is also used in combination with the Clear Key to lock out all inputs to the keyboard.
(Z) 8 Key High Back Light This key is used to adjust the high back light function. This is accessed by holding the clear key and pressing the 8 key. (AA) 9 Key LED Contrast This key is used to adjust the LCD contrast and night mode function. This is accessed by holding the clear key and pressing the 9 key. Back View (AB) Belt Clip Attachement Point (AC) Battery Pack Front Back (K) (AB) (M) (V) (L) (P) (W) (X) (Y) (Z) (N) (O) (R) (S) (AA) (T) (U) (Q) (AC) 13 Manual.
Operating Instructions To perform the following functions you must be in the basic operating mode of the PJ2 COM. To ensure that you are in the basic operating mode, press the clear key until the last frequency that was entered manually is displayed. Manual Frequency Selection The PJ2 COM will receive and transmit on the 760 COMM frequencies (118.000 MHz to 136.975 MHz).
Frequency Search To manually search through the frequency range, the Up Key or Down Key may be pressed at any time to select the next higher or lower frequency. The Up and Down Keys may be pressed repeatedly to continue changing the selected frequency. To automatically search the entire frequency range for a broadcasting signal, the Up Key or Down Key may be pressed and held for one second. The Screen will display SEARCH as seen below.
Frequency Memory The PJ2 COM has 20 visual memory channels numbered 00 to 19 to store those frequencies used most often. These channels are stored in groups of five on four separate pages. These memory channels may be used to store COMM and WX frequencies. Select a desired frequency, such as 122.700, to be stored by using either manual frequency selection or frequency search. To store this frequency, press the Memory Key. The following screen will appear.
You may also overwrite an existing memory channel or select an available memory channel other than the first one displayed. Once again, select the desired frequency and then press the Memory Key. The first available memory channel will be displayed with an arrow on the screen. Now press either the Up or Down Key to scroll through the 20 memory channels.
Memory Recall To recall a frequency stored in a memory channel, press the Recall Key. The first five memory channel numbers and their corresponding frequencies will be displayed. The first stored memory channel immediately becomes the active frequency and is received by the PJ2 COM. In this example, memory channel 00 is listed first. At this point you may select any stored memory channel by either pressing the Up or Down Key to scroll through the stored frequencies.
Memory Scan The Memory Scan function is very similar to the Search function, except it only scans those frequencies stored in the memory channels. To Scan the memory channels, press the Recall Key to enter the Recall function. Then press and hold the Up or Down Key for one second to initiate either an upward or downward Scan. The word SCAN will appear on the screen and the memory channel number and frequency will be displayed on the top line of the screen.
Memory Clear To clear or erase a memory channel, press and hold the Clear Key followed by the Memory Key. Release the keys when MEM CLR is displayed on the top line of the screen. The first five memory channels with stored frequencies will be displayed on the screen. Press the Up or Down Key to scroll through the memory channels to select the memory channel to clear. Once the desired memory channel is displayed, press the Memory Clear Key (also the 0 Key on the Numeric Keypad) to clear the selected channel.
Transmitting Press the Push-To-Talk Button (PTT) at any time while tuned to a COMM frequency to broadcast over the selected frequency. While the PTT is pressed the screen will display TX beneath the frequency to verify the PJ2 COM is broadcasting. Release the PTT to end the transmission and the PJ2 COM will once again receive the selected COMM frequency.
Key Lock Inputs from the keypad may be locked out at any time by holding the Clear Key and pressing the Down Key. When Key Lock is active, KEY.L is displayed at the top of the screen as shown below. Key Lock is deactivated by holding the Clear Key and pressing the Down Key a second time. Key Lock only locks out the PJ2 COM’s keypad. The PTT and Light functions are not affected. Screen and Keypad Lighting The screen and keypad lighting are on by default.
NOAA Weather Band Press the WX Key to recall the ten stored NOAA Weather frequencies. The first five channel numbers and their corresponding frequencies will be displayed. The first stored frequency immediately becomes the active frequency and is received by the PJ2 COM. At this point you may select any stored weather channel by pressing the Up or Down Key to scroll through the stored frequencies. Weather channels may also be accessed directly by using the Numeric Keypad.
Low Back Light Mode To set the back light mode of the PJ2 COM to low, press the clear key and the 7 key. Once in the low back light mode, the back light can be further adjusted from level 0 to level 10 by pressing the up or down keys. Press the clear key to save the setting. High Back Light Mode To set the back light mode of the PJ2 COM to high, press the clear key and the 8 key. Once in high back light mode, the back light can be further adjusted from level 10 to level 99 by pressing the up or down keys.
Page intentionally left blank 25 Manual.
General Specifications Communication Frequencies: 760 Frequencies from 118.000 MHz to 136.975 MHz Memory Channels 20 channels numbered 00 to 19 NOAA Weather Band 10 channels numbered 0 to 9 Weight with Alkaline Battery Pack (including antenna) 1.12 lb. (508 grams) Weight without battery pack (including antenna) .72 lb. (327 grams) Dimensions with battery pack Height 6.9 in. (175.95 mm) Width 2.4 in. (60.95 mm) Depth 1.7 in. (43.
Receiver Audio Output 350 mW into 8 Ohms, 10% Sensitivity 2.0 uV @ 1 kHz, Modulation 30% Band Width ± 25 KHz at 60 dB down Transmitter Transmitter Power 1.5 Watts ± 20%, 5 Watt (PEP) at 85% modulation Spurious Radiation -60 dB below carrier Power Consumption 1 A (max) 27 Manual.
Custom Manufactured by Rexon for Sporty’s Pilot Shop 2001 Sportys Drive Batavia, OH 45103 Made in Taiwan 1812A Sportys.com Manual.