as82 of Multimedia Module 05/ 06 E 2.
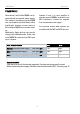
Multi Media of Re:source Multi Media Module MMM Installation Power Supply Connection panel MMM 05 / 06 2 3 4 5+6 Glossary NETWORK TERMINOLOGY 8-11 Multi Media Module Setup .
Multi Media MULTI MEDIA MODULE Re:source MMM The Program Director As the name suggests, you won't just have access to a wealth of storage media. With Internet Radio, you will also have access to the whole world. The days are gone when Program directors decided what you could listen to and then subjected you to intrusive advertising and traffic reports as well. Now, you are your own Program director. You can select your own music genre of choice and listen to broadcasts at a time that suits you.
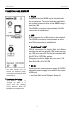
Multi Media Re:source INSTALLATION The Multi Media Module is equipped with the latest electronics and should be handled with care. Loosen the two screws with the TORX screwdriver supplied and remove the blanking plate. Before you install the card, the M51/ M10 must be switched off and separated from the power supply, by plugging the unit out. Before removing the MMM module from its packaging, you should make sure that you are not statically charged.
Multi Media Re:source POWER SUPPLY Instead of one, it is now possible to operate several MMMs in parallel in an M51 installation, if these are supplied from an external power supply. Generations 5 and 6 of the MMM can be operated with an external power supply. This makes it possible to put the MMM into a quickstart mode (Fast Start), which significantly shortens access times to the individual MMM sources after startup. Additionally, Apple devices can now be charged-up of standby mode.
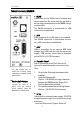
Multi Media Re:source CONNECTION PANEL MMM 05 ► WLAN Connection for the WLAN aerial included with the accessories. The aerial must be installed to set up data communication to the MMM using a wireless LAN. The WLAN connection is deactivated if a LAN connection is established. ► LAN RJ45 connector for a LAN router in the network. The WLAN connection is deactivated as soon as a LAN connection is established. ► USB 1 USB A connection for an external USB mass storage (ext.
Multi Media Re:source CONNECTION PANEL MMM 06 ► WLAN Connection for the WLAN aerial included with the accessories. The aerial must be installed to set up data communication to the MMM using a wireless LAN. The WLAN connection is deactivated if a LAN connection is established. ► LAN RJ45 connector for a LAN router in the network. The WLAN connection is deactivated as soon as a LAN connection is established.
Multi Media Re:source Important advice Software/Firmware version Your network The following description for the cabling and the setup makes the assumption that there is a functioning network with router available and operational. If you have any questions about the setup and configuration of your network or Internet access, please refer to your System administrator or an IT specialist of your choosing. MMM 05 The software version V2.
Multi Media Re:source Glossary NETWORK TERMINOLOGY General the outside world actually to be established, the MMM must additionally be informed of the address of the router (Gateway). The network switch ensures the correct connections between the individual components. In order to make this possible, each device within a network must be capable of being uniquely identified. Each component therefore, is given its own address, the so-called IP address.
Multi Media Re:source Gateway MAC Address The computer or router in your network through which the data traffic with the world outside your network, i.e. the Internet is handled. The MAC address (Media Access Control) is the unique hardware address that is used for the unambiguous identification of the device in the network. With the MMM, the MAC address can either be read out in Setup on Page #1 or alternatively, if it has not yet been installed, from the MAC sticker on the back of the module.
Multi Media Re:source Glossary Proxy Server A proxy or proxy server is a computer in the network that makes data transfer quicker and more efficient and that can also increase security by deploying access control mechanisms. Usually, you do not find proxy servers in home networks. In such a case, you don't need to define a proxy address during the MMM network configuration. The MMM allows the use of a proxy server. SSID NETWORK TERMINOLOGY Service Set Identifier / Network name.
Multi Media Re:source Linux: Mediatomb http://mediatomb.cc/ GmediaServer http://www.gnu.org/software/gmediaserver/ WEP Wired Equivalent Privacy (WEP) is the previously used standard encryption algorithm for WLANs. It should control access to the network as well as ensuring the confidentiality and integrity of the data. Because of various weak spots, the process is considered to be unsafe. For this reason, WLAN installations should use the more secure WPA encryption. See WPA.
Multi Media Re:source SETUP Multi Media Module Important advice The basic settings for the MMM are made in Setup. The following description for the Setup makes the assumption that there is a functioning network with router available and operational. Select Media from the Source menu and press and hold the Setup key for approx 2 seconds. Then select the Source softkey. The following display appears: There is no further explanation of specialist terminology used in individual chapters.
Multi Media Re:source Setup #1 IP Address The first page shows the IP address that the MMM used to login to the network. MAC Address Display of the MAC address that has been uniquely assigned to this MMM. This is important for logging in to the Revox Internet Audio Portal (IAP) The MAC address must be defined WITHOUT the colons shown here, in order to log the MMM in to the Revox Internet Audio Portal, which offers the configuration of the Internet radio.
Multi Media Re:source Setup #1 Playlists for M-Text Within a building control system, it is possible to call up playlists through the MMM, from the module software version 2.10. Other applications and functions are not affected by this menu. Now the Add PL softkey appears. The playlist must be created first before it can be called up through MText. The MMM can work with playlists in M3U and PLS formats. The maximum length of a playlist name is 16 characters.
Multi Media Re:source Setup #1 Setup #1 – Fast Start Deleting playlists If a playlist is to be deleted completely, it has to be removed from the MMM list of playlists first, before it is then removed from the storage medium. This prevents paths that are no longer valid from being stored in the MMM. Quickstart function The MMM 05/06 has a quickstart mode (Fast Start), that reduces the switch-on time to just a few seconds.
Multi Media Re:source Setup #1 – iPod fast charging MMM 06 only – Fast charging The MMM 06 uses a USB connection for connecting Apple devices (iPod, iPhone, iPad), which they can also be charged over. The charging current can be increased to 1.0 A for Apple devices with a charging current that is higher than 0.5 A, if the Fast Start module is active and if an external power supply has been selected. Fast charging can be activated (ON/OFF) with the iPod 1 A softkey.
Multi Media Re:source Setup #2 Hiding MMM sources [Source On/ Off] 5 media sources are available in the MMM: • iRadio (Internet radio) • iPod (iPhone) • USBMusic (USB stick, HDD) • UPnP (Music sever, PC, etc.) • MyMusic The individual MMM sources can be renamed and hidden on the second Setup page. The hide function is active by default when Page #2 is called.
Multi Media Re:source Setup #2 - [Source On/ Off] ! Follow me function It is important that only one source is visible (on), in order to be able to take one MMM source from one side room to another. If 2 or more sources are displayed, a direct switch to the selected source is made. system starts up with the last Internet Radio station to have been listened to.
Multi Media Re:source Setup #2 - [Edit Name] The following functions are available to you for changing names: Renaming MMM sources Simply give a name that you can clearly assign to the individual MMM sources. This can be up to 8 characters long. The Cursor touch keys move the [ ] cursor left and right respectively. The Delete touch key deletes a character where the [ ] cursor is positioned. The Insert touch key inserts a character to the left of the [ ] cursor.
Multi Media Re:source Setup #2 - Submenu Activating M217 submenu If the Follow me function is activated (Setup #2, only one MMM source visible), a submenu can be activated additionally as a comfort function (Submenu On), that allows two further sources to be selected directly through the M217 wall-mounted display, within 10 seconds. If you don't want to make a selection in the submenu but rather want to navigate further, simply press one of the two softkeys .
Multi Media Re:source Setup #3 SSID [...] MMM aerial is not lined up correctly. Change the position and carry out a new softkey. search with the Here, you define the name of your network's SSID. If the required network is not found even though all conditions are fulfilled and the following display appears, it is possible that the cabled access (LAN) is already in place or the network name, (SSID), is hidden by the Access Point. In this case, the SSID must be entered manually, see SSID. The [...
Multi Media Re:source Setup #3 Security Mode Setup #4 and #5 with restart The encryption method can be selected or modified to that of the WLAN router with the Security softkey. Further Setup pages (#4 for WPE settings and #5 for WPA(2)-PSK settings) are now accessible, depending on the selected encryption method. Carry out a restart of the MMM with the Restart softkey, after configuring Setup pages #4 and/or #5. Otherwise, the existing encryption method is retained. There are three options.
Multi Media Re:source Setup #4 [ WPE] WEP Key [...] Authentication (WEP) The MMM offers both the WEP authentications Open and Shared. WEP encryption is done using a WEP key that is defined once for the router and all WLAN devices. The required authentication can be set softkey. through the Enter your WLAN network WEP key here. The [...] cursor is moved left and right and with the softkeys respectively. The softkey inserts a character to the left of softkey the [...] cursor.
Multi Media Re:source Setup #5 [ WPA(2) PSK] WPA(2) Key [...] WPA Cipher The MMM offers both AES and TKIP as WPA(2) cipher (encryption standard). WPA encryption is done using a WPA key that is defined once for the router and all WLAN devices. The required encryption standard can be softkey. set through the Enter your WLAN network WPA(2) key here. The [...] cursor is moved left and right and with the softkeys respectively. The softkey inserts a character to the left of softkey the [...] cursor.
Multi Media Re:source Setup #6 DHCP Setup #7 IP-Address [...] Using the softkey, you can define whether logging in to the network should be done automatically DHCP Yes, or whether the required setting will be made manually DHCP No. The 4 blocks of the IP address that the MMM should have, are set using the two Address softkeys. In a network of DHCP-enabled LAN devices, you must always ensure that these are NOT given the MMM's IP.
Multi Media Re:source Setup #7 IP Gateway [...] Setup #8 DNS Server 1 / 2 [...] Access to the Internet is defined through the two Gateway softkeys. The IP addresses of the DNS serves 1 and 2 can be entered using the DNS 1 and DNS 2 softkeys respectively. If such a data exchange should be done outside the LAN, the IP Gateway must be configured according to the on-site requirements. NOTE If the MMM is connected with a standard (WLAN) router, the IP address of this router can simply be entered here.
Multi Media Re:source Setup #9 Setup #10 Proxy Server Proxy Server Address [...] You can define whether communication should be done using a Proxy server with softkey. the The 4 blocks of the Proxy Server address is defined using the two Proxy softkeys. The setting Use Proxy ? Yes, makes Setup page #9 accessible, where the corresponding settings (Proxy address, Port) can be made. You get to this Setup softkey. page with the Proxy Server Port [...
Multi Media Re:source MMM Operation Once all the required settings have been made in the MMM Setup, the Multi Media Module (MMM) can be called in the M51 Source menu and/or through the keys on the M217/M218 combination that were assigned through the Remote menu. The following Start screen appears in the initial seconds after calling the source Media: The manual always shows the M51 display view to illustrate working with the MMM.
Multi Media Re:source M217/ M218 operation M217 Menu overview Thanks to the sophisticated Revox Multiroom concept, it is possible to operate the MMM from each additional room that is connected to the Multiroom system. The following menu overview shows the most important M217 menus for operating the MMM. As the selection menus are very dependant on the choice of devices connected to the MMM (USB, iPod, clients, etc.) it is possible that the graphics differ from your M217 menus.
Multi Media M217 Menu overview Re:source Part Network client selection Menu: Now Playing +MyMusic selection You can add the radio station currently playing and/or the path to your favourite music tracks to the MyMusic category by pressing the +MyMusic softkey. We recommend however, only adding music storage paths to MyMusic that are always available. ABC search The alphabetically sorted selection allows a specific selection based on names that start with a particular letter.
Multi Media Re:source General control softkeys Softkey ABC... The alphabetically sorted selection allows a specific selection based on names that start with a particular letter. This can be names of folders, titles or radio stations. The ABC search can only be used with sorted lists. The following message appears with unsorted lists: „unsorted list...“ Softkey Search Fast forward or rewind to a particular timepoint. Softkey Back This key returns you to the next highest menu level.
Multi Media Re:source SHUFFLE REPEAT The Shuffle function allows the playback of tracks in a random order. Depending on the selection criterion you use to activate the Shuffle function, either only the tracks within an album are played in a random order (Albums) or all the tracks on the iPod (Songs). With the Repeat function, you can repeat individual tracks (Repeat On) or complete folders, (Albums, Songs, etc.) (Rpt All).
Multi Media Re:source Fast wind with search Info - Status overview The Search function enables jumping to a particular time-position through fast forward or rewind. The Info softkey shows the status of the currently selected source. The following display appears when the Search menu is called: In the example shown below, the track When I Kissed The teacher by ABBA from the Album Arrival is playing. This title was stored with a data rate of 192 Kbps.
Multi Media Re:source USB The USB menu enables access to content on connected USB storage media (USB Memory stick). The Play softkey only appears once a track is available for selection. Press Play to start the playback of the title: All tracks and music folders are displayed after the USB selection is made. You can make your selection using the Page and Select navigation softkeys. The Browse softkey opens folders containing more than one track.
Multi Media Re:source iPod The iPod menu allows access to content on the connected iPod. Press Play to start the playback of the title: You can scroll to the preceding or the following track respectively within the list / album, using the Previous and Next softkeys. The selection options in the iPod menu are predefined by the iPod and are not handled by the MMM controller. For this reason, it is possible that new or modified selection options will be added in the future.
Multi Media Re:source Internet Radio The selection Internet Radio gives you access to thousands of radio stations available from around the world. As well as the linguistic diversity available, you can also make specific selection based on particular musical directions (Genres). Podcasts offer even more individuality. Podcasts are broad-casts such as news programs, magazine shows, crime dramas, comedies, etc. that are started when you select them.
Multi Media Re:source Podcasts By Genres radio station in the IAP. You will usually find this on the provider's homepage or you can display them in a media player. Listing of podcast transmission based on the genre, which these transmissions are assigned to. New Stations Device location (country) New radio stations are being added somewhere in the world every day.
Multi Media Re:source Shortening access times When you store stations or podcasts through the Internet radio option into the MyMusic folder, a list path is created in the background. If a MyMusic entry is now called, the receiver uses this list path as the route to find the corresponding radio station. The more entries there are in the list, the more time the receiver needs to find the entry again.
Multi Media Re:source UPnP-AV Server Menu from the Revox NAS server in the development department: Network servers that support the UPnPAV standard can be accessed through the network (LAN or WLAN). The most usual instance of such a server is a NAS hard disc. The name of a media server is defined at the server itself. You can make your selection using the Page and Select navigation softkeys, as with all other media content. The individual selection criteria are selected with the Browse softkey.
Multi Media Re:source MyMusic The MyMusic selection on the start page covers all your favourites that you have added through the MMM menu. This can include paths to music tracks on USB storage media or network hard discs or also favourite radio stations. We recommend however, only adding music content storage paths to MyMusic that are always available. You can make your selection using the Page and Select navigation softkeys. You start the playback with the Play softkey.
Multi Media Re:source M208 Operation - MyMusic There is a separate mpi file called Revox Multimedia Module in the M208 Project Manager device library, for controlling the MMM in the MyMusic area. The are several navigation options to help you find the desired entry in the list in the shortest time: Jump to start As the description in this manual relates to the system software V2.00+, it is important to use the corresponding M208 Project Manager V2.01 or higher. The MMM doesn't support older versions.
Multi Media Re:source M208 Remote control Basic settings Switching M51/M219 off Change sound track Select subtitles Change angle Show details List selection Cover selection Sound setting Volume control Mute Navigation (in the menu) Confirm/Execute Cancel Playack Stop Jump forwards/back Pause / Freeze frame Search forwards/back Number pad for direct access Show details Pause change 42
Multi Media Re:source Synchronising MyMusic Synchronisation now starts and only takes a few seconds. When the synchronisation is complete, the following display appears: The following display appears the first time the MMM is started on the remote control: The MyMusic selection has not yet been synchronised in this constellation. Now, all stored MyMusic entries appear in the display the next time the MMM controller is called. The display order is determined by the order they were stored in the MMM.
Multi Media Re:source Setting up Internet Radio The list of radio stations that appears in the Internet Radio category in your Multimedia Module is made available by a service provider and transferred to your MMM through the Internet connection. You can extend and edit the Favorites and Added Stations lists in the Internet Radio menu in the Online Services category as you wish, through Revox's Internet Portal. This is done as follows: Open your Internet Browser and call the Revox Homepage under: www.
Multi Media Re:source Internet Audio Portal - IAP You can login (Member Login) if your MMM has already been registered in the Internet Audio Portal (IAP). If this is not the case, you can register with How to do this is described in the next chapter: Initial login Revox Internet Audio Portal start page Initial login Press Source softkey. You must register your MMM in order to be able to use the IAP service.
Multi Media Re:source IAP Registration page NOTE If you are using several MMMs, each one has to be registered individually. You can transfer a one-time generated Favorites list from one MMM to all other MMMs. This is also done in the IAP under the section: Register for online newsletter If required, you can subscribe to the free-of-charge Revox Newsletter, which is sent by e-mail. To do this, you just have to complete the corresponding fields and set the checkbox in the corresponding field.
Multi Media Re:source Managing the Revox IAP Currently, you can make selections on the Internet Audio Portal according to the following criteria: Once you have registered, you can make a selection for the extensive pool of radio stations and add it to the favourites list (Favorites), add new radio stations to Added Stations or search for podcasts. Browse Stations By location By genre By language New stations The transfer of the lists to your MMM happens automatically over the Internet connection.
Multi Media Re:source Adding radio stations to favourites Clicking on the in the station list adds the corresponding radio station to the favourites in the MMM's Internet Radio selection. This opens the window shown on the right where you can decide which favourite group the radio station should be added to or if you want to create a new favourites group for it. A maximum of 9 groups can be generated to organise your favourites.
Multi Media Re:source Synchronising MMM devices If you own several Revox devices (Multimedia Module, S118, S119, S120 of the Joy series), you can synchronise your Favourites list and added radio stations with each other. This means you create your Favourites list one time and it can then be called from all registered Joy devices.
Multi Media Re:source Network: Questions & Answers NETWORK QUESTIONS / TIPS Network is ok but there is no sound. The connection is lost after a few minutes: This is a system-based characteristic of the UPnP standard. Active communication starts on a port with a number higher than 1024 and then changes regularly during operation. Not all firewall programs recognise this knocking on different doors as a continuous connection.
Multi Media Re:source NETWORK QUESTIONS / TIPS NETWORK QUESTIONS / TIPS The MMM finds my Access Point, however my computer is not displayed. • Make sure you have installed a UPnP server on your computer and that this is activated. Depending on the amount of data and the software, it can take a few seconds before the option appears as a selection on the MMM. • You have activated a MAC address filter on your router. In this case, add the MMM MAC address to you router configuration.
Multi Media Re:source NETWORK QUESTIONS / TIPS NETWORK QUESTIONS / TIPS Network activity? Two LEDs are integrated in the MMM network socket, which display bus activity. If the network connection is working, the orange LED lights up permanently while the flashing of the green LED indicates that data exchange is taking place.
Multi Media Re:source Multiroom- Questions & Answers Wake-up function with MMM The MMM can also be used to wake you over the Multiroom system. The following has to be taken into account: Remote setting The Multiroom module timer (MTR) makes three sources available to choose from, which are called as soon as the timer is switched on. Tuner, DVD/CD and Aux/Server can serve as variables (Remote button).
Multi Media Re:source Technical data Playable formats Streaming Client1 Playlists WAV (96 kHz,32 bit), FLAC (24 bit), AIFF (32 bit), AAC, MP3 (cbr +vbr, 320 kB), OGG-Vorbis, WMA M3U, PLS Internet Radio Data Base Revox Internet Audio Portal (Online Services) Supported Media server Connect Server (WMDRM10) Supported Media server UPnP-AV 1.
Multi Media Re:source Warranty Note COPYRIGHT Warranty covers a period of 24 months from the purchasing date. iPod is a trademark of Apple Inc. 1 Infinite Loop, MS60-DR, Cupertino, California, USA, 95014. All rights reserved. Your specialist dealer is your first contact if you need service help. If he can't give you the help you need, send the MMM module carriage free and without any accessories to your national Sales Office.
Multi Media Re:source Multimedia Module Manual 05/06 Part no.: 10.30.