
Manual


Netcon (Remote Administration System)
31
Chapter 4 — Operation
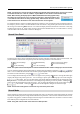
4.1 LIVE MONITORING
Netcon provides remote monitoring functions for viewing video images in real time from either a single site or multiple
sites. In addition, when events are detected at a remote site while in the live monitoring mode, Netcon displays the event
information on the Watch Event View panel. In order to perform live monitoring, the display option must be set to Watch
Screen or Watch and Search Screen during System setup.
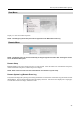
To connect a remote site on the Watch screen, select the site or camera you want to connect to in the Remote Site, Favorite
Sites or Map panel and then drag and drop it in the desired position on the screen. The
icon will be displayed on each
Watch screen. To disconnect the current connection, select the site or camera you want to disconnect to in the Remote
Sites, Favorite Sites or Map panel or on the screen and then click the button on the toolbar or select Disconnect from
the System drop-down menu.
NOTE: When selecting the display option of Watch and Search Screen during System setup,
the remote site can also be set to connect using the right or left mouse buttons (This is
user-defined and must be set during System setup). Select Watch Screen to connect to
the selected site on the Watch screen when the text menu screen appears.
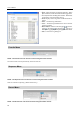
Screen Layout and Frame Layout
Netcon provides multiple screen layout options. The formats available are single-screen, quad, 1+7, 3x3, 4x4, 5x5, 1+32,
6x6, 7x7, 8x8 and full-screen. When in one of the multi-view formats, clicking the
or
button will move to the
previous or next page. To view a specific image in the single-screen mode, move the cursor to that image and double
click the left mouse button. To return to the previous screen mode from the single-screen mode, double click the left
mouse button in the monitoring window.
Clicking (Layout Load) will apply the selected frame layout to Netcon, and clicking
(Layout Setup) allows you
to set up the user-defined frame layout.
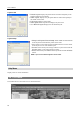
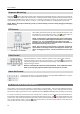
Audio Communication
Netcon supports audio communication between the Netcon system and a DVR location equipped with two-way audio.
The icon will be displayed on each camera screen. If you want to enable audio communication with the remote site,
select any camera of the remote site on the screen and click the right mouse button. Selecting Enable Audio from the
menu displays the following audio control panel.
If you want to send audio to the selected remote site, click the button and talk into the microphone. If you want to
monitor live audio from the selected remote site through the attached speaker, click the
button. Clicking both
button and
button allows two-way communication. Clicking the button disables audio communication.
If the remote DVR allows you to select an audio channel to monitor from the Netcon system,
clicking the
button displays the Select Audio Channel dialog box. Select an audio channel
to monitor and click the OK button.