
Manual


User’s Manual
32
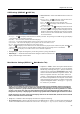
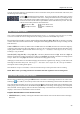
NOTE: It is possible no recorded image displays on the current screen. Press the DISPLAY button on the remote
control and change the screen mode to 4x4 for the 16-channel DVR, 3x3 for the 8-channel DVR and 2x2 for the
4-channel DVR. You will be able to easily see which cameras have recorded video for target time.
You also can narrow your event search by selecting Option… and setting up the new search condition.
From: Pressing the
button toggles between On and Off. When
set to Off, you can enter a specific Date and Time. When set to
On, the search will be from the first recorded image.
To: Pressing the
button toggles between On and Off. When
set to Off, you can enter a specific Date and Time. When set to
On, the search will be to the last recorded image.
Check Time Overlap: Selecting the box and pressing the
button toggles between On and Off. You will be able to turn the
Check Time Overlap on or off only if user-defined date and time
have been set in the From and To boxes. If the DVR’s date and
time have been reset, it is possible for the DVR to have overlapping
start and stop times. When set to On, you will be asked to select
one of the overlapping start and stop times. When set to Off, the
DVR will display search results from all start times to all stop times.
Alarm-In: Select the alarm inputs that you want to include in your search.
Motion: Select the cameras for which you want any reports of motion detection.
Video Loss: Select the cameras for which you want any reports of lost video.
Record Channels: Select the cameras that you want to search for any reports of event recorded data. The DVR
will display the events (not the camera channels) that occurred and that also are recorded on the camera channel that
you selected. If you do not select a camera channel in this field, the DVR will search events that are not associated
with cameras.
Check Recording, Check Alarm-In, Disk Almost Full, Disk Bad, Disk Temperature, Disk S.M.A.R.T., Fan
Error: Pressing the
button toggles between On and Off to include or exclude self-diagnostic events as part of
your search.
Once you set your desired search conditions, select Search and press the
button to display the search results in
the Event Log Search screen. Selecting Cancel exits the screen without saving the changes.
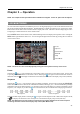
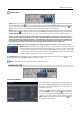
Record Table Search
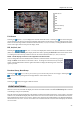
Standard View
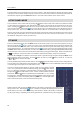
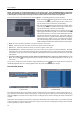
Compact View
Expanded View
Recording information about video images currently displayed on the screen displays in the recording status bar. A
grey vertical line indicates the current search position. To search for specific video, move the vertical line by pressing
the Left or Right arrow buttons on the remote control, scrolling the mouse wheel or clicking the mouse on the desired
segment.
If the DVR’s time and date have been reset to a time that is earlier than some recorded video, it is possible for the DVR
to have more than one video stream in the same time range. In this case, the overlapping time range in the record table
will be separated by a yellow vertical line.