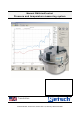
Manual PMGrindControl Pressure and temperature measuring system Translation © Retsch GmbH, 42781 Haan, Retsch-Allee 1-5, Germany 08.02.
Copyright Copyright by Retsch GmbH Haan, Retsch-Allee 1-5 D-42781 Haan Federal Republic of Germany 2
1 Notes on the Operating Manual ............................................................................................................ 5 2 Confirmation ........................................................................................................................................... 6 2.1 3 Method of Operation .......................................................................................................................... 7 Technical Data .........................................
5.5.3 5.5.3.1 Menu Settings - Measuring Systems Management ............................................................. 24 5.5.3.2 Menu Settings - Options ...................................................................................................... 24 5.5.4 Menu Help.................................................................................................................................... 24 5.5.5 Menu View ...........................................................................
Notes on the Operating Manual Pos : 1.1 /00020 BD A Software/20005 PM GC Kapitelsamml ung/0001 Hi nweis e z ur Bedienungs anl eitung/1 Hi nweis e zur Bedi enungs anleit ung @ 0\mod_1213007358760_9.doc @ 1573 @ @ 1 1 Notes on the Operating Manual Pos : 1.2 /00020 BD A Software/20005 PM GC Kapitelsamml ung/0001 Hi nweis e z ur Bedienungs anl eitung/M odul Hi nweis z ur Bedienungsanl ei tung @ 0\mod_1207746013967_9.
Confirmation Pos : 2.2 /00020 BD A Software/20005 PM GC Kapitelsamml ung/Ü berschriften/1. Ü berschriften/1 Bestätigung (For mul ar für den Betrei ber) @ 0\mod_1208870841095_9.doc @ 430 @ @ 1 Bes tätigung 2 Confirmation Pos : 2.3 /00020 BD A Software/20005 PM GC Kapitelsamml ung/0003 Bestätigung/Eas ySieve M odul Bestätigung @ 0\mod_1208959364569_9.
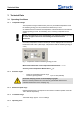
Confirmation Pos : 3.2 /00020 BD A Software/20005 PM GC Kapitelsamml ung/Ü berschriften/1.1 Ü bersc hriften/11 Funkti ons weis e @ 0\mod_1208870493457_9.doc @ 406 @ @ 1 Method of Oper ation 2.1 Method of Operation Pos : 3.3 /00020 BD A Software/20005 PM GC Kapitelsamml ung/Warnhinweis e/Hinweis nic ht i n PM200 verwendbar @ 0\mod_1210056716286_9.doc @ 766 @ @ 1 The wireless grinding jar cover cannot be used in the PM 200. Pos : 3.
Technical Data Pos : 4.2 /00020 BD A Software/20005 PM GC Kapitelsamml ung/Ü berschriften/1. Ü berschriften/1 T ec hnis che D aten @ 0\mod_1208870877356_9.doc @ 436 @ @ 1 3 Technical Data Pos : 4.3 /00020 BD A Software/20005 PM GC Kapitelsamml ung/Ü berschriften/1.1 Ü bersc hriften/11 Betriebs beding ung en @ 0\mod_1209388949288_9.doc @ 656 @ @ 1 3.1 Operating Conditions Pos : 4.4 /00020 BD A Software/20005 PM GC Kapitelsamml ung/Ü berschriften/1.1.
Technical Data Operating time with full battery charge: – highly dynamic measuring rate (200 Hz) - 40h – long-time measuring rate (0.2 Hz) - 80h Pos : 5.1 /00020 BD A Software/20005 PM GC Kapitelsamml ung/Ü berschriften/1. Ü berschriften/1 Tr ansport und Pfl ege @ 0\mod_1213010453912_9.doc @ 1587 @ @ 1 Pos : 5.2 /00020 BD A Software/20005 PM GC Kapitelsamml ung/- - - - Seitenumbruc h - - - - @ 0\mod_1208857688413_0.
Technical Data Pos : 5.3 /00020 BD A Software/20005 PM GC Kapitelsamml ung/Ü berschriften/1.1 Ü bersc hriften/11 Transport und Lager ung @ 0\mod_1216808117898_9.doc @ 2072 @ @ 1 3.2 Transport and Storage Pos : 5.4 /00020 BD A Software/20005 PM GC Kapitelsamml ung/0006 Kapitel Trans port und Liefer umfang/M odul Tr ans port und Lagerung @ 0\mod_1216808076180_9.doc @ 2078 @ @ 1 3.2.1 Packaging The packaging has been adapted to the mode of transport.
The First Start Pos : 6.2 /00020 BD A Software/20005 PM GC Kapitelsamml ung/Ü berschriften/1. Ü berschriften/1 D er erste Start @ 0\mod_1208854281759_9.doc @ 324 @ @ 1 Der 4 The First Start Pos : 6.3 /00020 BD A Software/20005 PM GC Kapitelsamml ung/Ü berschriften/1.1 Ü bersc hriften/11 Vollständiger Programm-Ablauf bis zur ersten Messung @ 0\mod_1218549278088_9.doc @ 2270 @ @ 1 4.1 Complete Program Sequence up to First Measurement Pos : 6.
The First Start Fig. 2: Enter into the MAC address field. You will find the MAC address on the cover page of your operating manual: Fig. 3: MAC address After 15 minutes without assignment to a measurement task, the wireless grinding jar cover switches off. If the status indicator lamp is not glowing red any longer, take out one of the batteries and then put it back in again. 8. Click on the button Add measurement system.. Once the system corresponding to the MAC address has been found, 9.
The First Start This adds the wireless grinding jar cover to the current measurement task as one of the four possible measurement systems. 14. After clicking on the Accept button, you can end the procedure by clicking on the Close button. 15. Now, click on the Continue button in the Assign measurement systems program window. In the Measurement Task window, you can input a remark for the measurement task. 16. Click on the Continue button. 17.
The First Start Fig. 7: Start - Pause - Stop Pos : 7.1 /00020 BD A Software/20005 PM GC Kapitelsamml ung/- - - - Seitenumbruc h - - - - @ 0\mod_1208857688413_0.
Software Pos : 7.2 /00020 BD A Software/20005 PM GC Kapitelsamml ung/Ü berschriften/1. Ü berschriften/1 Software @ 0\mod_1208871101324_9.doc @ 448 @ @ 1 5 Software Pos : 7.3 /00020 BD A Software/20005 PM GC Kapitelsamml ung/Ü berschriften/1.1 Ü bersc hriften/11 Sys tem- Vorrauss etzungen @ 0\mod_1209389491118_9.doc @ 711 @ @ 1 5.1 System Requirements Pos : 7.4 /00020 BD A Software/20005 PM GC Kapitelsamml ung/0006 Software/M odul Sys tem- Vorr aus setzungen @ 0\mod_1210073353541_9.
Software 5.2.2 Installation of the PM GrindControl Software Pos : 7.9 /00020 BD A Software/20005 PM GC Kapitelsamml ung/0006 Software/M odul Ins tall ati on der Softwar e PM Gri ndC ontrol @ 0\mod_1214924249492_9.doc @ 1893 @ @ 1 • Start the setup.exe from the accompanying installation-CD-ROM and follow the instructions that appear. • Check with Windows Update whether important updates for .Net Framework are available. • Start the PM GrindControl software.
Software Folder: c:\Measurement files File: Measurement_task_A.afg File: Measurement_task_B.afg File: Measurement_task....afg The folder for the measurement files must be on a local data medium. It is not possible to move it to other data carriers. Folder: Measurement task Folder: Measurement File: _1 Measurement_1.data t File: Measurement_1_1.dat Folder: Measurement_2 Once the file reaches a certain size – e.g. during continuous measurements the measurement data file is split. File: Measurement_2.
Software Pos : 7.13 /00020 BDA Softwar e/20005 PMGC Kapitels ammlung/Ü bersc hriften/1.1 Übersc hriften/11 Software Oberfl äche @ 0\mod_1208936354855_9.doc @ 480 @ @ 1 oInterfac e 5.4 Software Interface Pos : 7.14 /00020 BDA Softwar e/20005 PMGC Kapitels ammlung/0006 Softwar e/M odul Softwar e F unkti ons- Ber eiche @ 0\mod_1218452830342_9.doc @ 2206 @ @ 1 The program window for the PM GrindControl software breaks down into the following function areas: Fig.
Software 5.5.1 Menu File - Measurement task, new Use this command to create a new empty measurement task and at the same time end the current measurement task. Using standard Windows functions, create a new folder for each new measurement task. This folder may only be stored on the local computer system and not in the network . When creating a new measurement task, a new folder is created automatically for the measurement data and a measurement file (.afg).
Software After 15 minutes without assignment to a measurement task, the wireless grinding jar cover switches off. If the status indicator lamp is not glowing red any longer, take out one of the batteries and then put it back in again. 2. Click on the Add measurement system button. Once the system that corresponds to the MAC address has been found, 3. confirm with the OK button. The status indicator lamp now glows green. The “System Information” program window is displayed. 4.
Software Fig. 11: Assign the active system to the measurement This adds the wireless grinding jar cover as one of the four possible measurement systems for the current measurement task. 9. After clicking on the Accept button, you can end the procedure by clicking on the Close button. 10. Now click on the Continue button in the Configure Measuring Systems program window. In the “Measurement Task” window, you can input a remark for the measurement task. 11. Click on the Continue button. 12.
Software 5.5.1.3 4. Select a file in the "Existing Measurement Files" list. This accepts the protocol inputs from the corresponding measurement. 5. Enter a tick into the Add Counter checkbox. This inserts a counter after the file name or updates an existing counter. 6. Click on the Finish button. Menu File - Close Measurement Task This command closes and saves an opened and an active measurement task and the active measurement. 5.5.1.
Software • tool bar Fig. 22: PM GrindControl Software function areas 5.5.2.1 Menu View - Diagram Activates or deactivates the display of the measurement diagram. Item numbers [3]+[4] in the "Function Areas of the PM GrindControl software" figure. Alternatively, you can also use the following button. Fig. 23: Show Diagram button 5.5.2.2 Menu View - Measurement Settings Activates or deactivates the display of the measurement settings and measurement Start - Pause - Stop.
Software Item number [1] in the "Function Areas of the PM GrindControl Software" figure. 5.5.3 Menu Settings In the Settings menu item you will find the following entries: 5.5.3.1 • Measuring Systems Management • Options... Menu Settings - Measuring Systems Management Opens the “Measuring Systems Management” window. 5.5.3.2 Menu Settings - Options Opens the “Options” window. 5.5.4 Menu Help You will find the following entries in the Help menu item: 5.5.
Software 40 42 41 43 44 46 48 50 45 47 49 51 Fig. 14: Program window for protocol inputs The protocol details are saved in the .afg file.
Software Pos : 7.18 /00020 BDA Softwar e/20005 PMGC Kapitels ammlung/Ü bersc hriften/1.1 Übersc hr iften/11 Statusleis te der Messs ys teme @ 0\mod_1218453801705_9.doc @ 2242 @ @ 1 5.6 Status Bar for the Measuring Systems Pos : 7.19 /00020 BDA Softwar e/20005 PMGC Kapitels ammlung/0006 Softwar e/M odul Statusleiste der Mes ss ysteme @ 0\mod_1219303118953_9.doc @ 2280 @ @ 1 30 31 33 34 32 35 Fig.
Software Fig. 32: Show existing measurement data Fig. 33: Export measurement data Fig. 34: Display diagram Fig. 35: Display measurement settings Fig. 36: Display status bar Fig. 37: Measuring systems management Pos : 7.22 /00020 BDA Softwar e/20005 PMGC Kapitels ammlung/Ü bersc hriften/1.1 Übersc hriften/11 M essraten @ 0\mod_1214312745260_9.doc @ 1756 @ @ 1 Meas uring R ates 5.8 Measuring Rates Pos : 7.
Wireless Grinding Jar Cover Pos : 8.2 /00020 BD A Software/20005 PM GC Kapitelsamml ung/Ü berschriften/1. Ü berschriften/1 F unk-Mahlbec her dec kel @ 0\mod_1208960030049_9.doc @ 581 @ @ 1 6 Wireless Grinding Jar Cover Pos : 8.3 /00020 BD A Software/20005 PM GC Kapitelsamml ung/Ü berschriften/1.1 Ü bersc hriften/11 Funk-Mahl bec herdec kel Komponenten @ 0\mod_1209036401882_9.doc @ 616 @ @ 1 6.1 Wireless Grinding Jar Cover Components Pos : 8.
Wireless Grinding Jar Cover 6.2 Inserting the Batteries Pos : 8.6 /00020 BD A Software/20005 PM GC Kapitelsamml ung/F unk M ahl becherdec kel/M odul Eins etz en der Akkus @ 0\mod_1208959898706_9.doc @ 568 @ @ 1 Fig. 17: Inserting the batteries Batteries may not be disposed of with the household trash. Bring the used batteries to your dealer or to the battery collection point. Pos : 8.7 /00020 BD A Software/20005 PM GC Kapitelsamml ung/Ü berschriften/1.
Wireless Grinding Jar Cover – Green flashing (measurement was started and measurement values are being transmitted) Pos : 8.11 /00020 BDA Softwar e/20005 PMGC Kapitels ammlung/Ü bersc hriften/1.1 Übersc hriften/11 R einigung der Luftkanäl e des Druc ksens ors @ 0\mod_1216716068719_9.doc @ 2046 @ @ 1 6.5 Cleaning the Air Duct in the Pressure Sensor Pos : 8.12 /00020 BDA Softwar e/20005 PMGC Kapitels ammlung/F unk Mahlbec herdec kel/Modul Rei nigung der Luftkanäle Druc ksens or @ 0\mod_1216715881345_9.
Wireless Grinding Jar Cover Pos : 8.16 /00020 BDA Softwar e/20005 PMGC Kapitels ammlung/Ü bersc hriften/1.1 Übersc hriften/11 Austausc hen der D ec kelgrundpl atte @ 0\mod_1210072111061_9.doc @ 784 @ @ 1 6.7 Exchanging the Cover Baseplate Pos : 8.17 /00020 BDA Softwar e/20005 PMGC Kapitels ammlung/F unk Mahlbec herdec kel/Modul Austausc h der D ec kelgrundplatte @ 0\mod_1214313457521_9.doc @ 1780 @ @ 1 13 2 4 9 12 14 7 11 14 12 2 Fig.
Wireless Grinding Jar Cover • Unscrew the antenna (4). • Remove the two black caps from the venting holes (9). • Remove the three screws (13) on the pre-assembled standard cover baseplate and lift the plate up from the cover housing. • Place the cover baseplate with the venting holes (12) in front of you with the recess for the filter fleece (8) pointing upwards. • Caution! When inserting the two de-aerating tubes (14), the surface with which the tubes are fitted (flat) (10) must point downwards.
Wireless Grinding Jar Cover Fig. 13: Replacing the filter fleece • Replace the filter fleece. • Before assembly, check the state and the correct position of the seals and the filter fleece. • Now, insert the cover baseplate back in the cover housing; when doing so, pay attention to the position of the filter fleece (11). • Next, tighten the cover baseplate with the three screws (13). • Screw the antenna (4) onto the grinding jar cover. Tauschen Sie das Filtervlies aus. 6.
Wireless Grinding Jar Cover Pos : 8.22 /00020 BDA Sof twar e/20005 PMGC Kapitels ammlung/F unk Mahlbec herdec kel/Modul Mahlbec her mit Spannring versc hließ en @ 0 \mod_1214827597315_9.doc @ 1855 @ @ 1 The wireless grinding jar cover cannot be used in the PM 200. Comply with the operating instructions for your ball mill too. This document only has instructions for the use of the PM GrindControl. Safe handling of the planetary ball mill is a precondition for the use of the PM GrindControl.
Wireless Grinding Jar Cover Risk of burning your hands. It is essential to wear safety gloves when removing or opening the heated grinding jar. Pos : 8.23 /00020 BDA Softwar e/20005 PMGC Kapitels ammlung/Ü bersc hriften/1.1 Übersc hriften/11 N ass ver mahlungen mit leic ht e ntz ündlic hen M aterialien @ 0\mod_1216805932680_9.doc @ 2060 @ @ 1 6.12 Wet Grinding with Highly Flammable Materials Pos : 8.
Telegesis (ZigBee) USB stick • Before removing the grinding bowl, make sure that the clamping ring is sitting securely. • Only remove the grinding bowl with the closing device. Before opening it, let it cool down and make sure it is in a safe position (suction equipment).• Pos : 9.1 /00020 BD A Software/20005 PM GC Kapitelsamml ung/Ü berschriften/1. Ü berschriften/1 U SB Stic k T eleg esis (ZigBee) @ 0\mod_1209389458882_9.doc @ 705 @ @ 1 7 Telegesis (ZigBee) USB stick Pos : 9.
Operating Instructions for Powerline 5 LCD Pos : 11.1 /00020 BDA Softwar e/20005 PMGC Kapitels ammlung/Ü bersc hriften/1. Ü bersc hriften/1 Bedienungs anl eitung Powerline 5 LCD @ 0\mod_1218446915778_9.doc @ 2194 @ @ 1 8 Operating Instructions for Powerline 5 LCD Pos : 11.2 /00020 BDA Softwar e/20005 PMGC Kapitels ammlung/Ladeg erät/Modul Vorsic ht N eue Batterien Laden @ 0\mod_1215594705254_9. doc @ 1996 @ @ 1 Charge new batteries completely before using them for the first time.
Operating Instructions for Powerline 5 LCD Pos : 11.6 /00020 BDA Softwar e/20005 PMGC Kapitels ammlung/Ladeg erät/Modul Ladeg erät Bedi enungsanlei tung @ 0\mod_1214318216209_9.doc @ 1798 @ @ 1 Read the operating instructions carefully before commissioning the appliance! 8.1 Safety Instructions Warning – General dangers! • The appliance may only be operated in closed, dry rooms. • To eliminate the danger of fire or of an electrical shock, the appliance must be protected from moisture and rain.
Operating Instructions for Powerline 5 LCD 8.3.1 – Status indication with indicator lamps and LCD – Battery fault detection – faulty batteries are picked out and displayed.– Indicator Lamps for Batteries (1) Indicator glows red: charging Indicator flashing red: battery faulty Indicator glows yellow: discharging Indicator glows green: battery charged / pulse retention charging 8.3.
Operating Instructions for Powerline 5 LCD 8.6 Environment Notice By using rechargeable batteries and chargers, you can protect the environment and save at the same time. Batteries should not be disposed of with the household waste. Bring used batteries to your dealer or to the battery collection point. Pos : 11.7 /00020 BDA Softwar e/20005 PMGC Kapitels ammlung/- - - - Seitenumbr uch - - - - @ 0\mod_1208857688413_0.
Operating Instructions for Powerline 5 LCD Pos : 11.8 /00020 BDA Softwar e/20005 PMGC Kapitels ammlung/Ladeg erät/Modul Ladeg erät Gr afi ken @ 0\mod_1214381853335_9.doc @ 1810 @ @ 1 Fig. 20: LCD display, charger Fig.
9 Index A Accuracy of the Temperature Measurement ........ 8 Active Systems ...................................................20 Explanation of the Icons and Symbols ............... 26 Export Measurement Data ................................. 22 Extreme Dirt ....................................................... 10 Add Counter ........................................................22 F ASCII...................................................................22 File Endings ...........................
Measurement Resolution of the Temperature Measurement .................................................... 8 Measurement Settings ........................................23 Measurement task, new......................................19 Measuring Rates .................................................27 Measuring Systems Management ......................24 Menu and Menu Bar ...........................................18 Menu file .............................................................18 Menu Help .......
Copyright ® Copyright by Retsch GmbH Haan, Retsch-Allee 1-5 D-42781 Haan Federal Republic of Germany