
Owner's Manual


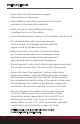

Table Of Contents

8
Copyright © 2017 Retro Manufacturing, LLC
8
Copyright © 2018 Retro Manufacturing, LLC
STEP 1: Install the Radio Face
Plug the ribbon cable included with the Motor 4 radio body
into the radio face. After plugging in the radio face, attach
it to the radio body (if it is not already attached) and tighten
with the four radio face mounting screws provided in the
radio face box (the screws are very small and are included
in the hardware kit included with your Motor 4 box).
The RetroSound
®
logo on the Motor 4 radio body should be facing
upwards. Take care to not install the face to the body upside down.
NOTE: Optionally, the radio face can be mounted remotely up to nine feet away
from the Motor 4 radio body using an optional Face to Body Extension Cable (sold
separately). In some installation applications, a bracket (not included) can be used
to mount the radio face to the radio body at an angle.
INSTALLATION INSTRUCTIONS
Figure 1 - Attach the Radio Face
Radio Face
Motor 4
Radio Body