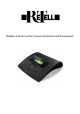
MailBox & Multi Function Answering Machine with Flexi speech
Safety information Safety information When installing, connecting and operating the Retell 340, please follow the safety information below: • Connect the connecting cables only into the correct sockets. • Please ensure that cables do not lead to any danger of stumbling and avoid folding, pulling and pinching of the cables. • Avoid installing near sources of electrical interference. • Only connect approved accessories to the device. • Never open the device.
Key assignment Key assignment Playback: Starts the playback of new and not yet played back incoming messages. Allows the repetition of the last 3 seconds when being pressed during playback. Stop: Stops a function that is currently being executed and also exits an open menu. Answering mode: Activates or deactivates the answering mode. Menu: Opens the menu. Serves as an entry key for letters and numbers within the electronic telephone book.
Operating elements Operating elements IV
Table of contents Table of contents Safety information ............................................................................................ II Key assignment ................................................................................................ III Operating elements .......................................................................................... IV Table of contents .............................................................................................. 1 Display symbols.
Table of contents Example on how to enter the call forwarding function................................ 29 Individual ringing tone ..................................................................................... 30 Automatic two-way conversation recording................................................... 32 Programmable parameters for the automatic two-way conversation recording 32 Settings for the automatic two-way conversation recording ....................... 32 Electronic telephone book ...........
Display symbols Display symbols 07 Answering mode is active, new messages exist. Answering mode is active, no new messages exist. Playback Telephone number of the calling party Message recording in process, microphone is active Call forwarding 2-way conversation recording is active Volume Recording (general). Remaining recording capacity Time control is active, switching times. Secondary function Message transfer is active.
Initial operation Initial operation Scope of supply In the packaging carton of your Retell 340, you will find: • Retell 340 • Telephone connecting cable • AC adapter 11.5V/ 500mA • Operating instructions • Cable for input/output (copying lead) Installation Your Retell 340 was designed for normal use conditions. Solvents in some furniture lacquers or furniture cleaning products may attack the rubber at the feet of the device and thus cause patches.
Initial operation 4 If you want to record outgoing messages from an external source, plug the jack plug of the copying lead in the “IN” jack and plug the phono plug in the audio output of the external device (tape recorder, audio device). 5 If you want to copy the electronic telephone book of your Retell 340 to another Retell 340, use a copying lead with two jack plugs (accessory).
Settings Settings Programmable parameters Language .............................. German or English. Time ...................................... Here, you can set the time if necessary. Date ....................................... Here, you can set the date if necessary. Summer (daylight saving time)/winter ........................... Yes or no. If you set “yes”, the summer time (daylight saving time) will be set automatically on the last Sunday in March. Winter time, i. e.
Settings Redialling .............................. Every 5 to 60 seconds. Here, you can define the pause to be made between the individual dialling attempts during the automatic redialling process. Call-back code ...................... Here, you enter the call-back code of your telecommunications provider (eg H*37#). The “H” stands for the hook flash-function. Up to 6 digits are at your disposal for entries. Telephone systems .............. >> Exchange identification code ....
Settings Set-up menu Press the menu button. The display shows the main menu. Press the select button next to the corresponding menu item. The set-up menu is shown in the display. Use the arrow buttons (up/down) to view the available setting parameters. All available parameters for the function in question are shown in the display. Press the select button located next to the setting to be changed until the desired setting option is being displayed. The display shows the current setting.
Settings Contrast adjustment You can adjust the display contrast when the device is in the idle state. Adjust the contrast by pressing the arrow buttons (left/right). The display contrast is being changed. Brightness adjustment The brightness of the display light can be adjusted when the device is in the idle state. Press the button for the secondary function. The display shows the symbol for the secondary function. Adjust the brightness by pressing the arrow buttons (left/right).
Outgoing messages Outgoing messages General information Your Retell 340 provides 5 individual outgoing messages (OGM 1-5) and one pre-recorded outgoing message (OGM 6). You can exchange the outgoing messages by pressing the function key next to the outgoing message symbol. You cannot alter OGM 6. The duration of an OGM can be between 3 seconds and 3 minutes. Generally, two different kinds of outgoing messages are distinguished, i. e.
Outgoing messages Recording outgoing messages For high quality recordings (e. g. outgoing messages with background music), we recommend to set the highest recording quality temporarily (see “settings”). Select the desired OGM by pressing the select button next to the OGM symbol. The selected OGM is displayed next to the symbol at the bottom right side. Press OGM and keep pressed. Wait, you will hear a brief tone, the display shows a microphone symbol to indicate the readiness for recording.
Outgoing messages Recording OGMs from an external signal source Professional OGMs can also be recorded from external signal sources (e. g. tape deck) - via the audio input. Select the desired OGM by pressing the select button next to the OGM symbol. The selected OGM is displayed next to the symbol at the bottom right side. Press the button for the secondary function. The display shows the symbol for the secondary function. Press OGM and keep pressed.
Outgoing messages Testing the outgoing messages Select the desired OGM by pressing the select button next to the OGM symbol. The selected OGM is displayed next to the symbol at the bottom right side. Press the OGM button briefly. The OGM is being played back. The display shows the playback symbol, the current duration and the OGM number. You can adjust the volume by pressing the arrow buttons (left/right).
Answering mode Answering mode Take care that you provide enough recording capacity for incoming messages. If required, you may erase individual recorded messages or all incoming messages. Select the desired OGM by pressing the select button next to the OGM symbol. The selected OGM is displayed next to the symbol at the bottom right side. Press the button for the answering mode. The answering mode button is lit.
Playback and erase incoming messages (ICMs= Play back and erase incoming messages (ICMs) Playback of new incoming messages Press the playback button. Use the arrow buttons to adjust the volume (left/right). The playback of new and not yet played back incoming messages starts. The display shows the running number, the remaining playback duration as well as date and time of the recording. If the caller's telephone number is being transferred, the display will show it as additional information.
Playback and erase incoming messages (ICMs= Search (Skip) Press the select button next to the FORWARD symbol or the REWIND symbol. The incoming message that is currently being played back is skipped or repeated. Scan function (Flexi-Speech) Press the arrow buttons (up/down) during playback. The playback speed is either increased or decreased. For the current or repeated playback, the normal playback speed will be resumed automatically.
Two-way conversation recording/Personal information (dictate) Two-way conversation recording/Personal information (dictate) Two-way conversation recording (telephone calls) You have the option to record important conversations directly. The corresponding recording may have a duration of 3 seconds to 12 minutes. During a telephone call, press the select button next to the symbol for “recording”. The device starts recording.
Two-way conversation recording/Personal information (dictate) Personal information (dictate) Personal information can be dictated directly via the built-in microphone. The length of the recording can be between 3 seconds and 12 minutes. Press the select button next to the symbol for “recording”. Wait, you hear a brief tone, the display shows a microphone symbol that indicates the readiness for recording.
Time control Time control The time control allows you to program up to 10 individual switching times at which you have the option to switch the answering mode on or off, exchange the outgoing messages, switch the call transfer or the message transfer on or off. Programmable parameters for the time control Switching time ...................... You can set the time at which the function is to be executed. The entry “- - -” indicates that no switching time has been programmed. Weekday .......................
Time control Programming the time control Press the menu button. The display shows the main menu. Press the select button next to the time control menu item. The entry field for the first switching time is shown in the display. Use the arrow buttons (up/down) to view and set individual switching times. The display switches between the 10 optional switching times. Press the select button next to the time control menu item and use the arrow buttons (up/down) to make the desired settings.
Time control 2s To erase all time control parameters, press the select button next to the “delete” symbol for 2 seconds. All switching times are erased. Press the stop button to enter further switching times. The parameters are taken over. To end the entry process, press stop several times. The display resumes the initial state. Example of time control settings Your Retell 340 shall turn on every day from Monday to Friday answering calls with outgoing message 1.
Time control Activate the time control Press the time control button. The display shows a symbol showing a clock that shall indicate the active time control function. The time control sets the current functional state. To deactivate the time control, press the time control button again. The symbol for the clock is no longer displayed.
Message transfer Message transfer For the message transfer, the answering machine always dials a stored destination number after having recorded 1 to 5 incoming messages (see message collection). When the called party answers the call, the following announcement is heard: “Automatic call, x messages, please perform a remote interrogation. I repeat...” or if you programmed your own telephone number as an identification number “Automatic call from ...
Message transfer Press the select button next to the line with the desired entry. Possibly, you can use the arrow buttons (up/down) to change parameters. The display shows the current parameter. To enter the destination number, press the select button next to “destination number” and set the first number using the arrow buttons (up/down). The cursor blinks. The display shows the numbers and special characters. The special characters stand for: ~ = Wait for dialling tone / 3 sec.
Message transfer 2s To erase the entire destination number, press the select button next to the “delete” symbol and keep it pressed for 2 seconds. The entire destination number is erased. If you want to perform other settings, press stop. The current settings are stored. Press stop several times to complete the entry. The display resumes the initial state.
Message transfer Activating the message transfer Press the message transfer button. The display shows the symbol for message transfer. To deactivate the message transfer, press the message transfer button again. The symbol for message transfer is no longer displayed. During a running message transfer process, the message transfer symbol blinks.
Call forwarding Call forwarding If your telecommunications network or your telephone system supports the “call forwarding” function, you use this facility, you just need to enter the target time interval for call forwarding via the “time control”. Using this function you can forward incoming calls to your private telephone after 18:00 hrs in the evening and in the mornings you can forward incoming calls to your business telephone again (day/night mode).
Call forwarding Press the select button next to the menu item to be changed. The cursor is positioned on the entry point. Use the arrow buttons (left/right) to select the desired entry position and conduct changes by pressing the arrow buttons (up/down). The display shows the current setting. To enter the destination number, set the first number using the arrow buttons (up/down). The display shows numbers and special characters. The special characters stand for: ~ = Wait for dialling tone / 3 sec.
Call forwarding 2s To erase the entire destination number, press the select button next to the “delete” symbol and keep it pressed for 2 seconds. The entire destination number is erased. If you want to perform other settings, press stop. The current settings are stored. Press stop several times to complete the entry. The display resumes the initial state. You can also activate the call forwarding function via remote control (see remote operation and control).
Individual ringing tone Individual ringing tone If you want to set a ringing tone that is different from the standard ringing tone, you have the option to record up to 8 different ringing tones. Ringing tone number 9 is pre-programmed and cannot be modified. The individual ringing tone may have a length of up to 5 seconds. For incoming calls, you will always here the complete individual ringing tone – regardless of its length. Press the menu button. The display shows the main menu.
Individual ringing tone To play back an existing recording, press the select button next to the playback symbol. The ringing tone is played back. To delete the ringing tone, press the select button next to the “delete” symbol. The ringing tone is deleted. To exit the menu, press the stop button. The display resumes the initial state. Due to technical reasons, the individual ringing tone only starts with the second ringing signal for an incoming call.
Automatic two-way conversation recording Automatic two-way conversation recording If you activate the function “automatic two-way conversation recording”, the recording of a telephone call starts as soon as you pick-up the handset. The recording stops as soon as you replace the handset or if the maximum recording capacity of 12 minutes was achieved. It is up to you whether you want to record all telephone calls or just incoming calls (threatening or malicious calls).
Electronic telephone book Electronic telephone book General information The electronic telephone book can store up to 100 entries. An entry consists of the name (search criterion) and the telephone number whereas the name has to begin with a letter. The telephone number should always be entered together with the area code (prefix number).
Electronic telephone book 2s 2s To delete the entire entry, press the select button next to the “delete” symbol for 2 seconds. The entire entry is deleted. Press the select button next to the empty entry field for the telephone number. The cursor is positioned in the TELEPHONE NUMBER field. Use the arrow buttons (up/down) to enter the first digit of the telephone number. The display shows the numbers and special characters. The special characters stand for: ~ = Wait for dialling tone / 3 secs.
Electronic telephone book Overview of possible characters and numbers Button Assignment (ABC) Assignment (abc) Assignment (12!?) ABCDEÄ abcdeä 12!?. FGHIJ fghij 34-+& KLMNOÖ klmnoö 56/: PQRST pqrstß 78(), UVWXYZÜ uvwxyzü 90*# Searching for entries Press the arrow button (down) or (up). The electronic telephone book opens with the letter A or the letter Z. Use the arrow buttons (up/down) to search for the desired entry. You browse through the entries.
Electronic telephone book Use the arrow button (right) and the corresponding entry keys to enter further letters for a generic search (up to 5 characters). The entries in question are shown in the display and can be selected. Checking and changing entries Search for the name as described under “Searching for entries”. 2s Press the select button next to the desired name for 2 seconds. The display shows the entry field for the name and the telephone number. The cursor blinks. Take out your changes.
Electronic telephone book Automatic redialling/Call-back on busy You can set the Retell 340 to automatically re-dial busy numbers (up to 10 dialling attempts can be executed). If the function “Call-back on busy” also known as CCBS (completion of call to busy subscriber) is chosen, your telephone will ring as soon as the target subscriber replaces his handset.
Code lock Code lock You can use a PIN to prevent that unauthorised persons use your Retell 340. The PIN can be any 1-digit to 4-digit number. To unlock the device, the PIN needs to be re-entered. In the factory pre-set, the PIN is “0000”. Locking the device/change PIN Press the menu button. The display shows the main menu. Select the menu item “Code lock” using the arrow buttons (up/down). Press the select button next to “Code lock”. The display shows the entry field for the PIN.
Code lock Press the select button next to “Lock device”. The display resumes the initial state. A small key symbol indicates that the device is locked. Press the select button next to “Change PIN”. Your Retell 340 asks you to enter a new PIN. Use the arrow buttons to enter a new PIN. The current entry is shown in the display. or To complete your entry, press stop several times. The new PIN is now valid. The display resumes the initial state. Unlock the device Use the arrow buttons to enter the PIN.
Message and VIP function Message and VIP function Message function The message function allows a caller to whom the message code is known to leave a message on your answering machine even if your Retell 340 only plays back an OGM without incoming recording. As for an OGM with incoming announcement, the message function allows to skip the OGM. You can set your personal message code as described under “Settings”. ℡ Call the Retell 340. You hear the outgoing message.
Message and VIP function VIP function If you do not wish to be disturbed and have your Retell 340 answering incoming calls, you can remain addressable by important callers using the VIP code. You can set your personal VIP code as described under “Settings”. ℡ Call the Retell 340. You hear the outgoing message. Enter the VIP code via the telephone keypad. If you entered a wrong number accidentally, you can erase your entry by pressing the * button and start again.
Remote control Remote control You have the option to remote control your Retell 340 via the numeric keypad of any tone dialling telephone world-wide. In order to perform a remote control, you need your personal remote control code. You can set your personal remote control code individually. Follow the steps as described under “Settings”. Remote operation ℡ Call the Retell 340. You hear the current outgoing message. Enter the remote control code via the telephone keypad.
Remote control Search (skip) During the playback, press “4” to search backwards, press “6” to search forwards. The currently played back message is repeated or skipped. Scan function (Flexi speech) During playback, press “1” for a slower and “3” for a faster playback speed. The playback speed is increased or decreased. Telephone number announcement Press “2” during playback.
Remote control Changing the destination number for message transfer Press “*” and “9” consecutively. The currently stored destination number is announced by synthesised voice. Afterwards, you are asked to enter the new destination number. Enter the new destination number. For special characters, press the following buttons consecutively. Each number is acknowledged.
Mailboxes Mailboxes General information Apart from the normal answering machine functionality, you also have the possibility to implement up to 4 mailboxes. Each mailbox provides an additional outgoing message, an own remote control code and an own destination number for the message transfer. If several persons use your Retell 340, the caller can leave a message for a specific person using the individual mailbox. In your outgoing message, you should inform the callers about this option.
Mailboxes Use the arrow buttons (up/down) to select the desired setting parameters. The display shows all programmable menu items. Press the select button next to the menu item to be changed until the desired setting is shown in the display. The display shows the current setting. When entering numbers, press the select button next to the corresponding line. The cursor blinks. Change the setting parameter by pressing the arrow buttons (up/down). The display counts up or down.
Mailboxes coming messages. In addition to that, two-way conversation recording/personal information (dictate) and outgoing messages are included. These functions are all described in detail in the last chapters. As there is only one outgoing message available per mailbox, you will not have any option to exchange OGMs. Press the select button next to the line with the mailbox symbols several times - until the symbol for the desired mailbox blinks. The selected mailbox blinks.
Service menu Service menu The service menu offers you information on the currently installed program version, to resume the factory pre-set, to erase the electronic telephone book or to load the latest program version via the telephone network. In addition to that, you have the possibility to copy the electronic telephone book from one Retell 340 to another Retell 340 via the audio interface.
Appendix Appendix General information CE sign This device is approved for the connection and use within the public telephone networks in all EC countries – according to the European Requirements (CTR21) This device was produced in compliance with the directive EN 55022 as well as EN50082-1. Threshold values for electromagnetic interference immunity class B for residential and business areas as well as standard EN 50082-1 are met. The device complies with the safety standard EN60950.
Appendix Troubleshooting The following table will help you to resolve problems or malfunctions with your Retell 340. Problem Possible cause Solution / recommendation No display. AC adapter not plugged in. Check all cables and connections. Check the telephone at another power outlet.
Appendix Problem Possible cause Solution / recommendation No automatic call-back on busy Call-back code is not entered, telecommunications provider or telephone system does not support this function or the function is not released. Enter the call-back code. Ask your telecommunications provider or your telephone system manufacturer whether the function is possible or needs to be released. Call forwarding cannot be initiated Missing or wrong settings for the call forwarding function.
Appendix Factory pre-set In the following table, you can see the factory pre-set parameters or values for your Retell 340. You can change all these parameters individually. You can easily reset the telephone to the factory pre-set parameters via the “service menu”.
Appendix Technical data Dimensions (W x H x D) Retell 340 AC adapter 180 x 50 x 190 mm 58 x 67 x 48 mm Weight Retell 340 AC adapter 400 g 350 g Operating voltage AC adapter Power consumption in the idle state 230 V / 50 Hz < 2W Ambient temperature 0 – 40 °C Outgoing messages (OGMs) Number of OGMs Length of the OGM 10 3 seconds - 3 minutes Recordings Recording procedure Total recording capacity Number of all messages digital (58 / 8.6 / 6.5 or 4 kbit/s) about 4 / 25 / 35 / or 60 minutes max.
Index Index AC adapter ................................................................................ II, 4 Activate the time control..............................................................22 Answering mode ..........................................................................14 Audio output ..................................................................................5 Automatic redialling ....................................................................
Brief operating instructions Other Product Available Retell 953 Professional Telephone Answering Machine • Automatic storage onto hard disk with almost unlimited capacity • 1350 hour answering machine • Up to 65,000 recordings possible • Inbuilt clock, calendar and timetable set to match hours of business • Unlimited time on outgoing & incoming message • Up to 30 time & date selectable outgoing messages • Each message is time and date stamped • Auto Attendant with up to 999 locations • Cal
Brief operating instructions Brief operating instructions Outgoing message recording Press the select button to select the OGM Press OGM and keep pressed Start speaking your OGM Release OGM Press the select button to set the type of OGM Testing your outgoing messages or Press the select button to choose the outgoing message Press OGM briefly Set the desired volume Press the select button to erase Playback of incoming messages or Play back new messages Play back all messages Set the desired vol