
Instructions

Preparing installation
Installation of the product must be carried out by a qualied professional
(i.e. an electrician) who is familiar with all applicable regulations!
By handling mains voltage improperly, you endanger not only yourself but
also others!
If you do not have the relevant expert knowledge, do not install the product
yourself, but have it done by a professional.
• Mount the product exclusively on an even, stable ceiling.
• Never mount the product in the vicinity of easily ammable materials (i.e. curtains,
fabrics, etc.). Make sure there is sufcient room for ventilation around the product.
• When mounting the product, take into consideration the routing of the mains cable.
• Only use a suitable, xed mains cable for power supply.
• The product must be secured via an existing sub-distribution unit with a 10/16A
fuse. This setup requires the installation of an upstream residual current circuit
breaker (FI switch).
• The product must be completely free of voltage for installation. Just turning off the
light via the switch does not make it entirely voltage-free.
Turn off the corresponding circuit breaker and/or automatic fuse to remove all
voltage from the power circuit. Secure them against unauthorized restart, e.g. by
installing a warning sign. Also switch off the relevant circuit breaker in order to
disconnect all poles of the mains cable from the mains supply.
Check the power circuit for any remaining voltage using an appropriate measuring
device.
Installation
a) Light
• Turn the protective grid counter clockwise to remove it.
• Turn the lamp shade counter clockwise to remove it.
• Use the base plate as a template. Mark the position of the 3 drill holes on the
ceiling.
• Drill the holes in the ceiling and insert wall anchors.
When drilling or tightening screws, make sure not to damage any cables,
wires or pipes located underneath the surface.
• Connect the power cable to the appropriate terminals:
- Brown cable = L
- Green/yellow cable = PE/ground wire, grounding symbol
- Blue cable = N
The ground wire must be connected to the terminal block under all
circumstances.
Make sure that the cables are not bare for too long as this may cause
short-circuiting.
If the power cable has a diameter greater than 6 mm, install the 3 included
spacers on the screw holes (between base plate and ceiling).
• Fasten the base plate to the ceiling using the 3 long screws.
• Then place the lamp shade on the base plate. Slightly press the lamp shade
toward the ceiling to expose the thread for the protective grid. Turn the lamp shade
clockwise until it is snug.
• Place on the protective grid and turn it clockwise until it is ush with the lamp
shade.
• Turn on power to the circuit and check to see if the product works.
If the illuminant does not light up, cut the power supply immediately
(remove the fuse or turn off the circuit breaker).
Then check the connection to the power circuit.
In case of doubt, contact a professional (i.e. an electrician).
b) Wall mount
• If necessary, fasten the wall holder for the remote control on a suitable surface.
• You can fasten the wall holder either with the 2 short screws or the adhesive strip.
When drilling or tightening screws, make sure not to damage any cables,
wires or pipes located underneath the surface.
Inserting/replacing batteries (remote control)
• Slide out the housing piece with the buttons.
• Insert 2 AAA batteries and heed correct polarity. Heed correct polarity as indicated
in the battery compartment.
• Close the battery compartment.
Replace the batteries as soon as the light no longer responds to the remote
control.
Operation
a) General
• Turn on the product using the wall switch.
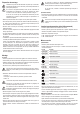
• Direct the remote control at the light. The following table describes the function of
all buttons.
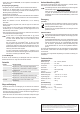
Button Function
Lighting ON Turn on light
Lighting OFF Turn off light
Increase brightness
Decrease brightness
30 Min. Timer mode
Audio ON Activate Bluetooth
®
Audio OFF Deactivate Bluetooth
®
Decrease volume
Increase volume
Previous track
Playback/pause
Next track
• When the product receives a signal from the remote control, a short conrmation
beep sounds.
• If you press and hold the buttons for increasing/decreasing brightness or volume,
a signal sounds when the maximum/minimum level is reached.
b) Timer mode
• Briey press the timer button labeled 30 Min. Two short conrmation beeps sound.
• After 30 minutes, the product will turn off automatically.
• If you press the timer button before 30 minutes have elapsed, the 30 minute
countdown restarts.
• To cancel the timer, press and hold the timer button for approx. 2 seconds. A long
conrmation beep sounds.
Speaker
a) Switching on/off
• Briey press the Audio ON button to turn on the loudspeaker. The blue LED
ashes rapidly.
• The product can now paired with a Bluetooth
®
device. If the product is already
paired with a Bluetooth
®
device, the connection is established to this device.
• Briey press the Audio OFF button to turn off the loudspeaker. The blue LED
goes off.