
User manual


Table Of Contents
- Notes regarding these materials
- Precautions on Using The Product Described Herein
- For Inquiries About Product Contents or This Manual
- Preface
- Contents
- 1. Overview
- 2. Contents of the Product Package
- 3. Usage Precautions
- 4. Starter Kit Usage Conditions
- 5. Hardware Setup
- 6. Software Setup
- Appendix 1 Contents of CD-ROM
- Appendix 2 Part List
- Appendix 3 M3A-2152G02 Product Standards
- 1. Overview
- 2. Functional Specifications
- 2.1 Configuration of the Power Supply
- 2.2 FP Select Circuit
- 2.3 MOD Select Circuit
- 2.4 Serial I/O Interface
- 2.5 Oscillator Circuit
- 2.6 General-purpose Output Port LED Indicators
- 2.7 General-purpose Input Port Control Circuit
- 2.8 Analog Port Input Control Circuit
- 2.9 CAN Interface
- 2.10 JTAG Peripheral Circuit
- 3. Reference Data
- REVISION HISTORY
32176 Group
Starter Kit User’s Manual M3A-2152
REJ10B0224-0300/Rev.3.00 Jan. 2007 Page 9 of 82
(5) About hardware break
Debug functions of M3T-PD32RM (or M3S-KD32R) are realized by using the M32R core’s internal
debug circuit (SDI), and not by using the emulator’s hardware resources based on bus signals and
debug information from the MCU as in conventional emulators. The pre-execution PC break,
post-execution PC break, and chip break all uses this internal debug circuit (SDI).
Because the M3T-PD32RM (or M3S-KD32R) does not have trace pin information available as
hardware resources, the hardware break functions cannot be used that use the trace pins
implemented in the M3T-PD32R-compatible emulators.
Heed this point when referring to the PD32RM Help and PD32R Help.
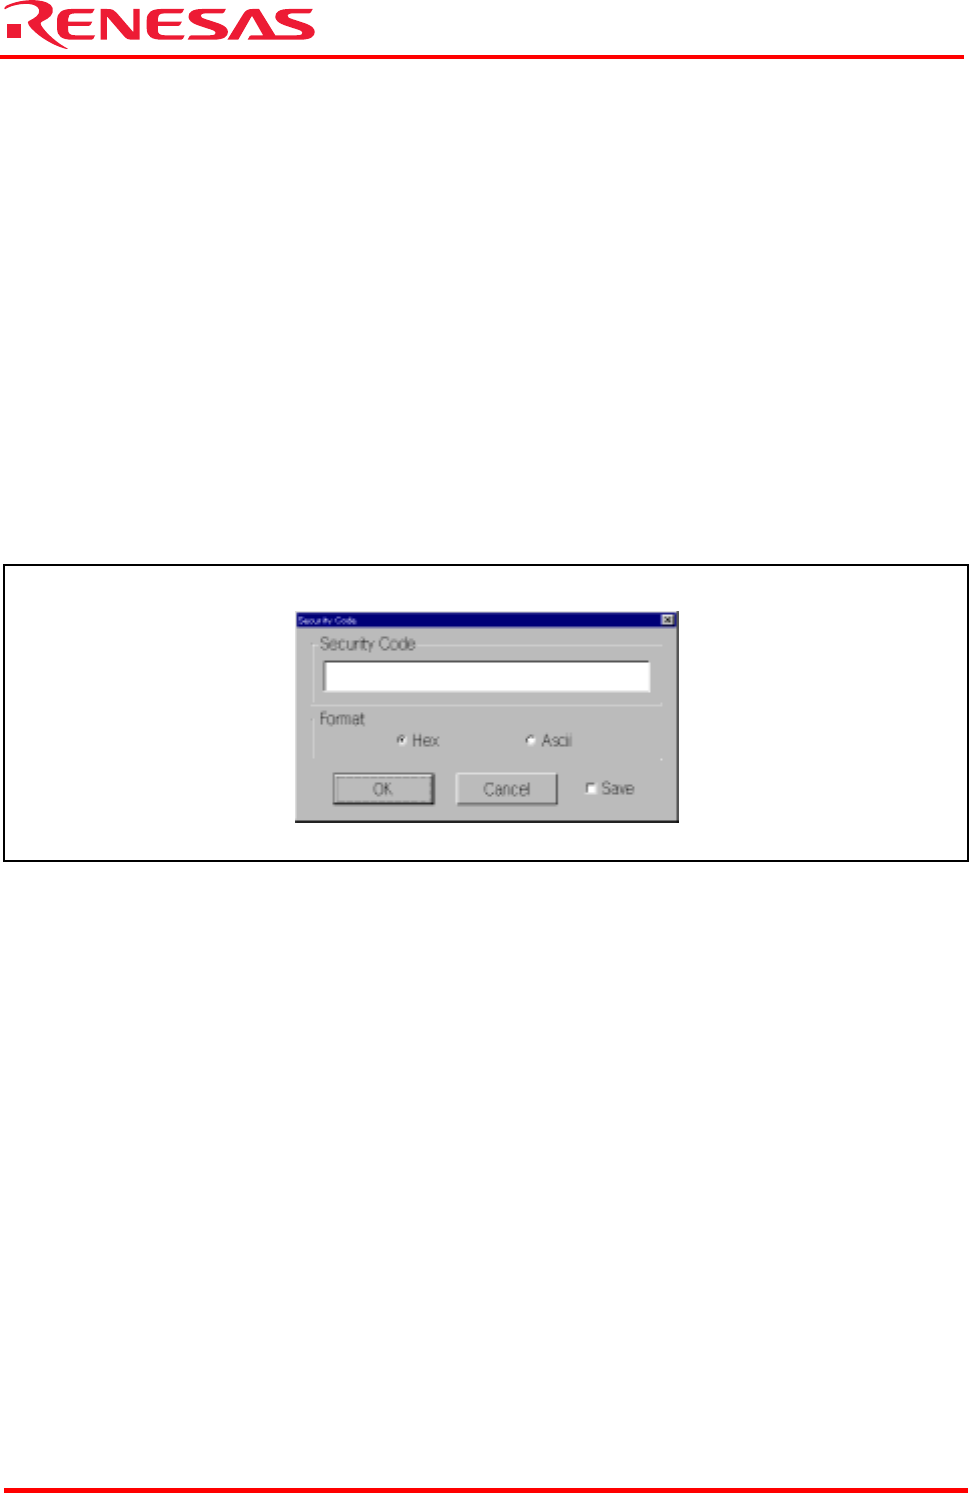
3.5.3 About Security Code Check Function
If the target microcomputer has security code stored in it, the dialog box shown in Figure 3.1
appears at M3T-PD32RM (or M3S-KD32R) startup. When this dialog box is displayed, enter the
appropriate security code. If the security code you’ve entered does not match the stored security
code, M3T-PD32RM (or M3S-KD32R) will not start unless the contents of the internal flash
memory are deleted.
Figure 3.1 Security Code Input Dialog Box
Be sure to enter the security code that you set when writing to the flash memory.
Use the Format select button to choose the format of the security code you entered. Select the
Save check box, and the security code you entered is saved. From next time on, the security code
saved here is used to check matching with the stored security code when M3T- PD32RM (or
M3S-KD32R) starts.