
User's Manual Part 1

Installing AccelTest
7
Installing
AccelTest
Follow these steps to start AccelTest, if it is not already open.
1.
Windows computers: Click the [Start] button and select Programs, AccelTest, and AccelTest.
Macintosh computers: If it is not already open on your desktop, open the AccelTest folder on your hard
drive. Then, double-click the AccelTest icon to start the program.
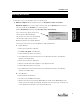
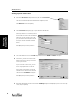
When the Registration dialog box opens, go directly to step 2 on the next page.
If one of two messages appear, you will need to
either a. upgrade or b. install QuickTime.
If the message states you need to install Authoring
and Still images support, you have a partial
QuickTime installation. See a. Upgrade QuickTime.
If the message states that you need to install QuickTime, see b. Install QuickTime.
a. Upgrade QuickTime
To add the missing components in Windows:
• Click Start and Programs. Select QuickTime.
• Click on the QuickTime updater. Select Custom.
• Go to the QuickTime folder and click on the boxes next to “QuickTime Still Images” and “QuickTime
Authoring.” Click [Update Now].
To add the missing components in Macintosh:
• Navigate to your QuickTime folder. It probably is in your Applications folder.
• Launch the QuickTime updater. Select Custom.
• Go to the QuickTime folder and click on the boxes next to “QuickTime Still Images” and “QuickTime
Authoring.” Click [Update Now].
b. Install QuickTime
To install in Windows and Macintosh:
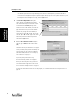
• Insert the AccelTest CD-ROM in your CD drive.
• Navigate to the Extras folder and open the QUICKTIME folder. Double-click the QUICKTIME file for the
installer. Select default settings and click [Next], and [Agree] at the license agreement. You will not need
to enter anything on the registration screen. Click [Finish] when done.
Starting AccelTest