
User's Manual


W RITE ON! LESSONS FOR NEO
Road Map of Write On! Lesson Files
249
. . . . .
NEO
User Manual
4. Connect NEO to your computer using a USB cable (see page 9).
5. On your computer, make sure the cursor is blinking in the file that you
want to send the exercise to. If not, click in the file to make it active; this
ensures the student’s exercise will be sent there.
6. On NEO, press send. The NEO displays a progress bar and a percentage
of how much text has been transferred.
7. When the transfer is complete, disconnect NEO and save the file on your
computer.
Printing Exercises Directly from NEOs
If your classroom is set up for printing, follow these steps to have students
print directly from NEOs (using a USB cable, infrared printing, or wireless RF
printing for NEO 2 only). This method provides you or the student with a
hard copy of the exercise for editing or grading.
1. Do one of the following:
• For USB printing, connect NEO to your printer with a USB cable (see
page 9).
• For IR printing, make sure the printer’s IR transceiver is in range of
NEO’s IR lens (within 5–7 inches).
• For NEO 2 wireless RF printing, make sure your Renaissance
Receiver is connected to the computer and is on (see page 18).
2. Turn on the NEO and make sure you’re in the file that contains the
exercise.
3. Press print on the NEO.
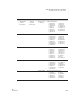
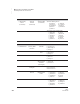
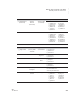
Road Map of Write On! Lesson Files
When you installed NEO Manager, the Write On! exercise files were copied to
your computer. The exercises are grouped by school level: elementary school,
middle school, and high school. Within these groups, files are further broken
down by types of activity, and writing lessons are also broken down by types
of writing, writing process, writing skills, and more.
Here is where you can find the files on your computer:
• Windows computers: Program Files\Renaissance Learning\Write On
Text Files\
• Macintosh computers: Applications : AlphaSmart : AlphaSmart
Manager 2 : Write On Text Files
You can also view
lessons in NEO
Manager as you
select a Write On! lesson. See
page 69.