
User's Manual


K EYW ORDS SMARTA PPLET
Adding Students to NEO 2s Using NEO Manager
121
. . . . .
NEO
User Manual
Adding Students to NEO 2s from NEO Manager
To add students on NEO 2s, or to have students add themselves, follow these
steps.
Note: Whether you are adding the students or they are adding themselves,
the Student Information Report in NEO Manager gives you a helpful list of
students’ user names and passwords. See page 149.
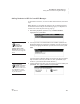
1. After starting KeyWords, press the
↓ key until Add a student is
highlighted; then, press enter.
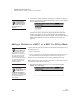
2. You may be shown a list of Networks that are available. (Networks are
Renaissance Receivers connected to computers.) Use the up and down
arrow keys to highlight the Receiver you want to connect to; then, press
enter.
If you have chosen a Receiver before, the program may ask if you want to
stay connected. Press Y for yes or N for no; then, press enter. (If you
choose no, you’ll need to select another Receiver.)
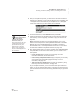
3. Type the student’s user name (your user name if you are the student) and
press enter. Then, type the password and press enter.
The name that you
gave the
Renaissance
Receiver is the one
students will see in the
Networks list. See page 20
to find out how to change the
name.
If you make a
mistake, press back
space to erase and
correct the error. If the error is
on a different line, use the
arrow keys to go to the error
so you can correct it.