
User's Manual


M ATHF ACTS IN A FLASH (OFFLINE) SMARTA PPLET
Sending the History to Renaissance Place
111
. . . . .
NEO
User Manual
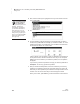
3. Use the arrow keys to highlight Print; then, press enter.
4. The first time you print the history (or send it to Renaissance Place), your
NEO 2 will search for the networks that are within range. (Networks are
Renaissance Receivers connected to computers.) Then, it will show you a
list. Use the arrow keys to highlight the one you want to connect to; then,
press enter.
If you have connected to a Renaissance Receiver before, you will be
asked whether you want to stay connected to the Receiver you chose. To
continue with this Receiver, press Y for yes and press enter. (If you need
to choose a different Receiver, press N for no, then enter.)
5. Next, your name or ID. (This information will be printed on the history.)
Then, press enter.
6. After your history has been sent to the computer’s default printer, you will
be asked if you want to clear the history—that is, erase the history of the
practice you’ve done so far in this SmartApplet.
If you want to clear (erase) the history, press Y for yes. Then, press enter.
If you do not want to clear the history, press N for no. Then, press enter.
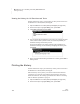
Sending the History to Renaissance Place
Students or teachers follow these steps to send the practice and test history to
MathFacts in a Flash Renaissance Place. The history is automatically cleared
when you send it to Renaissance Place.
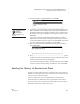
Before you follow these steps, print the MathFacts in a Flash Student
Information Report in Renaissance Place to get the PIN for each student.
The history will be sent to the Renaissance Place address that you set in the
Renaissance Wireless Server Utility. See page 21.
To find out how to
name the
Renaissance
Receiver (network), see
page 20.