
Manual
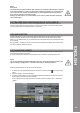
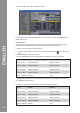
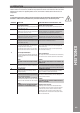
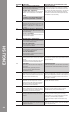
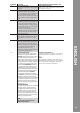
Table Of Contents
- DEUTSCH
- Inhaltsverzeichnis
- Sicherheitshinweise
- Bestimmungsmäßige Verwendung
- Wartung
- 1. Aufbau
- 1.1 Bedienelemente
- 1.2 Anschlüsse
- 2. Geräteinstallation
- 3. Computer-Konfiguration
- 3.1 Grundschritte
- 3.2 Traktor LE-Einrichtung
- 3.2.1 Installation
- 3.2.2 Konfiguration
- 3.3 Traktor Pro-Konfiguration [gegebenenfalls]
- 3.3.1 Audio Setup
- 3.3.2 Mapping-Import
- 4. Bedienung
- 5. Geräteeinstellungen und -tests
- 5.1 MIDI-Channel-Zuweisung
- 5.2 Jog Wheel-Kalibrierung
- 5.3 LED-Funktionstest
- 6. Updates & Support
- 7. Anhang
- 7.1 Systemanforderungen Traktor LE
- 7.2 MIDI-Zuweisungstabelle
- 7.3 Tipps zur Fehlerbehebung
- 7.4 Technische Daten
- ENGLISH
- Table of contents
- Safety Instructions
- Application In Accordance With Regulations
- Maintenance
- 1. Setup
- 1.1 Control Elements
- 1.2 Connections
- 2. Device Setup
- 3. Computer Configuration
- 3.1 Basic Steps
- 3.2 Traktor LE Setup
- 3.2.1 Installation
- 3.2.2 Configuration
- 3.3 Traktor Pro Configuration (if applicable)
- 3.3.1 Audio Setup
- 3.3.2 Mapping Import
- 4. Operation
- 5. Device Settings and Tests
- 5.1 MIDI Channel Assignment
- 5.2 Jog Wheel Calibration
- 5.3 LED Functionality Test
- 6. Updates & Support
- 7. Appendix
- 7.1 System Requirements Traktor LE
- 7.2 MIDI Assignment Chart
- 7.3 Troubleshooting
- 7.4 Technical Specification
- FRANCAIS
- Sommaire
- Consignes De Sécurité
- Utilisation Conforme
- Entretien
- 1. Installation
- 1.1 Éléments de commande
- 1.2 Connectique
- 2. Installation de l‘équipement
- 3. Configuration de l‘ordinateur
- 3.1 Étapes de base
- 3.2 Installation Traktor
- 3.2.1 Installation
- 3.2.2 Configuration
- 3.3 Configuration Traktor Pro [le cas échéant]
- 3.3.1 Audio Setup
- 3.3.2 Importation De Mappage
- 4. Utilisation
- 5. Réglages et tests de l‘équipement
- 5.1 Affectation des canaux MIDI
- 5.2 Calibrage de la Jog Wheel
- 5.3 Test de fonctionnement des DEL
- 6. Mises à jours & assistance
- 7. Annexe
- 7.1 Matériel requis Traktor LE
- 7.2 Table d‘affectation MIDI
- 7.3 Conseils de dépannage
- 7.4 Caractéristiques
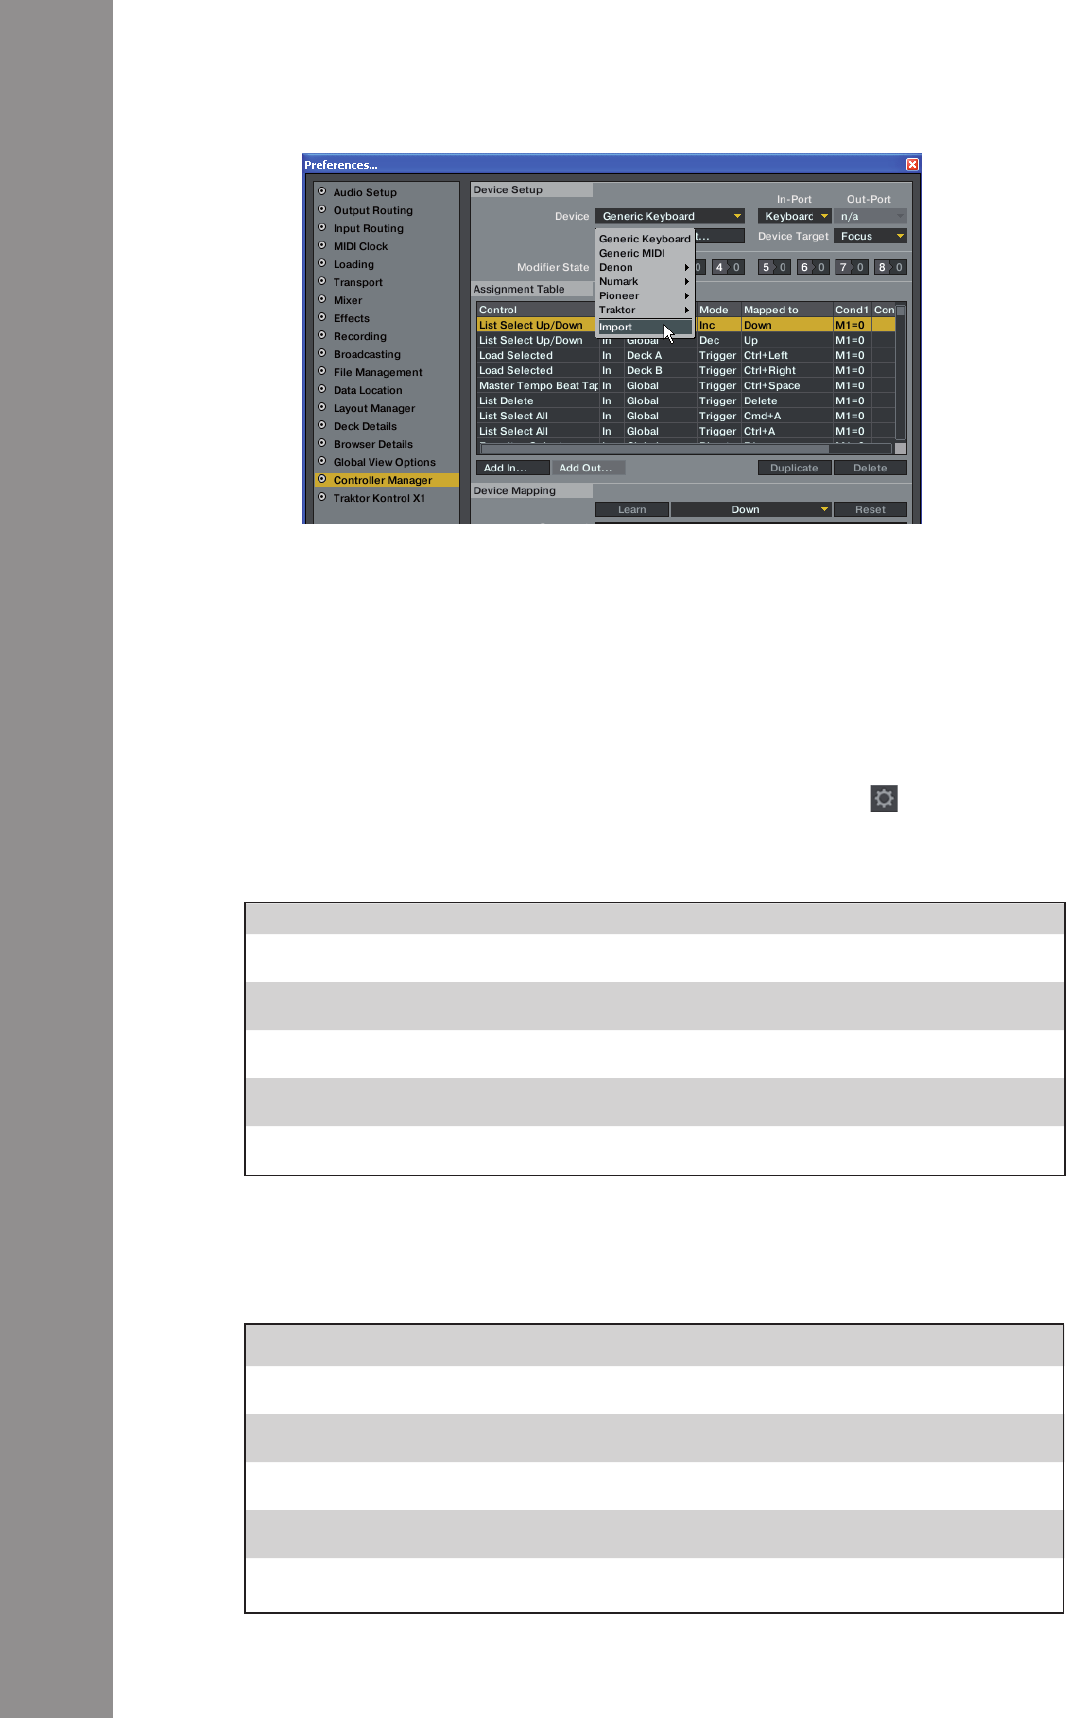
4. Now select the button „Add...“ followed by „Import“.
In the selection screen open the mapping le that is on the CD or that was downloaded from the
Reloop support site.
Should a problem arise and Contour‘s LEDs are not lit correctly, then this is probably caused in
most cases by installed MIDI software (e.g. MidiYoke, Maple Virtual MIDI Cable, etc.)
In order to solve the problem proceed as follows:
1. In Traktor open the adjustment dialogue by clicking the small cog wheel in the upper right
corner.
2. Open the category „Controller Manager“.
3. For the following device entries the following port assignments have to be congured:
If several Contour devices are in use, the various in- and out-ports for the different channels have
to be divided among the devices.
Example: For 2 Contours the device entries should be manipulated as follows:
Contour V* (CH1) Reloop CONTOUR Reloop CONTOUR
Contour V* (CH2) Reloop CONTOUR Reloop CONTOUR
Contour V* (CH3) Reloop CONTOUR Reloop CONTOUR
Contour V* (CH4) Reloop CONTOUR Reloop CONTOUR
Contour V* (Master) All ports None
Contour V* (CH1) Reloop CONTOUR Reloop CONTOUR
Contour V* (CH2) Reloop CONTOUR2 Reloop CONTOUR2
Contour V* (CH3) Reloop CONTOUR Reloop CONTOUR
Contour V* (CH4) Reloop CONTOUR2 Reloop CONTOUR2
Contour V* (Master) All ports None