
Submittal Sheet

PLEASE READ CAREFULLY BEFORE USE
VIPER 2-in-1 FOAM SPRAYER
PART No. RT301S
No
Description
①
Spray Nozzle Connector
②
Spray Nozzle
③
O-Ring and Foamer Insert
④
Foam Nozzle Complete
⑤
EPDM Pressure Seal
⑥
Hand Pump
⑦
Foamer Sprayer Housing
⑧
Pressure Relief Valve
⑨
Foam / Spray Trigger
⑩
Foam Sprayer Handle
⑪
Siphon Casing
⑫
EPDM O-Ring Seal
⑬
Foam Liquid Pickup Tube (Black)
⑭
Canister
⑮
Spray Liquid Pickup Tube (White)
⑯
Check Valve
⑰
Pump O-Ring Seal
⑱
Air Tube
⑲
Spray Nozzle Complete
2-in-1 Foaming and Jet nozzle for all HVACR servicing or domestic, commercial and industrial cleaning
• Compatible with all VIPER Coil Cleaners, Venom Packs, Pan & Drain Treatment and VIPER Big Blu Leak Detector.
• All seals and O-Rings are rated for liquids with a pH level of 7 to 14
• Pressure release valve located on the Foam Sprayer Housing
Operating Instructions
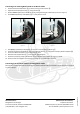
Setup
1. Check each part of the Sprayer to ensure good working condition
2. Unscrew Foam Sprayer housing ⑦ and remove from Canister ⑭ to check Liquid Tube Assembly ⑬ is secure
Foaming Nozzle mode (default setting): Using concentrate cleaning solution
1. Mix concentrate solution with potable water in Canister ⑭ as per manufacturer’s recommendation
2. Ensure the liquid solution does not exceed “Max Fill Line” on Canister ⑭ (do not overfill), then shake gently
Jet Nozzle mode: Using ready-mix liquid
1. Convert Sprayer to Jet Nozzle mode (please see Converting from Foaming Nozzle mode to Jet Nozzle mode)
2. Pour ready-mix solution into Canister ⑭.
3. Ensure liquid solution does not exceed “Max Fill Line” on Canister ⑭, then gently shake
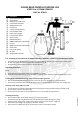
Activating the Sprayer
1. Attach Canister ⑭ to Foam Sprayer Housing ⑦ and securely tighten
2. Pressurise Sprayer by using Hand Pump ⑥ until Pressure Relief Valve ⑧ begins to release
3. Holding Sprayer upright, point nozzle at target object and press Foam / Sprayer Trigger ⑨
4. Slide Foam / Spray Trigger ⑨ forward for consistent spraying
5. Press red Pressure Relief Valve ⑧ to release pressure prior to cleaning and storage
Rev.4-03082020