
Operation Manual


ENGLISH
9
9
ENGLISH
8
8
To Scan Film (Film & Mounted Slides) CrystalScan 7200
Mounted Slides
1. Open Scanner Lid (1).
2. Release the Slide/Film Holder (5) put in slide “Shiny side up” then close
slide holder.
3. Close Scanner Lid (1) (optional).
4. Ready to scan.
Filmstrips
1. Open the scanner lid (1).
2. Release the Slide Holder (5).
3. Position the lm that you wish to scan in the center of the viewing
window (6).
4. Push down the lm frame and close the slide holder.
5. Ready to scan.
To Scan Mounted Slides
1. Mounted Slides
1-1. Load the mounted slides into the slide holder, shiny side facing upward
1-2. Insert the slide holder into the scanner with the arrow facing upwards
1-3. Insert to holder into the scanner from the left or the right side
ProScan7200
Installing Hardware
a. Connect the slide scanner to a power source.
1. Locate the power switch on the lower left side of the scanner. Make
sure the scanner is TURNED OFF.
2. Plug the AC adapter into an AC power source
FIRST before plugging it into the scanner.
3. Attach the USB cable to the computer using the stadard USB adapter
end. Attach the USB adapter end of the cable to back panel of the
scanner.
Additional features
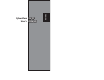
1. Lid.
2. Slide Holder
3. Film Deck
4. One Button Scan
5. Release Switch
6. Viewing Window.
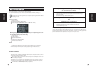
1. DC In
2. USB Port
3. Power Switch
1. Scanner
2. Slide holder
3. Film Holder
4. One Button Scan
5. Back of the unit
6. Viewing Window
CrystalScan 7200
ProScan 7200