ENGLISH CyberView X5 SF User’s Manual 1
FEDERAL COMMUNICATIONS COMMISSION (FCC) STATEMENT ENGLISH Re-orient or relocate the receiving antenna. Increase the separation between the equipment and receiver. Connect the equipment into an outlet on a circuit different fromwhich the receiver is connected to. • Consult the dealer or an experienced radio/TV technician for help. • • • Warning : Use only shielded signal cables to connect I/O devices to this equipment.
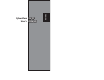
GETTING STARTED Important! Save the original box, receipt and packing material for future shipping needs. Package Contents • Slide Scanner. • Film Holder (Where Applicable) • Power Adapter [FAIRWAY Model No. : WRG 15F-120A] Note: Do not turn on the scanner unless it is within this range. If the scanner has been stored or transported outside of this range, allow it to return to within this range before turning it on. ENGLISH ENGLISH Check the package content before getting started.
INSTALLING SOFTWARE AND DRIVER QUICK INSTALLATION GUIDE (QIG) for PC (Windows) User ENGLISH Be sure to install the Application Software BEFORE installing the scanner driver CyberView X 5.0. You may install the scanner driver directly if you have already installed TWAIN compliant application software in your computer. Mac users can use iPhoto for editing. Notice: 1. In “Found New Hardware Wizard” window, select “Search automatically or Browse computer for driver software.” 2.
Installing Hardware a. Connect the slide scanner to a power source. ENGLISH ENGLISH 1. Locate the power switch on the lower left side of the scanner. Make sure the scanner is TURNED OFF. To Scan Film (Film & Mounted Slides) CrystalScan 7200 Mounted Slides 1. Open Scanner Lid (1). 2. Release the Slide/Film Holder (5) put in slide “Shiny side up” then close slide holder. 3. Close Scanner Lid (1) (optional). 4. Ready to scan. 2.
ProScan 7200 - Scanning Slides (Continued....) One Button Scan 1. Open the CyberView (see page 12 to acquire the CyberView driver program) 2. Configure Scan Settings (see Page 13) ENGLISH ENGLISH Please Note: improper insertion will cut off the top of the image. 3. Select the Scan to directory, file format (TIF or JPG, once configured, Press the scanner button ( ) to begin scanning. CrystalScan 7200 One Touch Button ProScan 7200 One Touch Button To Scan Negative Film Strips 2-1.
STEP 4 – Set Scan Settings HOW TO SCAN SLIDES STEP 1 – Acquire Driver ENGLISH (For MAC User) Open Macintosh Hard drive – Applications –CyberView STEP 2 – Select Film Type Select the film type to be scanned - Positive, Negative or B&W (Black and White). ENGLISH (For PC User) Open CyberView X 5 from Start – All Programs –CyberView a. Resolution The default scanning resolution is 1000dpi, additional resolution options are listed below.
STEP 5 – Set Scan Preferences Set Scan Preferences (Continued...) Select Scan - Preference - Film Type - Scan Setting 4. Options - Use Film Index: Use the number assigned to the slide based on it’s position in the cartridge. User Defined Start Number: Enter a specific start number ENGLISH ENGLISH 5. Choose the file type , “TIF” or “JPG”. (TIF uncompressed or JPG CompressedChoose image quality for JPEG.
Default Scanning Area ENGLISH ENGLISH Adjust the scanning size as well as adjust the “Scan Offset” setting to move the image position of slide. Auto Color takes the guesswork out of the scanning process to streamline the workflow and achieve the best results. Proprietary color enhancement technology is applied to scanned images to provide the most accurate color adjustment, resulting in vibrant images with optimal brightness, contrast and saturation.
There are four major parts of theCyberView X 5 user interface: I. Main Window Area [Fixed Windows] II. Preview Window Area [Fixed Window] III. Scan Setting Area [Floating Window] ENGLISH ENGLISH USER INTERFACE I. Main Window Area [Fixed Windows] Menu Commands - Scan Prescan - Prescan Current Frame: Pre-scan the existing slide. Scan - Scan Current Frame > Scan the current slide. Menu Commands - Preview Zoom, Rotate & Flip features.
Menu Commands - Image Adjustment a. Image Adjustment To adjust the brightness, contrast, saturation, and color (CMY or RGB) of the image. Comparisons between before and after adjusted images are shown for reference. ENGLISH ENGLISH 1. Variations: Generates different views of image with options to make changes to highlights, midtones, etc. 2.
3. Curves and Levels Menu Commands - Window Adjust image settings by moving Curve and Levels settings. Comparison between before and after adjustment is displayed for reference. 1. Exposure Setting: To adjust the exposure time (R, G, B) press ”Reset” to restore to ENGLISH ENGLISH the default setting. Menu Commands - Help • Update: Firmware: Upgrade the firmware version, select the path where the file of firmware has been saved.
Status Line ENGLISH ENGLISH In the lower left hand corner, the color level (RGB: red, green, blue) and coordinates of the location [ex: I] are displayed. The zoom scale, the current slide magazine location and how many areas selected to scan (2 or or higher indicates: Multiple scan areas on one slide [ex: II]. I. II. III. Scan Setting Area [Floating Windows] Preview the image you pre-scan, you can select the measurement unit “in“-“cm““px“ by clicking the upper-left corner.
TECHNICAL SUPPORT ENGLISH CyberView For information regarding the film scanner and CyberView driver, please visit www.reflecta.de. Bundled application software You can refer to the HELP function on the application menu bar or visit the software company’s website. **This user manual has also been archived in the packaged CD.