
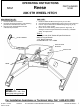
Owners manual

30160IN – 5JUN14 PCN3308 2014 CEQUENT™ PERFORMANCE PRODUCTS, INC PRINTED IN MEXICO
FOR KIT 30160
GUIDELINES FOR MATCHING HITCH TRUCK AND TRAILER
WARNING:
Failure to follow all of these instructions may result in death or serious injury
INDEX
Ensure that this hitch is properly rated for your 5
th
wheel trailer. Please consult Section F of assembly
instructions to verify proper ratings as noted in index F-1 on page 9.
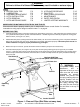
BEFORE EACH TRIP:
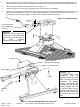
1. Lubricate skid plate surface of the hitch and pivot pin grease fitting (see Figure 1) with automotive type chassis grease or
use a plastic lubrication plate to provide a lubricated surface. Use lithium grease to lubricate pivot point of moving parts
within the hitch. (see Figure 2, 3, and 4)
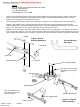
2. Plastic lubrication plates (Towing Products No. 83001/40001) can be used to avoid messy grease. The plastic lubrication
plate must not exceed 3/16 of an inch in thickness to ensure hitch will operate properly. Lubrication plates must be 12
inches in diameter or larger to properly distribute king pin weight.
3. Before each trip or maneuver, operate the handle and check that the jaw opens and closes freely.
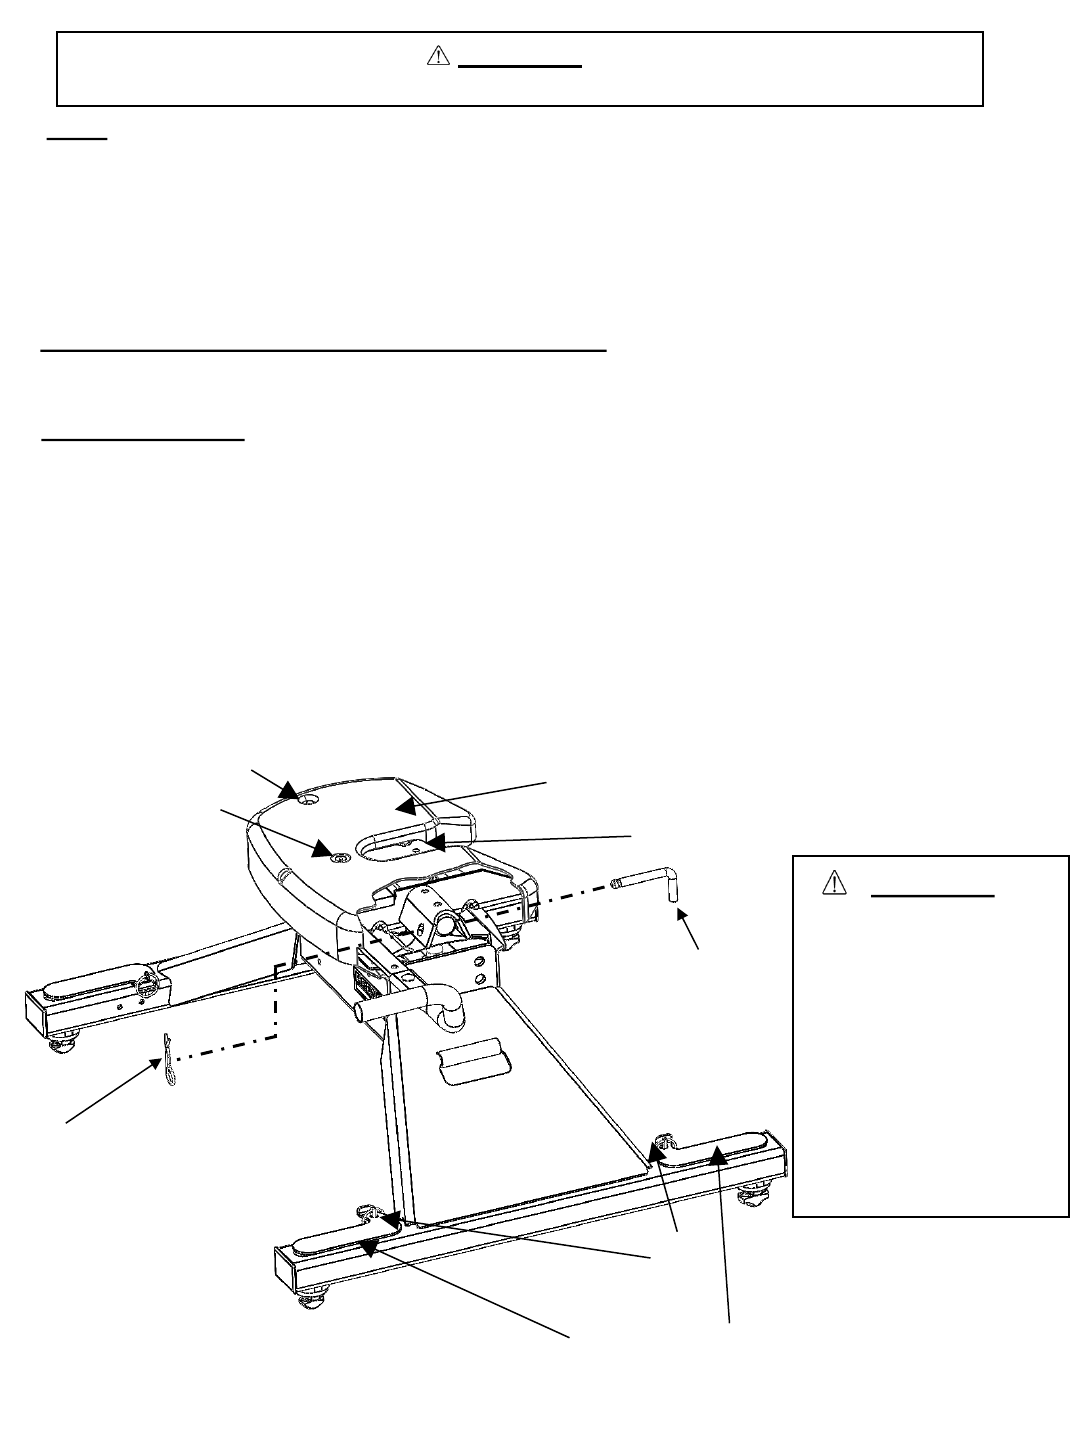
4. See that all hitch pull pins (# 13, Figure 33) are in place and the spring retaining pins (#14, Figure 33) are installed
(Figure 1). Note that hitch pull pins used with the hitch are 90 degree bent pins and if replacements are needed, please
contact Cequent Performance Products. Check that all four anchor assembly handles are lynch pinned/locked through
base arch shell.
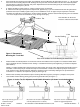
Figure 1 : Pins and Clips (Skid Plate cut away view)
Pivot Pin
Lubricate Skid Plate
(or use plastic Lubrication Plate)
Lubricate Jaw
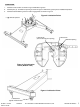
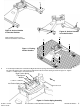
WARNING:
To prevent tilting head
detachment and or
separation of hitch you must
make sure that the anchor
assemblies are properly
installed and pinned, and
the spring retaining clips are
properly installed onto the
½” pull pins before towing.
The spring retaining clips
can easily be seen through
the site holes in the top of
the head.
Lynch
Pins
Anchor Handles
Site Holes (2)
A. BEFORE EACH TRIP P.2
B. LUBRICATION P.3
C. ASSEMBLY/ADJUSTMENT P.4
D. HITCH INSTALLATION P.8
E. HITCH REMOVAL P.8
F. HITCH MATCHING GUIDE P.9
G. HITCHING PROCEDURE P.12
H. PULL TEST P.14
I. UNHITCHING PROCEDURE P.15
J. MAINTENANCE P.15
K. PARTS EXPLOSION P.16
L. LIMITED LIFETIME WARRANTY P.17
2
Retaining
Clip
Pull Pin