
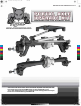
RER11289 Redcat Portal Axle Kit Instructions

Redcat Racing
04
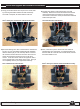
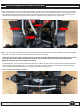
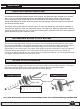
The next step will be to connect the drive shaft coupler to the input shaft on the portal axle by using the screw pin you removed
from the original axle. Now, you’ll need to adjust the direction the curves in the suspension links face. This will ensure all links
will properly clear the frame rails and drive shaft. All 3 links will need to be curved outward, as shown. We’ve also found the
best results when flipping the upper link around so that the angled rod end is toward the front of the vehicle.
Everything can be better understood in the following picture:
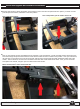
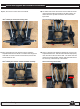
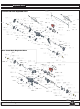
Now, you can mount the three links to the portal axle. Mounting the single upper link first will be easiest, and then the two lolower
links after. The upper link will use the 3x20mm BH Screw and an M3 Lock Nut.
NOTE: For the best result when mounting upper link, put the screw through the passenger side of the hole first, so that
the head of the screw is against the portal axle housing. Now, slide the link ball over the screw threads that are
exexposed, and tighten the lock nut against the link ball.
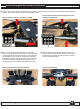
For the lower links, you’ll use 3x16mm BH Screws with M3 Lock Nuts. Be sure to use the lower of the two mounting options for
the lower links as a good starting point. You can also connect the servo link to the servo horn, using the screw you removed
from the original servo link and threading it into the outermost hole on the servo horn.
Here’s a picture of everything mounted:
7)
8)
Installation Instructions
Redcat Racing
01
Installation Instructions
Redcat Racing
05
Portal Axle Upgrade Kit Installation Instructions